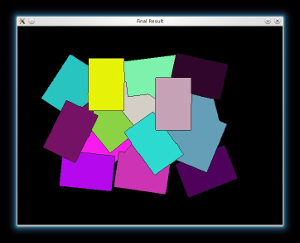
基于距离变换与分水岭算法的图像分割
在本教程中,你将学到:
- 如何使用 OpenCV 函数 cv::filter2D 执行拉普拉斯滤波(Laplacian filtering)来锐化图像;
- 如何使用 OpenCV 函数 cv::distanceTransform 获得二值图像的一种派生表示:其中每个像素的值被替换为它到最近背景像素的距离;
- 如何使用 OpenCV 函数 cv::watershed 将图像中的物体从背景中分离出来。
C++:
本教程的代码如下所示。你也可以从 这里 下载。
/** * @brief Sample code showing how to segment overlapping objects using Laplacian filtering, in addition to Watershed and Distance Transformation * @author OpenCV Team */
#include <opencv2/core.hpp>#include <opencv2/imgproc.hpp>#include <opencv2/highgui.hpp>#include <iostream>
using namespace std;using namespace cv;
int main(int argc, char *argv[]){    // Load the image    CommandLineParser parser( argc, argv, "{@input | cards.png | input image}" );    Mat src = imread( samples::findFile( parser.get<String>( "@input" ) ) );    if( src.empty() )    {        cout << "Could not open or find the image!\n" << endl;        cout << "Usage: " << argv[0] << " <Input image>" << endl;        return -1;    }
    // Show the source image    imshow("Source Image", src);
    // Change the background from white to black, since that will help later to extract    // better results during the use of Distance Transform    Mat mask;    inRange(src, Scalar(255, 255, 255), Scalar(255, 255, 255), mask);    src.setTo(Scalar(0, 0, 0), mask);
    // Show output image    imshow("Black Background Image", src);
    // Create a kernel that we will use to sharpen our image    Mat kernel = Mat_<float>({3,3}, {        1,  1, 1,        1, -8, 1,        1,  1, 1    }); // an approximation of second derivative, a quite strong kernel
    // do the laplacian filtering as it is    // well, we need to convert everything in something more deeper then CV_8U    // because the kernel has some negative values,    // and we can expect in general to have a Laplacian image with negative values    // BUT a 8bits unsigned int (the one we are working with) can contain values from 0 to 255    // so the possible negative number will be truncated    Mat imgLaplacian;    filter2D(src, imgLaplacian, CV_32F, kernel);    Mat sharp;    src.convertTo(sharp, CV_32F);    Mat imgResult = sharp - imgLaplacian;
    // convert back to 8bits gray scale    imgResult.convertTo(imgResult, CV_8UC3);    imgLaplacian.convertTo(imgLaplacian, CV_8UC3);
    // imshow( "Laplace Filtered Image", imgLaplacian );    imshow( "New Sharped Image", imgResult );
    // Create binary image from source image    Mat bw;    cvtColor(imgResult, bw, COLOR_BGR2GRAY);    threshold(bw, bw, 40, 255, THRESH_BINARY | THRESH_OTSU);    imshow("Binary Image", bw);
    // Perform the distance transform algorithm    Mat dist;    distanceTransform(bw, dist, DIST_L2, 3);
    // Normalize the distance image for range = {0.0, 1.0}    // so we can visualize and threshold it    normalize(dist, dist, 0, 1.0, NORM_MINMAX);    imshow("Distance Transform Image", dist);
    // Threshold to obtain the peaks    // This will be the markers for the foreground objects    threshold(dist, dist, 0.4, 1.0, THRESH_BINARY);
    // Dilate a bit the dist image    Mat kernel1 = Mat::ones(3, 3, CV_8U);    dilate(dist, dist, kernel1);    imshow("Peaks", dist);
    // Create the CV_8U version of the distance image    // It is needed for findContours()    Mat dist_8u;    dist.convertTo(dist_8u, CV_8U);
    // Find total markers    vector<vector<Point> > contours;    findContours(dist_8u, contours, RETR_EXTERNAL, CHAIN_APPROX_SIMPLE);
    // Create the marker image for the watershed algorithm    Mat markers = Mat::zeros(dist.size(), CV_32S);
    // Draw the foreground markers    for (size_t i = 0; i < contours.size(); i++)    {        drawContours(markers, contours, static_cast<int>(i), Scalar(static_cast<int>(i)+1), -1);    }
    // Draw the background marker    circle(markers, Point(5,5), 3, Scalar(255), -1);    Mat markers8u;    markers.convertTo(markers8u, CV_8U, 10);    imshow("Markers", markers8u);
    // Perform the watershed algorithm    watershed(imgResult, markers);
    Mat mark;    markers.convertTo(mark, CV_8U);    bitwise_not(mark, mark);    //    imshow("Markers_v2", mark); // uncomment this if you want to see how the mark    // image looks like at that point
    // Generate random colors    vector<Vec3b> colors;    for (size_t i = 0; i < contours.size(); i++)    {        int b = theRNG().uniform(0, 256);        int g = theRNG().uniform(0, 256);        int r = theRNG().uniform(0, 256);
        colors.push_back(Vec3b((uchar)b, (uchar)g, (uchar)r));    }
    // Create the result image    Mat dst = Mat::zeros(markers.size(), CV_8UC3);
    // Fill labeled objects with random colors    for (int i = 0; i < markers.rows; i++)    {        for (int j = 0; j < markers.cols; j++)        {            int index = markers.at<int>(i,j);            if (index > 0 && index <= static_cast<int>(contours.size()))            {                dst.at<Vec3b>(i,j) = colors[index-1];            }        }    }
    // Visualize the final image    imshow("Final Result", dst);
    waitKey();    return 0;}
Java:
本教程的代码如下所示。你也可以从 这里 下载。
import java.util.ArrayList;import java.util.List;import java.util.Random;
import org.opencv.core.Core;import org.opencv.core.CvType;import org.opencv.core.Mat;import org.opencv.core.MatOfPoint;import org.opencv.core.Point;import org.opencv.core.Scalar;import org.opencv.highgui.HighGui;import org.opencv.imgcodecs.Imgcodecs;import org.opencv.imgproc.Imgproc;
/** * * @brief Sample code showing how to segment overlapping objects using Laplacian filtering, in addition to Watershed * and Distance Transformation * */class ImageSegmentation {    public void run(String[] args) {        // Load the image        String filename = args.length > 0 ? args[0] : "../data/cards.png";        Mat srcOriginal = Imgcodecs.imread(filename);        if (srcOriginal.empty()) {            System.err.println("Cannot read image: " + filename);            System.exit(0);        }
        // Show source image        HighGui.imshow("Source Image", srcOriginal);
        // Change the background from white to black, since that will help later to        // extract        // better results during the use of Distance Transform        Mat src = srcOriginal.clone();        byte[] srcData = new byte[(int) (src.total() * src.channels())];        src.get(0, 0, srcData);        for (int i = 0; i < src.rows(); i++) {            for (int j = 0; j < src.cols(); j++) {                if (srcData[(i * src.cols() + j) * 3] == (byte) 255 && srcData[(i * src.cols() + j) * 3 + 1] == (byte) 255                        && srcData[(i * src.cols() + j) * 3 + 2] == (byte) 255) {                    srcData[(i * src.cols() + j) * 3] = 0;                    srcData[(i * src.cols() + j) * 3 + 1] = 0;                    srcData[(i * src.cols() + j) * 3 + 2] = 0;                }            }        }        src.put(0, 0, srcData);
        // Show output image        HighGui.imshow("Black Background Image", src);
        // Create a kernel that we will use to sharpen our image        Mat kernel = new Mat(3, 3, CvType.CV_32F);        // an approximation of second derivative, a quite strong kernel        float[] kernelData = new float[(int) (kernel.total() * kernel.channels())];        kernelData[0] = 1; kernelData[1] = 1; kernelData[2] = 1;        kernelData[3] = 1; kernelData[4] = -8; kernelData[5] = 1;        kernelData[6] = 1; kernelData[7] = 1; kernelData[8] = 1;        kernel.put(0, 0, kernelData);
        // do the laplacian filtering as it is        // well, we need to convert everything in something more deeper then CV_8U        // because the kernel has some negative values,        // and we can expect in general to have a Laplacian image with negative values        // BUT a 8bits unsigned int (the one we are working with) can contain values        // from 0 to 255        // so the possible negative number will be truncated        Mat imgLaplacian = new Mat();        Imgproc.filter2D(src, imgLaplacian, CvType.CV_32F, kernel);        Mat sharp = new Mat();        src.convertTo(sharp, CvType.CV_32F);        Mat imgResult = new Mat();        Core.subtract(sharp, imgLaplacian, imgResult);
        // convert back to 8bits gray scale        imgResult.convertTo(imgResult, CvType.CV_8UC3);        imgLaplacian.convertTo(imgLaplacian, CvType.CV_8UC3);
        // imshow( "Laplace Filtered Image", imgLaplacian );        HighGui.imshow("New Sharped Image", imgResult);
        // Create binary image from source image        Mat bw = new Mat();        Imgproc.cvtColor(imgResult, bw, Imgproc.COLOR_BGR2GRAY);        Imgproc.threshold(bw, bw, 40, 255, Imgproc.THRESH_BINARY | Imgproc.THRESH_OTSU);        HighGui.imshow("Binary Image", bw);
        // Perform the distance transform algorithm        Mat dist = new Mat();        Imgproc.distanceTransform(bw, dist, Imgproc.DIST_L2, 3);
        // Normalize the distance image for range = {0.0, 1.0}        // so we can visualize and threshold it        Core.normalize(dist, dist, 0.0, 1.0, Core.NORM_MINMAX);        Mat distDisplayScaled = new Mat();        Core.multiply(dist, new Scalar(255), distDisplayScaled);        Mat distDisplay = new Mat();        distDisplayScaled.convertTo(distDisplay, CvType.CV_8U);        HighGui.imshow("Distance Transform Image", distDisplay);
        // Threshold to obtain the peaks        // This will be the markers for the foreground objects        Imgproc.threshold(dist, dist, 0.4, 1.0, Imgproc.THRESH_BINARY);
        // Dilate a bit the dist image        Mat kernel1 = Mat.ones(3, 3, CvType.CV_8U);        Imgproc.dilate(dist, dist, kernel1);        Mat distDisplay2 = new Mat();        dist.convertTo(distDisplay2, CvType.CV_8U);        Core.multiply(distDisplay2, new Scalar(255), distDisplay2);        HighGui.imshow("Peaks", distDisplay2);
        // Create the CV_8U version of the distance image        // It is needed for findContours()        Mat dist_8u = new Mat();        dist.convertTo(dist_8u, CvType.CV_8U);
        // Find total markers        List<MatOfPoint> contours = new ArrayList<>();        Mat hierarchy = new Mat();        Imgproc.findContours(dist_8u, contours, hierarchy, Imgproc.RETR_EXTERNAL, Imgproc.CHAIN_APPROX_SIMPLE);
        // Create the marker image for the watershed algorithm        Mat markers = Mat.zeros(dist.size(), CvType.CV_32S);
        // Draw the foreground markers        for (int i = 0; i < contours.size(); i++) {            Imgproc.drawContours(markers, contours, i, new Scalar(i + 1), -1);        }
        // Draw the background marker        Mat markersScaled = new Mat();        markers.convertTo(markersScaled, CvType.CV_32F);        Core.normalize(markersScaled, markersScaled, 0.0, 255.0, Core.NORM_MINMAX);        Imgproc.circle(markersScaled, new Point(5, 5), 3, new Scalar(255, 255, 255), -1);        Mat markersDisplay = new Mat();        markersScaled.convertTo(markersDisplay, CvType.CV_8U);        HighGui.imshow("Markers", markersDisplay);        Imgproc.circle(markers, new Point(5, 5), 3, new Scalar(255, 255, 255), -1);
        // Perform the watershed algorithm        Imgproc.watershed(imgResult, markers);
        Mat mark = Mat.zeros(markers.size(), CvType.CV_8U);        markers.convertTo(mark, CvType.CV_8UC1);        Core.bitwise_not(mark, mark);        // imshow("Markers_v2", mark); // uncomment this if you want to see how the mark        // image looks like at that point
        // Generate random colors        Random rng = new Random(12345);        List<Scalar> colors = new ArrayList<>(contours.size());        for (int i = 0; i < contours.size(); i++) {            int b = rng.nextInt(256);            int g = rng.nextInt(256);            int r = rng.nextInt(256);
            colors.add(new Scalar(b, g, r));        }
        // Create the result image        Mat dst = Mat.zeros(markers.size(), CvType.CV_8UC3);        byte[] dstData = new byte[(int) (dst.total() * dst.channels())];        dst.get(0, 0, dstData);
        // Fill labeled objects with random colors        int[] markersData = new int[(int) (markers.total() * markers.channels())];        markers.get(0, 0, markersData);        for (int i = 0; i < markers.rows(); i++) {            for (int j = 0; j < markers.cols(); j++) {                int index = markersData[i * markers.cols() + j];                if (index > 0 && index <= contours.size()) {                    dstData[(i * dst.cols() + j) * 3 + 0] = (byte) colors.get(index - 1).val[0];                    dstData[(i * dst.cols() + j) * 3 + 1] = (byte) colors.get(index - 1).val[1];                    dstData[(i * dst.cols() + j) * 3 + 2] = (byte) colors.get(index - 1).val[2];                } else {                    dstData[(i * dst.cols() + j) * 3 + 0] = 0;                    dstData[(i * dst.cols() + j) * 3 + 1] = 0;                    dstData[(i * dst.cols() + j) * 3 + 2] = 0;                }            }        }        dst.put(0, 0, dstData);
        // Visualize the final image        HighGui.imshow("Final Result", dst);
        HighGui.waitKey();        System.exit(0);    }}
public class ImageSegmentationDemo {    public static void main(String[] args) {        // Load the native OpenCV library        System.loadLibrary(Core.NATIVE_LIBRARY_NAME);
        new ImageSegmentation().run(args);    }}
Python:
本教程的代码如下所示。你也可以从 这里 下载。
from __future__ import print_functionimport cv2 as cvimport numpy as npimport argparseimport random as rng
rng.seed(12345)
# Load the imageparser = argparse.ArgumentParser(description='Code for Image Segmentation with Distance Transform and Watershed Algorithm.\    Sample code showing how to segment overlapping objects using Laplacian filtering, \    in addition to Watershed and Distance Transformation')parser.add_argument('--input', help='Path to input image.', default='cards.png')args = parser.parse_args()
src = cv.imread(cv.samples.findFile(args.input))if src is None:    print('Could not open or find the image:', args.input)    exit(0)
# Show source imagecv.imshow('Source Image', src)
# Change the background from white to black, since that will help later to extract# better results during the use of Distance Transformsrc[np.all(src == 255, axis=2)] = 0
# Show output imagecv.imshow('Black Background Image', src)
# Create a kernel that we will use to sharpen our image# an approximation of second derivative, a quite strong kernelkernel = np.array([[1, 1, 1], [1, -8, 1], [1, 1, 1]], dtype=np.float32)
# do the laplacian filtering as it is# well, we need to convert everything in something more deeper then CV_8U# because the kernel has some negative values,# and we can expect in general to have a Laplacian image with negative values# BUT a 8bits unsigned int (the one we are working with) can contain values from 0 to 255# so the possible negative number will be truncatedimgLaplacian = cv.filter2D(src, cv.CV_32F, kernel)sharp = np.float32(src)imgResult = sharp - imgLaplacian
# convert back to 8bits gray scaleimgResult = np.clip(imgResult, 0, 255)imgResult = imgResult.astype('uint8')imgLaplacian = np.clip(imgLaplacian, 0, 255)imgLaplacian = np.uint8(imgLaplacian)
#cv.imshow('Laplace Filtered Image', imgLaplacian)cv.imshow('New Sharped Image', imgResult)
# Create binary image from source imagebw = cv.cvtColor(imgResult, cv.COLOR_BGR2GRAY)_, bw = cv.threshold(bw, 40, 255, cv.THRESH_BINARY | cv.THRESH_OTSU)cv.imshow('Binary Image', bw)
# Perform the distance transform algorithmdist = cv.distanceTransform(bw, cv.DIST_L2, 3)
# Normalize the distance image for range = {0.0, 1.0}# so we can visualize and threshold itcv.normalize(dist, dist, 0, 1.0, cv.NORM_MINMAX)cv.imshow('Distance Transform Image', dist)
# Threshold to obtain the peaks# This will be the markers for the foreground objects_, dist = cv.threshold(dist, 0.4, 1.0, cv.THRESH_BINARY)
# Dilate a bit the dist imagekernel1 = np.ones((3,3), dtype=np.uint8)dist = cv.dilate(dist, kernel1)cv.imshow('Peaks', dist)
# Create the CV_8U version of the distance image# It is needed for findContours()dist_8u = dist.astype('uint8')
# Find total markerscontours, _ = cv.findContours(dist_8u, cv.RETR_EXTERNAL, cv.CHAIN_APPROX_SIMPLE)
# Create the marker image for the watershed algorithmmarkers = np.zeros(dist.shape, dtype=np.int32)
# Draw the foreground markersfor i in range(len(contours)):    cv.drawContours(markers, contours, i, (i+1), -1)
# Draw the background markercv.circle(markers, (5,5), 3, (255,255,255), -1)markers_8u = (markers * 10).astype('uint8')cv.imshow('Markers', markers_8u)
# Perform the watershed algorithmcv.watershed(imgResult, markers)
#mark = np.zeros(markers.shape, dtype=np.uint8)mark = markers.astype('uint8')mark = cv.bitwise_not(mark)# uncomment this if you want to see how the mark# image looks like at that point#cv.imshow('Markers_v2', mark)
# Generate random colorscolors = []for contour in contours:    colors.append((rng.randint(0,256), rng.randint(0,256), rng.randint(0,256)))
# Create the result imagedst = np.zeros((markers.shape[0], markers.shape[1], 3), dtype=np.uint8)
# Fill labeled objects with random colorsfor i in range(markers.shape[0]):    for j in range(markers.shape[1]):        index = markers[i,j]        if index > 0 and index <= len(contours):            dst[i,j,:] = colors[index-1]
# Visualize the final imagecv.imshow('Final Result', dst)
cv.waitKey()- 加载源图像并检查它是否被成功加载,然后将其显示出来:
C++:
// Load the imageCommandLineParser parser( argc, argv, "{@input | cards.png | input image}" );Mat src = imread( samples::findFile( parser.get<String>( "@input" ) ) );if( src.empty() ){    cout << "Could not open or find the image!\n" << endl;    cout << "Usage: " << argv[0] << " <Input image>" << endl;    return -1;}
// Show the source imageimshow("Source Image", src);
Java:
// Load the imageString filename = args.length > 0 ? args[0] : "../data/cards.png";Mat srcOriginal = Imgcodecs.imread(filename);if (srcOriginal.empty()) {    System.err.println("Cannot read image: " + filename);    System.exit(0);}
// Show source imageHighGui.imshow("Source Image", srcOriginal);
Python:
parser = argparse.ArgumentParser(description='Code for Image Segmentation with Distance Transform and Watershed Algorithm.\    Sample code showing how to segment overlapping objects using Laplacian filtering, \    in addition to Watershed and Distance Transformation')parser.add_argument('--input', help='Path to input image.', default='cards.png')args = parser.parse_args()
src = cv.imread(cv.samples.findFile(args.input))if src is None:    print('Could not open or find the image:', args.input)    exit(0)
# Show source imagecv.imshow('Source Image', src)- 然后,如果我们的图像背景是白色的,最好把它转换为黑色。这样在之后应用距离变换(Distance Transform)时,可以更容易地区分前景物体:
C++:
// Change the background from white to black, since that will help later to extract// better results during the use of Distance TransformMat mask;inRange(src, Scalar(255, 255, 255), Scalar(255, 255, 255), mask);src.setTo(Scalar(0, 0, 0), mask);
// Show output imageimshow("Black Background Image", src);
Java:
// Change the background from white to black, since that will help later to// extract// better results during the use of Distance TransformMat src = srcOriginal.clone();byte[] srcData = new byte[(int) (src.total() * src.channels())];src.get(0, 0, srcData);for (int i = 0; i < src.rows(); i++) {    for (int j = 0; j < src.cols(); j++) {        if (srcData[(i * src.cols() + j) * 3] == (byte) 255 && srcData[(i * src.cols() + j) * 3 + 1] == (byte) 255                && srcData[(i * src.cols() + j) * 3 + 2] == (byte) 255) {            srcData[(i * src.cols() + j) * 3] = 0;            srcData[(i * src.cols() + j) * 3 + 1] = 0;            srcData[(i * src.cols() + j) * 3 + 2] = 0;        }    }}src.put(0, 0, srcData);
// Show output imageHighGui.imshow("Black Background Image", src);
Python:
# Change the background from white to black, since that will help later to extract# better results during the use of Distance Transformsrc[np.all(src == 255, axis=2)] = 0
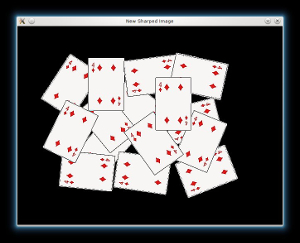
# Show output imagecv.imshow('Black Background Image', src)- 接下来我们对图像做锐化,以突出前景物体的边缘。我们将使用一个相当强的拉普拉斯滤波器(二阶导数的一种近似):
C++:
// Create a kernel that we will use to sharpen our imageMat kernel = Mat_<float>({3,3}, {    1,  1, 1,    1, -8, 1,    1,  1, 1}); // an approximation of second derivative, a quite strong kernel
// do the laplacian filtering as it is// well, we need to convert everything in something more deeper then CV_8U// because the kernel has some negative values,// and we can expect in general to have a Laplacian image with negative values// BUT a 8bits unsigned int (the one we are working with) can contain values from 0 to 255// so the possible negative number will be truncatedMat imgLaplacian;filter2D(src, imgLaplacian, CV_32F, kernel);Mat sharp;src.convertTo(sharp, CV_32F);Mat imgResult = sharp - imgLaplacian;
// convert back to 8bits gray scaleimgResult.convertTo(imgResult, CV_8UC3);imgLaplacian.convertTo(imgLaplacian, CV_8UC3);
// imshow( "Laplace Filtered Image", imgLaplacian );imshow( "New Sharped Image", imgResult );
Java:
// Create a kernel that we will use to sharpen our imageMat kernel = new Mat(3, 3, CvType.CV_32F);// an approximation of second derivative, a quite strong kernelfloat[] kernelData = new float[(int) (kernel.total() * kernel.channels())];kernelData[0] = 1; kernelData[1] = 1; kernelData[2] = 1;kernelData[3] = 1; kernelData[4] = -8; kernelData[5] = 1;kernelData[6] = 1; kernelData[7] = 1; kernelData[8] = 1;kernel.put(0, 0, kernelData);
// do the laplacian filtering as it is// well, we need to convert everything in something more deeper then CV_8U// because the kernel has some negative values,// and we can expect in general to have a Laplacian image with negative values// BUT a 8bits unsigned int (the one we are working with) can contain values// from 0 to 255// so the possible negative number will be truncatedMat imgLaplacian = new Mat();Imgproc.filter2D(src, imgLaplacian, CvType.CV_32F, kernel);Mat sharp = new Mat();src.convertTo(sharp, CvType.CV_32F);Mat imgResult = new Mat();Core.subtract(sharp, imgLaplacian, imgResult);
// convert back to 8bits gray scaleimgResult.convertTo(imgResult, CvType.CV_8UC3);imgLaplacian.convertTo(imgLaplacian, CvType.CV_8UC3);
// imshow( "Laplace Filtered Image", imgLaplacian );HighGui.imshow("New Sharped Image", imgResult);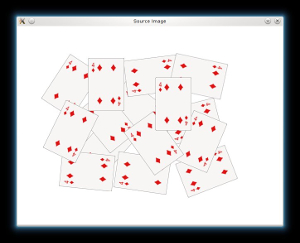
Python:
# Create a kernel that we will use to sharpen our image# an approximation of second derivative, a quite strong kernelkernel = np.array([[1, 1, 1], [1, -8, 1], [1, 1, 1]], dtype=np.float32)
# do the laplacian filtering as it is# well, we need to convert everything in something more deeper then CV_8U# because the kernel has some negative values,# and we can expect in general to have a Laplacian image with negative values# BUT a 8bits unsigned int (the one we are working with) can contain values from 0 to 255# so the possible negative number will be truncatedimgLaplacian = cv.filter2D(src, cv.CV_32F, kernel)sharp = np.float32(src)imgResult = sharp - imgLaplacian
# convert back to 8bits gray scaleimgResult = np.clip(imgResult, 0, 255)imgResult = imgResult.astype('uint8')imgLaplacian = np.clip(imgLaplacian, 0, 255)imgLaplacian = np.uint8(imgLaplacian)
#cv.imshow('Laplace Filtered Image', imgLaplacian)cv.imshow('New Sharped Image', imgResult)- 现在,我们把锐化后的新源图像分别转换为灰度图和二值图:
C++:
// Create binary image from source imageMat bw;cvtColor(imgResult, bw, COLOR_BGR2GRAY);threshold(bw, bw, 40, 255, THRESH_BINARY | THRESH_OTSU);imshow("Binary Image", bw);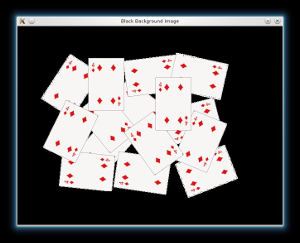
Java:
// Create binary image from source imageMat bw = new Mat();Imgproc.cvtColor(imgResult, bw, Imgproc.COLOR_BGR2GRAY);Imgproc.threshold(bw, bw, 40, 255, Imgproc.THRESH_BINARY | Imgproc.THRESH_OTSU);HighGui.imshow("Binary Image", bw);Python:
# Create binary image from source imagebw = cv.cvtColor(imgResult, cv.COLOR_BGR2GRAY)_, bw = cv.threshold(bw, 40, 255, cv.THRESH_BINARY | cv.THRESH_OTSU)cv.imshow('Binary Image', bw)- 现在我们可以对二值图像应用距离变换了。此外,我们还会对输出图像做归一化(normalize),以便可视化和阈值化结果:
C++:
// Perform the distance transform algorithmMat dist;distanceTransform(bw, dist, DIST_L2, 3);
// Normalize the distance image for range = {0.0, 1.0}// so we can visualize and threshold itnormalize(dist, dist, 0, 1.0, NORM_MINMAX);imshow("Distance Transform Image", dist);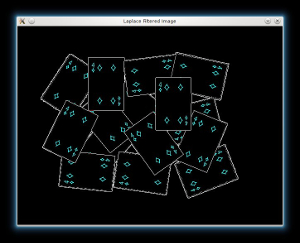
Java:
// Perform the distance transform algorithmMat dist = new Mat();Imgproc.distanceTransform(bw, dist, Imgproc.DIST_L2, 3);
// Normalize the distance image for range = {0.0, 1.0}// so we can visualize and threshold itCore.normalize(dist, dist, 0.0, 1.0, Core.NORM_MINMAX);Mat distDisplayScaled = new Mat();Core.multiply(dist, new Scalar(255), distDisplayScaled);Mat distDisplay = new Mat();distDisplayScaled.convertTo(distDisplay, CvType.CV_8U);HighGui.imshow("Distance Transform Image", distDisplay);
Python:
# Perform the distance transform algorithmdist = cv.distanceTransform(bw, cv.DIST_L2, 3)
# Normalize the distance image for range = {0.0, 1.0}# so we can visualize and threshold itcv.normalize(dist, dist, 0, 1.0, cv.NORM_MINMAX)cv.imshow('Distance Transform Image', dist)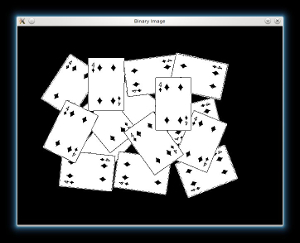
- 我们对 dist 图像做阈值处理,然后执行一些形态学操作(即膨胀),以从上图中提取峰值区域:
C++:
// Threshold to obtain the peaks// This will be the markers for the foreground objectsthreshold(dist, dist, 0.4, 1.0, THRESH_BINARY);
// Dilate a bit the dist imageMat kernel1 = Mat::ones(3, 3, CV_8U);dilate(dist, dist, kernel1);imshow("Peaks", dist);
Java:
// Threshold to obtain the peaks// This will be the markers for the foreground objectsImgproc.threshold(dist, dist, 0.4, 1.0, Imgproc.THRESH_BINARY);
// Dilate a bit the dist imageMat kernel1 = Mat.ones(3, 3, CvType.CV_8U);Imgproc.dilate(dist, dist, kernel1);Mat distDisplay2 = new Mat();dist.convertTo(distDisplay2, CvType.CV_8U);Core.multiply(distDisplay2, new Scalar(255), distDisplay2);HighGui.imshow("Peaks", distDisplay2);
Python:
# Threshold to obtain the peaks# This will be the markers for the foreground objects_, dist = cv.threshold(dist, 0.4, 1.0, cv.THRESH_BINARY)
# Dilate a bit the dist imagekernel1 = np.ones((3,3), dtype=np.uint8)dist = cv.dilate(dist, kernel1)cv.imshow('Peaks', dist)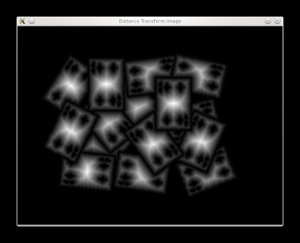
- 然后,借助 cv::findContours 函数,我们从每个团块(blob)中为分水岭算法(watershed algorithm)创建种子/标记(seed/marker):
C++:
// Create the CV_8U version of the distance image// It is needed for findContours()Mat dist_8u;dist.convertTo(dist_8u, CV_8U);
// Find total markersvector<vector<Point> > contours;findContours(dist_8u, contours, RETR_EXTERNAL, CHAIN_APPROX_SIMPLE);
// Create the marker image for the watershed algorithmMat markers = Mat::zeros(dist.size(), CV_32S);
// Draw the foreground markersfor (size_t i = 0; i < contours.size(); i++){    drawContours(markers, contours, static_cast<int>(i), Scalar(static_cast<int>(i)+1), -1);}
// Draw the background markercircle(markers, Point(5,5), 3, Scalar(255), -1);Mat markers8u;markers.convertTo(markers8u, CV_8U, 10);imshow("Markers", markers8u);
Java:
// Create the CV_8U version of the distance image// It is needed for findContours()Mat dist_8u = new Mat();dist.convertTo(dist_8u, CvType.CV_8U);
// Find total markersList<MatOfPoint> contours = new ArrayList<>();Mat hierarchy = new Mat();Imgproc.findContours(dist_8u, contours, hierarchy, Imgproc.RETR_EXTERNAL, Imgproc.CHAIN_APPROX_SIMPLE);
// Create the marker image for the watershed algorithmMat markers = Mat.zeros(dist.size(), CvType.CV_32S);
// Draw the foreground markersfor (int i = 0; i < contours.size(); i++) {    Imgproc.drawContours(markers, contours, i, new Scalar(i + 1), -1);}
// Draw the background markerMat markersScaled = new Mat();markers.convertTo(markersScaled, CvType.CV_32F);Core.normalize(markersScaled, markersScaled, 0.0, 255.0, Core.NORM_MINMAX);Imgproc.circle(markersScaled, new Point(5, 5), 3, new Scalar(255, 255, 255), -1);Mat markersDisplay = new Mat();markersScaled.convertTo(markersDisplay, CvType.CV_8U);HighGui.imshow("Markers", markersDisplay);Imgproc.circle(markers, new Point(5, 5), 3, new Scalar(255, 255, 255), -1);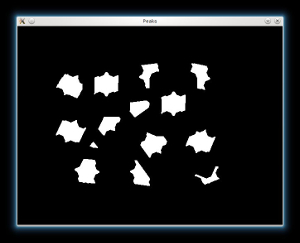
Python:
# Create the CV_8U version of the distance image# It is needed for findContours()dist_8u = dist.astype('uint8')
# Find total markerscontours, _ = cv.findContours(dist_8u, cv.RETR_EXTERNAL, cv.CHAIN_APPROX_SIMPLE)
# Create the marker image for the watershed algorithmmarkers = np.zeros(dist.shape, dtype=np.int32)
# Draw the foreground markersfor i in range(len(contours)):    cv.drawContours(markers, contours, i, (i+1), -1)
# Draw the background markercv.circle(markers, (5,5), 3, (255,255,255), -1)markers_8u = (markers * 10).astype('uint8')cv.imshow('Markers', markers_8u)- 最后,我们可以应用分水岭算法,并将结果可视化:
C++:
// Perform the watershed algorithmwatershed(imgResult, markers);
Mat mark;markers.convertTo(mark, CV_8U);bitwise_not(mark, mark);//    imshow("Markers_v2", mark); // uncomment this if you want to see how the mark// image looks like at that point
// Generate random colorsvector<Vec3b> colors;for (size_t i = 0; i < contours.size(); i++){    int b = theRNG().uniform(0, 256);    int g = theRNG().uniform(0, 256);    int r = theRNG().uniform(0, 256);
    colors.push_back(Vec3b((uchar)b, (uchar)g, (uchar)r));}
// Create the result imageMat dst = Mat::zeros(markers.size(), CV_8UC3);
// Fill labeled objects with random colorsfor (int i = 0; i < markers.rows; i++){    for (int j = 0; j < markers.cols; j++)    {        int index = markers.at<int>(i,j);        if (index > 0 && index <= static_cast<int>(contours.size()))        {            dst.at<Vec3b>(i,j) = colors[index-1];        }    }}
// Visualize the final imageimshow("Final Result", dst);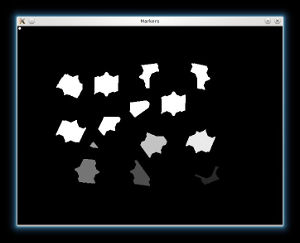
Java:
// Perform the watershed algorithmImgproc.watershed(imgResult, markers);
Mat mark = Mat.zeros(markers.size(), CvType.CV_8U);markers.convertTo(mark, CvType.CV_8UC1);Core.bitwise_not(mark, mark);// imshow("Markers_v2", mark); // uncomment this if you want to see how the mark// image looks like at that point
// Generate random colorsRandom rng = new Random(12345);List<Scalar> colors = new ArrayList<>(contours.size());for (int i = 0; i < contours.size(); i++) {    int b = rng.nextInt(256);    int g = rng.nextInt(256);    int r = rng.nextInt(256);
    colors.add(new Scalar(b, g, r));}
// Create the result imageMat dst = Mat.zeros(markers.size(), CvType.CV_8UC3);byte[] dstData = new byte[(int) (dst.total() * dst.channels())];dst.get(0, 0, dstData);
// Fill labeled objects with random colorsint[] markersData = new int[(int) (markers.total() * markers.channels())];markers.get(0, 0, markersData);for (int i = 0; i < markers.rows(); i++) {    for (int j = 0; j < markers.cols(); j++) {        int index = markersData[i * markers.cols() + j];        if (index > 0 && index <= contours.size()) {            dstData[(i * dst.cols() + j) * 3 + 0] = (byte) colors.get(index - 1).val[0];            dstData[(i * dst.cols() + j) * 3 + 1] = (byte) colors.get(index - 1).val[1];            dstData[(i * dst.cols() + j) * 3 + 2] = (byte) colors.get(index - 1).val[2];        } else {            dstData[(i * dst.cols() + j) * 3 + 0] = 0;            dstData[(i * dst.cols() + j) * 3 + 1] = 0;            dstData[(i * dst.cols() + j) * 3 + 2] = 0;        }    }}dst.put(0, 0, dstData);
// Visualize the final imageHighGui.imshow("Final Result", dst);
Python:
# Perform the watershed algorithmcv.watershed(imgResult, markers)
#mark = np.zeros(markers.shape, dtype=np.uint8)mark = markers.astype('uint8')mark = cv.bitwise_not(mark)# uncomment this if you want to see how the mark# image looks like at that point#cv.imshow('Markers_v2', mark)
# Generate random colorscolors = []for contour in contours:    colors.append((rng.randint(0,256), rng.randint(0,256), rng.randint(0,256)))
# Create the result imagedst = np.zeros((markers.shape[0], markers.shape[1], 3), dtype=np.uint8)
# Fill labeled objects with random colorsfor i in range(markers.shape[0]):    for j in range(markers.shape[1]):        index = markers[i,j]        if index > 0 and index <= len(contours):            dst[i,j,:] = colors[index-1]
# Visualize the final imagecv.imshow('Final Result', dst)