
Gazebo Classic 里程计设置
本指南介绍如何将机器人的里程计系统与 Nav2 集成。首先简要介绍里程计,以及 Nav2 正常运行所需发布的消息和坐标变换。随后演示两种设置里程计的方式:一是为已配备车轮编码器的实体机器人设置里程计;二是使用 Gazebo 在 sam_bot(上一节构建的机器人)上模拟一套可用的里程计系统。
注意:本教程的完整源代码可在 navigation2_tutorials 仓库的
sam_bot_description包中找到。该仓库包含的是完成本系列所有教程后的最终代码。
里程计系统根据机器人的运动,对其位姿和速度进行局部估计。里程计信息可从多种来源获取,如 IMU、激光雷达、雷达、VIO 和车轮编码器。需要注意的是,IMU 会随时间漂移,车轮编码器会随行驶距离漂移,因此二者常组合使用,以相互补偿。
odom 坐标系及其关联的变换通过里程计系统发布定位信息。该信息是连续的,但精度会随时间或行驶距离下降(具体取决于传感器类型和漂移特性)。尽管如此,机器人仍可凭借里程计在附近区域导航(例如避障)。为了在长时间运行后仍保持精度,map 坐标系提供全局精确信息,用于校正 odom 坐标系。
如之前的指南以及 REP 105 中所述,odom 坐标系通过 odom => base_link 变换与系统的其余部分及 Nav2 相连。该变换由 tf2 广播器或 robot_localization 等框架发布,后者还能提供额外功能。后续章节会进一步讨论 robot_localization。
除了必需的 odom => base_link 变换外,Nav2 还要求发布 nav_msgs/Odometry 消息,因为该消息提供了机器人的速度信息。其结构如下:
# This represents estimates of position and velocity in free space.# The pose in this message should be specified in the coordinate frame given by header.frame_id# The twist in this message should be specified in the coordinate frame given by the child_frame_id
# Includes the frame id of the pose parent.std_msgs/Header header
# Frame id the pose is pointing at. The twist is in this coordinate frame.string child_frame_id
# Estimated pose that is typically relative to a fixed world frame.geometry_msgs/PoseWithCovariance pose
# Estimated linear and angular velocity relative to child_frame_id.geometry_msgs/TwistWithCovariance twist该消息包含机器人的位姿和速度估计。header 字段在指定坐标系中提供带时间戳的数据;pose 字段给出机器人相对于 header.frame_id 所指定坐标系的位置和朝向;twist 字段给出相对于 child_frame_id 所定义坐标系的线速度和角速度。
在机器人上设置里程计
Section titled “在机器人上设置里程计”在实体机器人上为 Nav2 设置里程计系统,主要取决于机器人配备了哪些传感器。由于配置种类繁多,本教程不涉及具体安装步骤,而是提供一些基本示例和参考资源,帮助你完成配置。
下面以使用车轮编码器作为里程计数据源的机器人为例。车轮编码器并非 Nav2 的硬性要求,但在大多数配置中都很常见。里程计设置的目标是计算出里程计信息,并通过 ROS 2 发布 nav_msgs/Odometry 消息和 odom => base_link 变换。为此,需要编写代码将车轮编码器数据转换为里程计信息,基本思路如下:
linear = (right_wheel_est_vel + left_wheel_est_vel) / 2angular = (right_wheel_est_vel - left_wheel_est_vel) / wheel_separation;其中 right_wheel_est_vel 和 left_wheel_est_vel 分别是右轮和左轮的估计速度,wheel_separation 是两轮之间的距离。轮速估计值可通过计算轮关节位置随时间的变化率得到。得到这些信息后,即可发布 Nav2 所需的内容。基本示例可参考 Navigation 文档中的相关教程。
除了手动发布这些信息外,推荐使用 ros2_control 框架。该框架包含一系列用于 ROS 2 机器人实时控制的包。对于车轮编码器场景,ros2_control 在 ros2_controllers 包下提供了 diff_drive_controller(差速驱动控制器)。diff_drive_controller 订阅 cmd_vel 话题上的 geometry_msgs/Twist 消息,计算里程计信息,并在 odom 话题上发布 nav_msgs/Odometry 消息。ros2_control 中还有处理其他类型传感器的包。
注意:更多信息请参阅 ros2_control 文档 和 diff_drive_controller 的 GitHub 仓库。
对于 IMU、VIO 等其他类型的传感器,各自的 ROS 驱动通常会提供发布里程计信息的文档。Nav2 要求发布 nav_msgs/Odometry 消息和 odom => base_link 变换,这是设置里程计系统时的核心目标。
使用 Gazebo 模拟里程计系统
Section titled “使用 Gazebo 模拟里程计系统”本节使用 Gazebo 模拟 sam_bot(上一节教程中构建的机器人)的里程计系统。你可以阅读本指南,也可以直接获取完整源代码。
注意:如果你已在使用自己的实体机器人并配置好了里程计传感器,可以跳过本节,直接进入下一节——那里将融合 IMU 和里程计消息,提供平滑的
odom=>base_link变换。
本节概述如下:首先安装 Gazebo 及其与 ROS 2 协同工作所需的包。接着添加 Gazebo 插件,分别模拟 IMU 传感器和差速驱动里程计系统,发布 sensor_msgs/Imu 和 nav_msgs/Odometry 消息。最后在 Gazebo 中生成 sam_bot,并通过 ROS 2 验证消息是否正常发布。
设置与前置条件
Section titled “设置与前置条件”Gazebo 是一款 3D 仿真器,可用于观察虚拟机器人在仿真环境中的表现。要在 ROS 2 中使用 Gazebo,请按 Gazebo 安装文档 中的说明进行安装。
首先,加载 ROS 2 安装目录的环境变量:
source /opt/ros/<ros2-distro>/setup.bash然后安装 gazebo_ros_pkgs,以便在 Gazebo 中模拟里程计并用 ROS 2 控制机器人:
sudo apt install ros-$ROS_DISTRO-gazebo-ros-pkgs可按此处的说明测试 ROS 2 与 Gazebo 的集成是否成功。
sam_bot 使用 URDF 描述。Gazebo 则使用仿真描述格式(SDF)来描述机器人。Gazebo 会自动将兼容的 URDF 文件转换为 SDF。URDF 与 Gazebo 兼容的主要要求是每个 <link> 元素内都包含 <inertia> 元素。sam_bot 的 URDF 已满足这一要求,可直接在 Gazebo 中使用。
注意:有关在 Gazebo 中使用 URDF 的更多信息,请参阅教程:在 Gazebo 中使用 URDF。
向 URDF 添加 Gazebo 插件
Section titled “向 URDF 添加 Gazebo 插件”接下来将 Gazebo 的 IMU 传感器和差速驱动插件添加到 URDF 中。Gazebo 中可用的插件详见教程:将 Gazebo 插件与 ROS 结合使用。
这里使用 GazeboRosImuSensor,它属于 SensorPlugin(传感器插件)。SensorPlugin 必须附着在连杆(link)上,因此需创建一个 imu_link 来承载 IMU 传感器,并在 <gazebo> 元素中引用该连杆。将 IMU 发布话题设为 /demo/imu,并将 initialOrientationAsReference 设为 false 以符合 REP 145 规范。此外,使用 Gazebo 的传感器噪声模型为传感器添加噪声。
按上述说明设置 IMU 传感器插件,在 URDF 的 </robot> 行之前添加以下内容:
<link name="imu_link">  <visual>    <geometry>      <box size="0.1 0.1 0.1"/>    </geometry>  </visual>
  <collision>    <geometry>      <box size="0.1 0.1 0.1"/>    </geometry>  </collision>
  <xacro:box_inertia m="0.1" w="0.1" d="0.1" h="0.1"/></link>
<joint name="imu_joint" type="fixed">  <parent link="base_link"/>  <child link="imu_link"/>  <origin xyz="0 0 0.01"/></joint>
 <gazebo reference="imu_link">  <sensor name="imu_sensor" type="imu">   <plugin filename="libgazebo_ros_imu_sensor.so" name="imu_plugin">      <ros>        <namespace>/demo</namespace>        <remapping>~/out:=imu</remapping>      </ros>      <initial_orientation_as_reference>false</initial_orientation_as_reference>    </plugin>    <always_on>true</always_on>    <update_rate>100</update_rate>    <visualize>true</visualize>    <imu>      <angular_velocity>        <x>          <noise type="gaussian">            <mean>0.0</mean>            <stddev>2e-4</stddev>            <bias_mean>0.0000075</bias_mean>            <bias_stddev>0.0000008</bias_stddev>          </noise>        </x>        <y>          <noise type="gaussian">            <mean>0.0</mean>            <stddev>2e-4</stddev>            <bias_mean>0.0000075</bias_mean>            <bias_stddev>0.0000008</bias_stddev>          </noise>        </y>        <z>          <noise type="gaussian">            <mean>0.0</mean>            <stddev>2e-4</stddev>            <bias_mean>0.0000075</bias_mean>            <bias_stddev>0.0000008</bias_stddev>          </noise>        </z>      </angular_velocity>      <linear_acceleration>        <x>          <noise type="gaussian">            <mean>0.0</mean>            <stddev>1.7e-2</stddev>            <bias_mean>0.1</bias_mean>            <bias_stddev>0.001</bias_stddev>          </noise>        </x>        <y>          <noise type="gaussian">            <mean>0.0</mean>            <stddev>1.7e-2</stddev>            <bias_mean>0.1</bias_mean>            <bias_stddev>0.001</bias_stddev>          </noise>        </y>        <z>          <noise type="gaussian">            <mean>0.0</mean>            <stddev>1.7e-2</stddev>            <bias_mean>0.1</bias_mean>            <bias_stddev>0.001</bias_stddev>          </noise>        </z>      </linear_acceleration>    </imu>  </sensor></gazebo>
下面添加差速驱动 ModelPlugin(模型插件)。配置该插件使 nav_msgs/Odometry 消息发布在 /demo/odom 话题上。左右轮关节设为 sam_bot 的轮关节。轮距(wheel separation)和轮径(wheel diameter)分别根据已定义的 wheel_ygap 和 wheel_radius 值设置。
将该插件加入 URDF,在 IMU 插件的 </gazebo> 标签之后添加以下内容:
<gazebo>  <plugin name='diff_drive' filename='libgazebo_ros_diff_drive.so'>    <ros>      <namespace>/demo</namespace>    </ros>
    <!-- wheels -->    <left_joint>drivewhl_l_joint</left_joint>    <right_joint>drivewhl_r_joint</right_joint>
    <!-- kinematics -->    <wheel_separation>0.4</wheel_separation>    <wheel_diameter>0.2</wheel_diameter>
    <!-- limits -->    <max_wheel_torque>20</max_wheel_torque>    <max_wheel_acceleration>1.0</max_wheel_acceleration>
    <!-- output -->    <publish_odom>true</publish_odom>    <publish_odom_tf>false</publish_odom_tf>    <publish_wheel_tf>true</publish_wheel_tf>
    <odometry_frame>odom</odometry_frame>    <robot_base_frame>base_link</robot_base_frame>  </plugin></gazebo>
启动与构建文件
Section titled “启动与构建文件”接下来修改启动文件 launch/display.launch.py,以便在 Gazebo 中生成 sam_bot。由于使用仿真,可以删除 generate_launch_description() 中以下内容,移除关节状态发布器(joint state publisher)的 GUI:
joint_state_publisher_gui_node = launch_ros.actions.Node( package='joint_state_publisher_gui', executable='joint_state_publisher_gui', name='joint_state_publisher_gui', condition=launch.conditions.IfCondition(LaunchConfiguration('gui')))然后删除以下 gui 参数:
DeclareLaunchArgument(name='gui', default_value='True', description='Flag to enable joint_state_publisher_gui')删除上述条件和参数后,为 joint_state_publisher_node 添加参数:
joint_state_publisher_node = launch_ros.actions.Node( package='joint_state_publisher', executable='joint_state_publisher', name='joint_state_publisher', arguments=[default_model_path], #Add this line parameters=[{'robot_description': Command(['xarcro ', default_model_path])}], #Remove this line condition=launch.conditions.UnlessCondition(LaunchConfiguration('gui')) # Remove this line)接着打开 package.xml,删除这一行:
<exec_depend>joint_state_publisher_gui</exec_depend>要启动 Gazebo,在 display.launch.py 中 joint_state_publisher_node, 行之前添加以下内容:
launch.actions.ExecuteProcess(cmd=['gazebo', '--verbose', '-s', 'libgazebo_ros_init.so', '-s', 'libgazebo_ros_factory.so'], output='screen'),接下来添加一个在 Gazebo 中生成 sam_bot 的节点。再次打开 launch/display.launch.py,在 return launch.LaunchDescription([ 行之前粘贴以下内容:
spawn_entity = launch_ros.actions.Node( package='gazebo_ros', executable='spawn_entity.py', arguments=['-entity', 'sam_bot', '-topic', 'robot_description'], output='screen')然后在 rviz_node 行之前添加 spawn_entity,,如下所示:
robot_state_publisher_node, spawn_entity, rviz_node])构建、运行与验证
Section titled “构建、运行与验证”运行构建好的包,检查 /demo/imu 和 /demo/odom 话题是否处于活动状态。
进入项目根目录,执行以下命令:
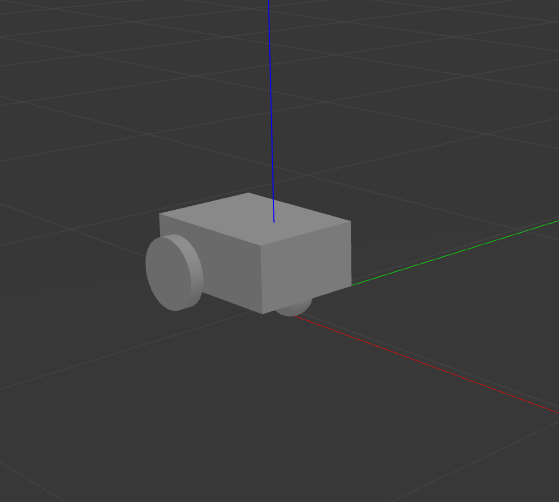
colcon build. install/setup.bashros2 launch sam_bot_description display.launch.pyGazebo 启动后,应能看到 sam_bot 的 3D 模型:
要查看系统中的活动话题,打开一个新终端执行:
ros2 topic list话题列表中应能看到 /demo/imu 和 /demo/odom。
要查看话题的详细信息,执行:
ros2 topic info /demo/imuros2 topic info /demo/odom输出应类似于:
Type: sensor_msgs/msg/ImuPublisher count: 1Subscription count: 0Type: nav_msgs/msg/OdometryPublisher count: 1Subscription count: 0可以看到,/demo/imu 话题发布 sensor_msgs/Imu 类型的消息,/demo/odom 话题发布 nav_msgs/Odometry 类型的消息,分别来自 Gazebo 仿真的 IMU 传感器和差速驱动插件。目前这两个话题还没有订阅者。下一节将创建一个 robot_localization 节点来订阅这两个话题,并利用其发布的消息为 Nav2 提供融合的、局部精确且平滑的里程计信息。
本指南介绍了 Nav2 对里程计系统的消息和变换要求,并演示了如何设置里程计系统以及验证发布的消息。