
相机标定
本教程介绍如何获取单目相机的标定参数。
1- 首先,加载 ROS 2 安装目录的环境变量:
source /opt/ros/<ros2-distro>/setup.bash2- 安装 Camera Calibration Parser、Camera Info Manager 和 Launch Testing Ament Cmake:
sudo apt install ros-$ROS_DISTRO-camera-calibration-parserssudo apt install ros-$ROS_DISTRO-camera-info-managersudo apt install ros-$ROS_DISTRO-launch-testing-ament-cmake3- 在工作空间中从源码构建 Image Pipeline:
git clone -b $ROS_DISTRO git@github.com:ros-perception/image_pipeline.git此外,请确保具备以下条件:
- 一块尺寸已知的大棋盘格。本教程使用 7x9 棋盘格,方格尺寸 20mm。标定使用的是棋盘格的内部角点,因此一块「8x10」的棋盘格需要使用示例中的内部角点参数「7x9」。 可从此处下载自定义尺寸的棋盘格。
- 一个光线充足、没有障碍物和其他棋盘格图案的区域
- 一台通过 ROS 发布图像的相机
1- 在桌面环境中打开一个终端
2- 启动对应相机的 ROS 驱动。
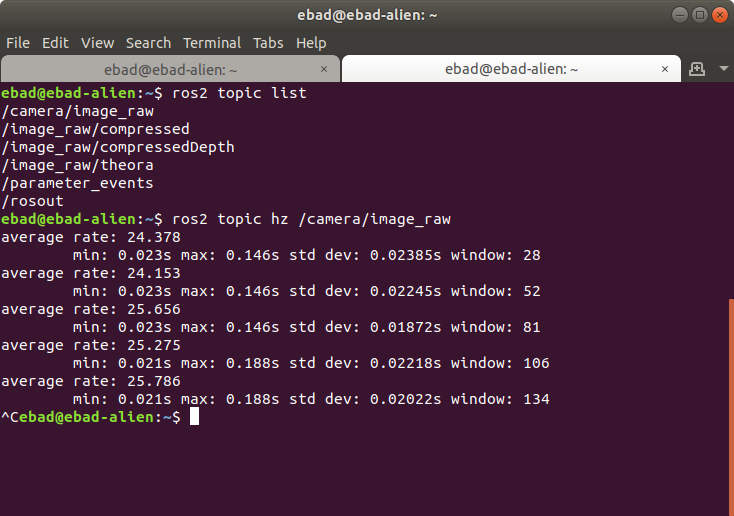
3- 确保相机正在通过 ROS 发布图像。运行以下命令验证:
ros2 topic list
4- 该命令会列出所有已发布的话题,请确认存在 /camera/image_raw 话题。要进一步验证该话题确实在持续发布,可检查其频率:
ros2 topic hz /camera/image_raw
5- 启动相机标定节点
ros2 run camera_calibration cameracalibrator --size 7x9 --square 0.02 --ros-args -r image:=/my_camera/image_raw -p camera:=/my_camera
Camera Name:
-c, --camera_name        name of the camera to appear in the calibration file
Chessboard Options:
You must specify one or more chessboards as pairs of --size and--square options.
  -p PATTERN, --pattern=PATTERN                    calibration pattern to detect - 'chessboard','circles', 'acircles','charuco'  -s SIZE, --size=SIZE                    chessboard size as NxM, counting interior corners (e.g. a standard chessboard is 7x7)  -q SQUARE, --square=SQUARE                    chessboard square size in meters
ROS Communication Options:
 --approximate=APPROXIMATE                    allow specified slop (in seconds) when pairing images from unsynchronized stereo cameras --no-service-check                    disable check for set_camera_info services at startup
Calibration Optimizer Options:
 --fix-principal-point                    fix the principal point at the image center --fix-aspect-ratio                    enforce focal lengths (fx, fy) are equal --zero-tangent-dist                    set tangential distortion coefficients (p1, p2) to                    zero -k NUM_COEFFS, --k-coefficients=NUM_COEFFS                    number of radial distortion coefficients to use (up to                    6, default 2) --disable_calib_cb_fast_check                    uses the CALIB_CB_FAST_CHECK flag for findChessboardCorners
这将打开标定窗口,并高亮显示检测到的棋盘格。
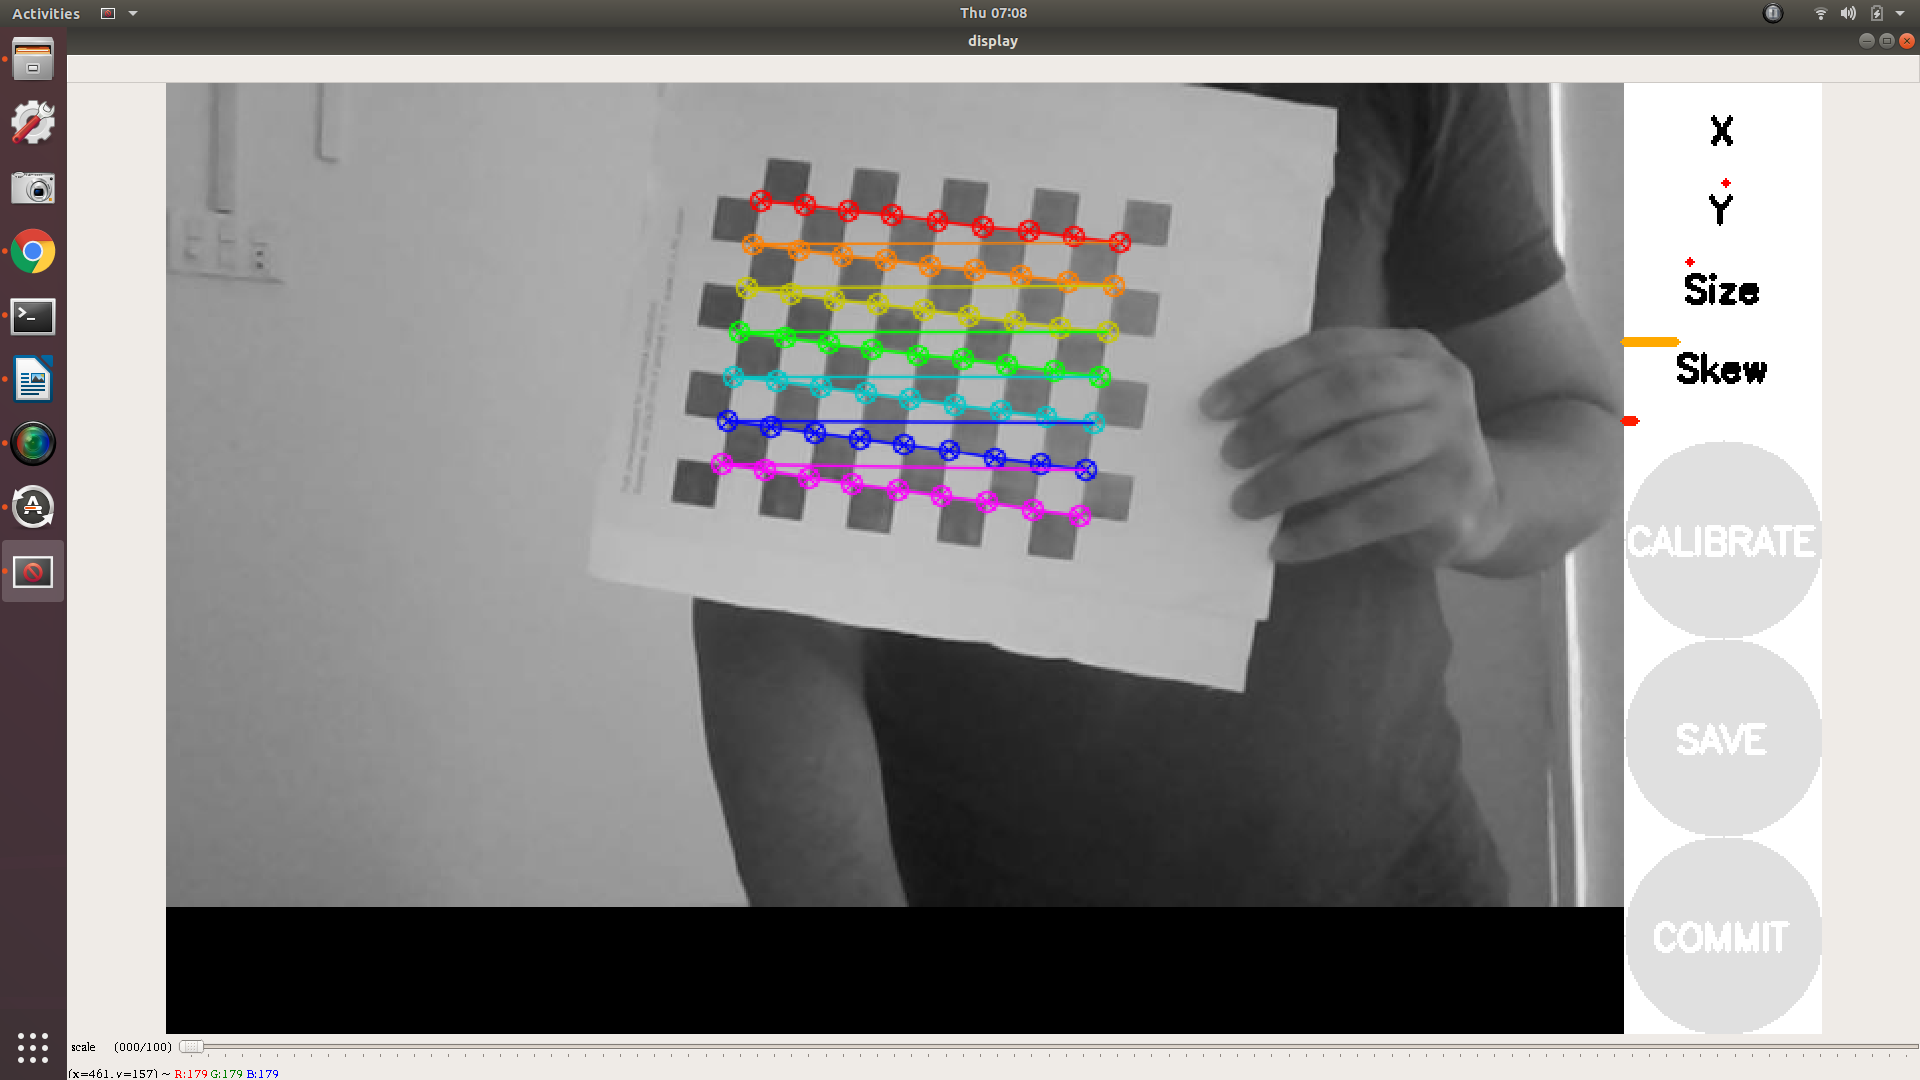
6- 为获得良好的标定效果,需要在相机画面中移动棋盘格,使其满足以下条件:
- 棋盘格覆盖相机视野的左侧、右侧、顶部和底部
- X 条——在视野中左右移动
- Y 条——在视野中上下移动
- Size 条——远离或靠近相机,并配合倾斜
- 棋盘格充满整个视野
- 棋盘格向左、右、上、下倾斜(Skew)
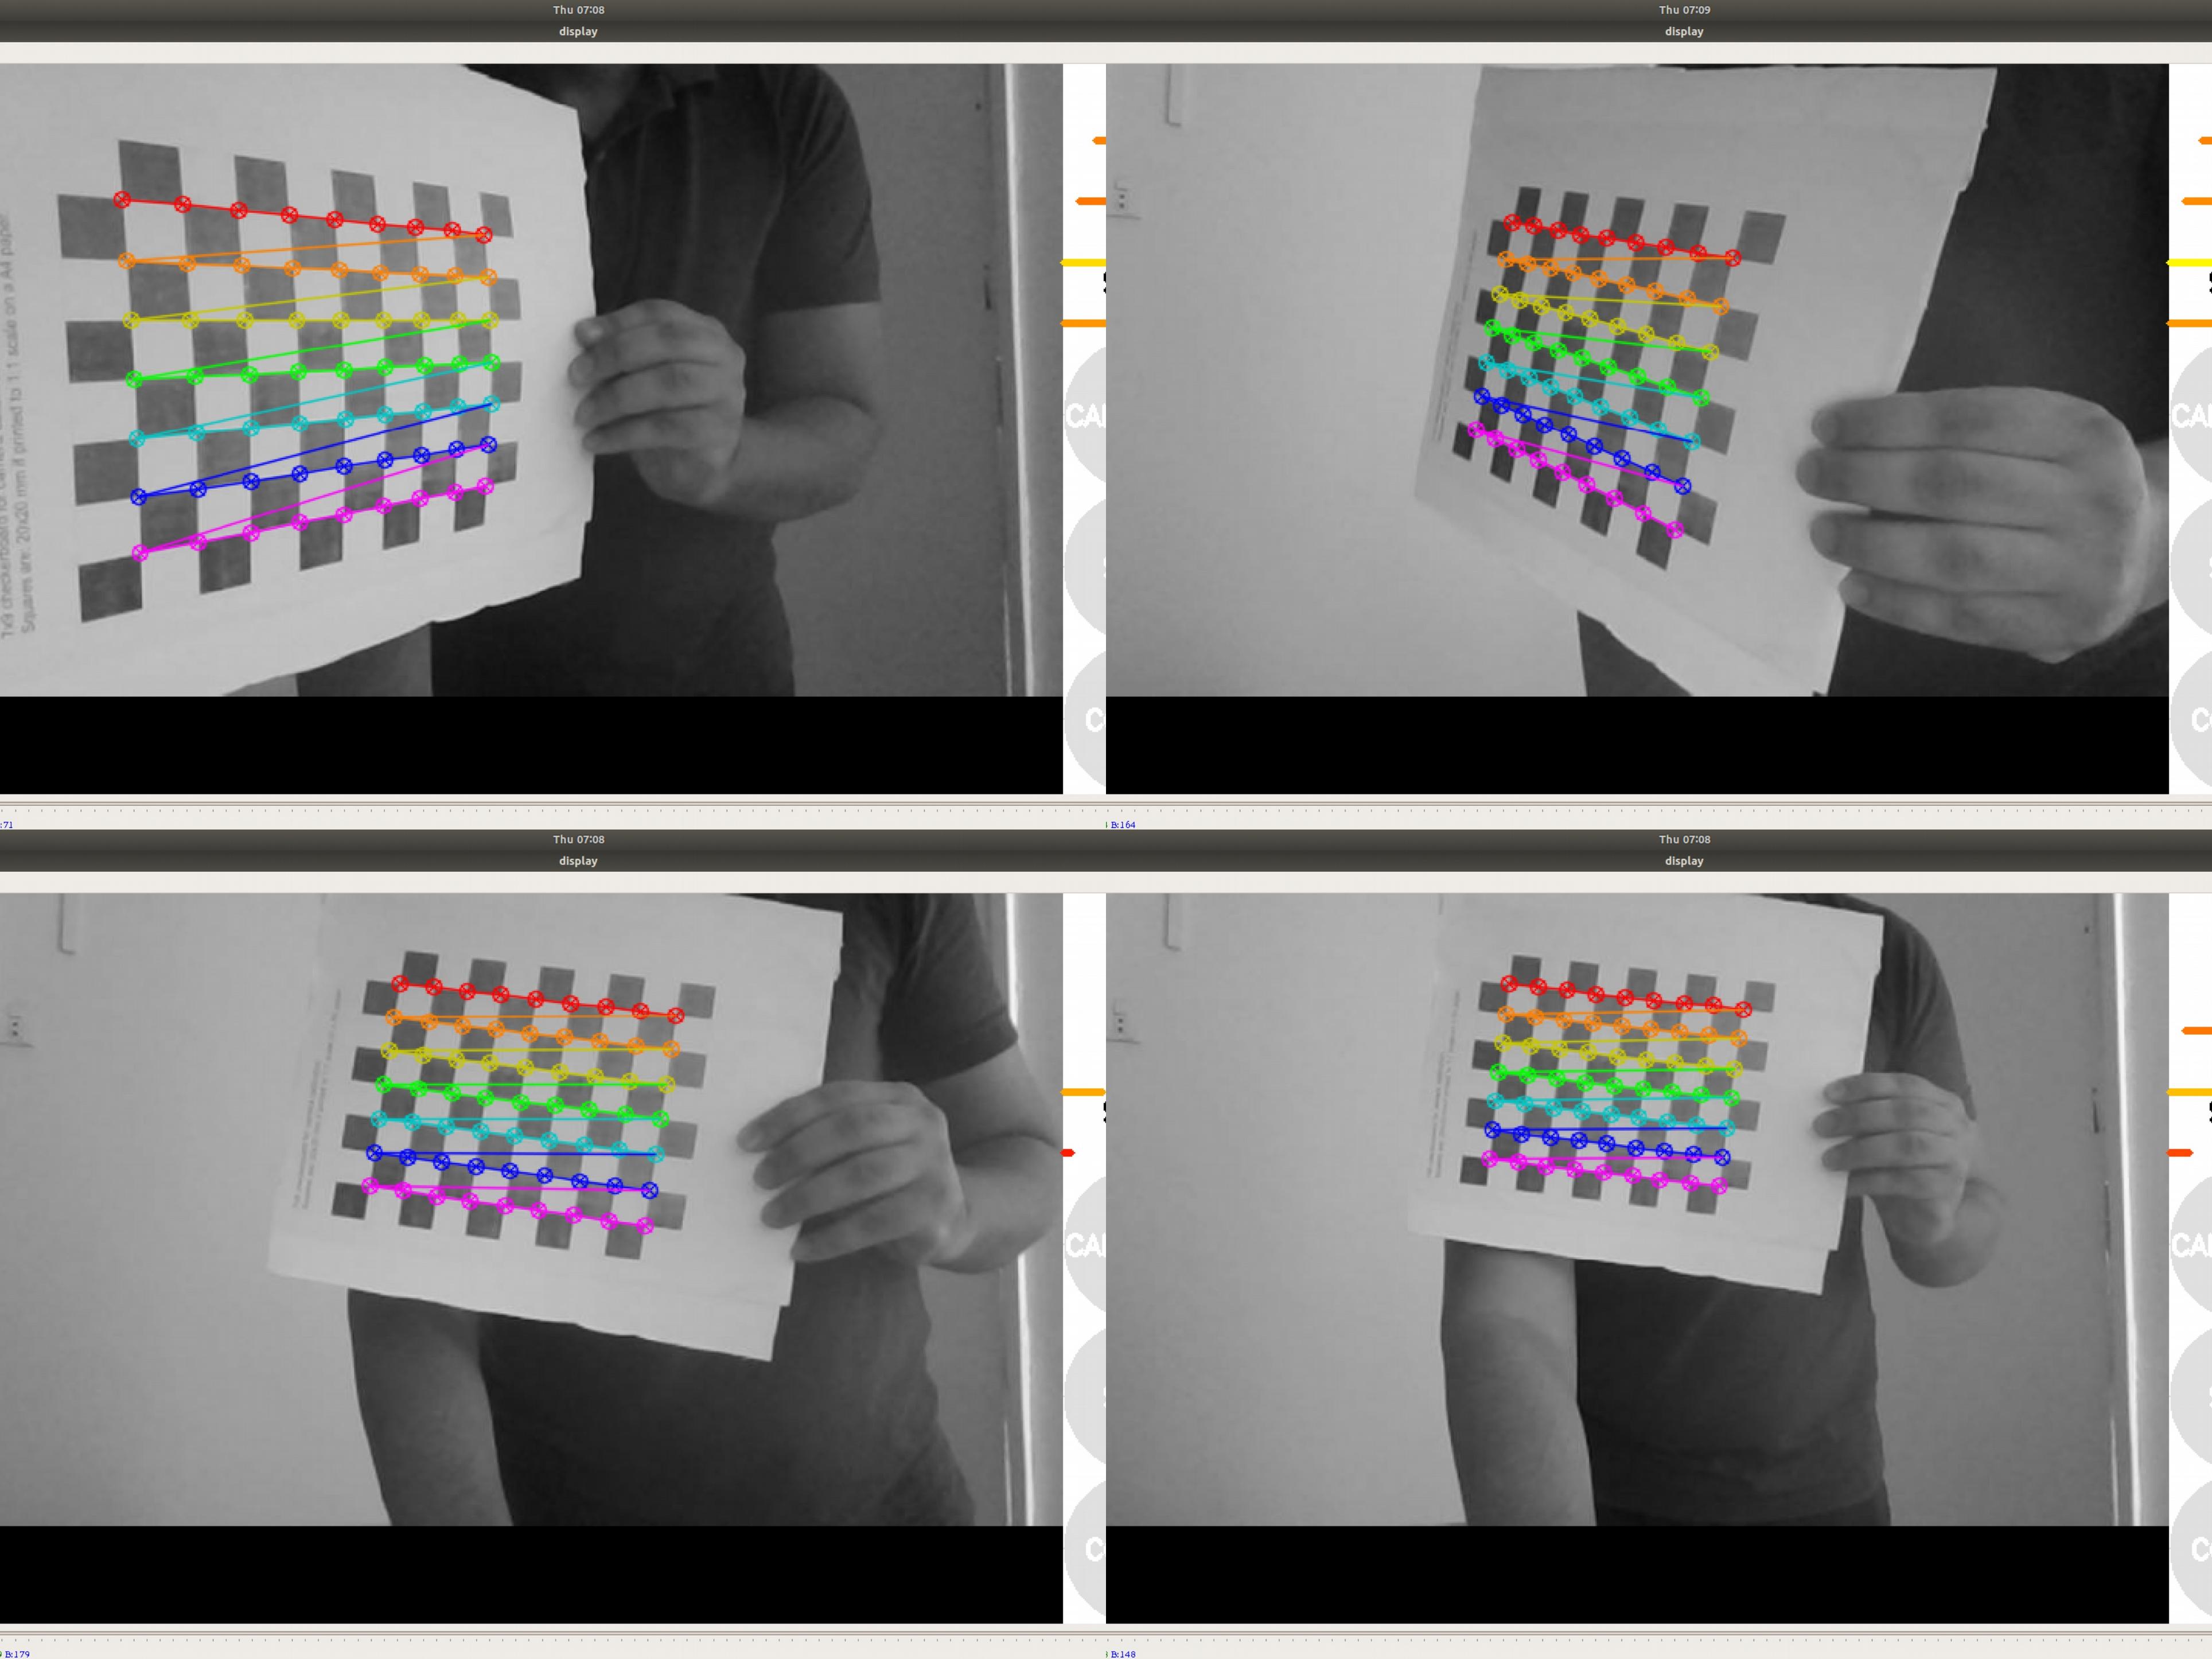
7- 随着棋盘格不断移动,标定侧边栏上的 4 个进度条会逐渐充满。当全部 4 个进度条都变为绿色,且数据量已足够用于标定时,CALIBRATE 按钮会亮起。点击该按钮查看结果,标定过程大约需要一分钟。
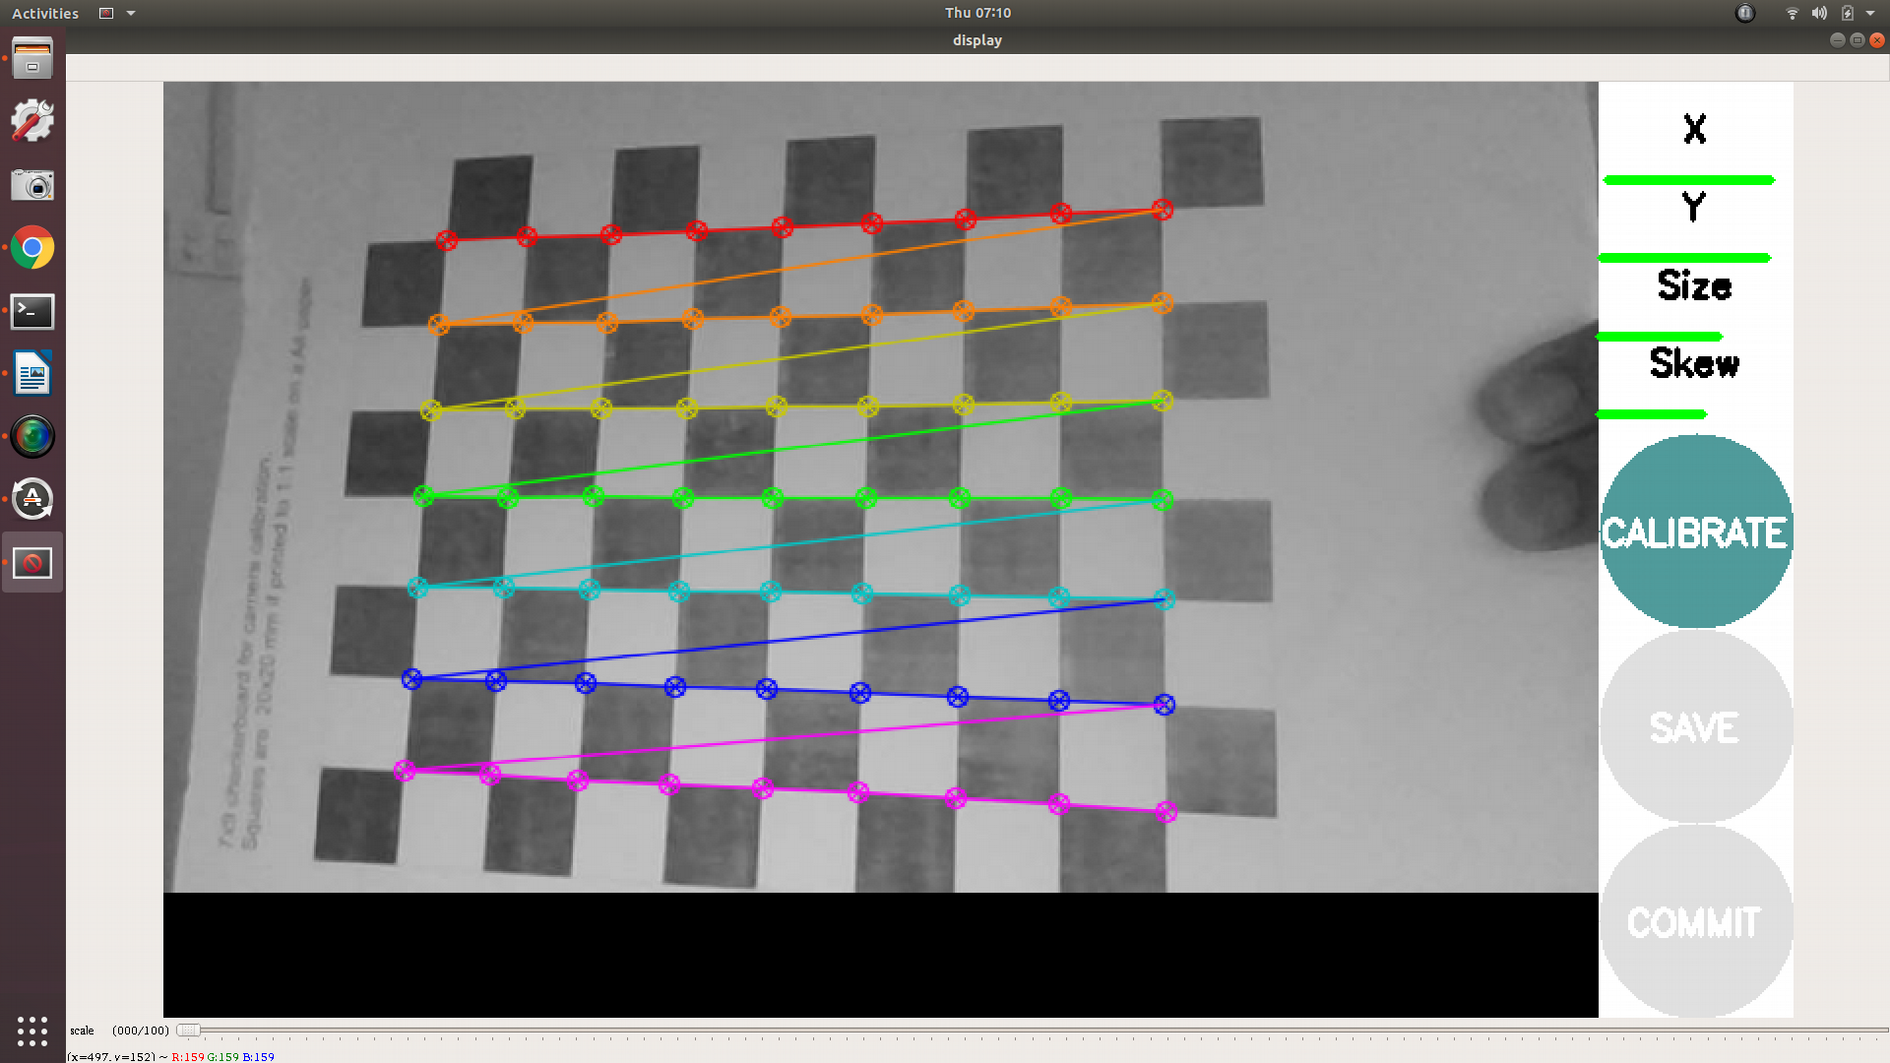
8- 标定完成后,SAVE 和 COMMIT 按钮会亮起,终端中也会显示标定结果。
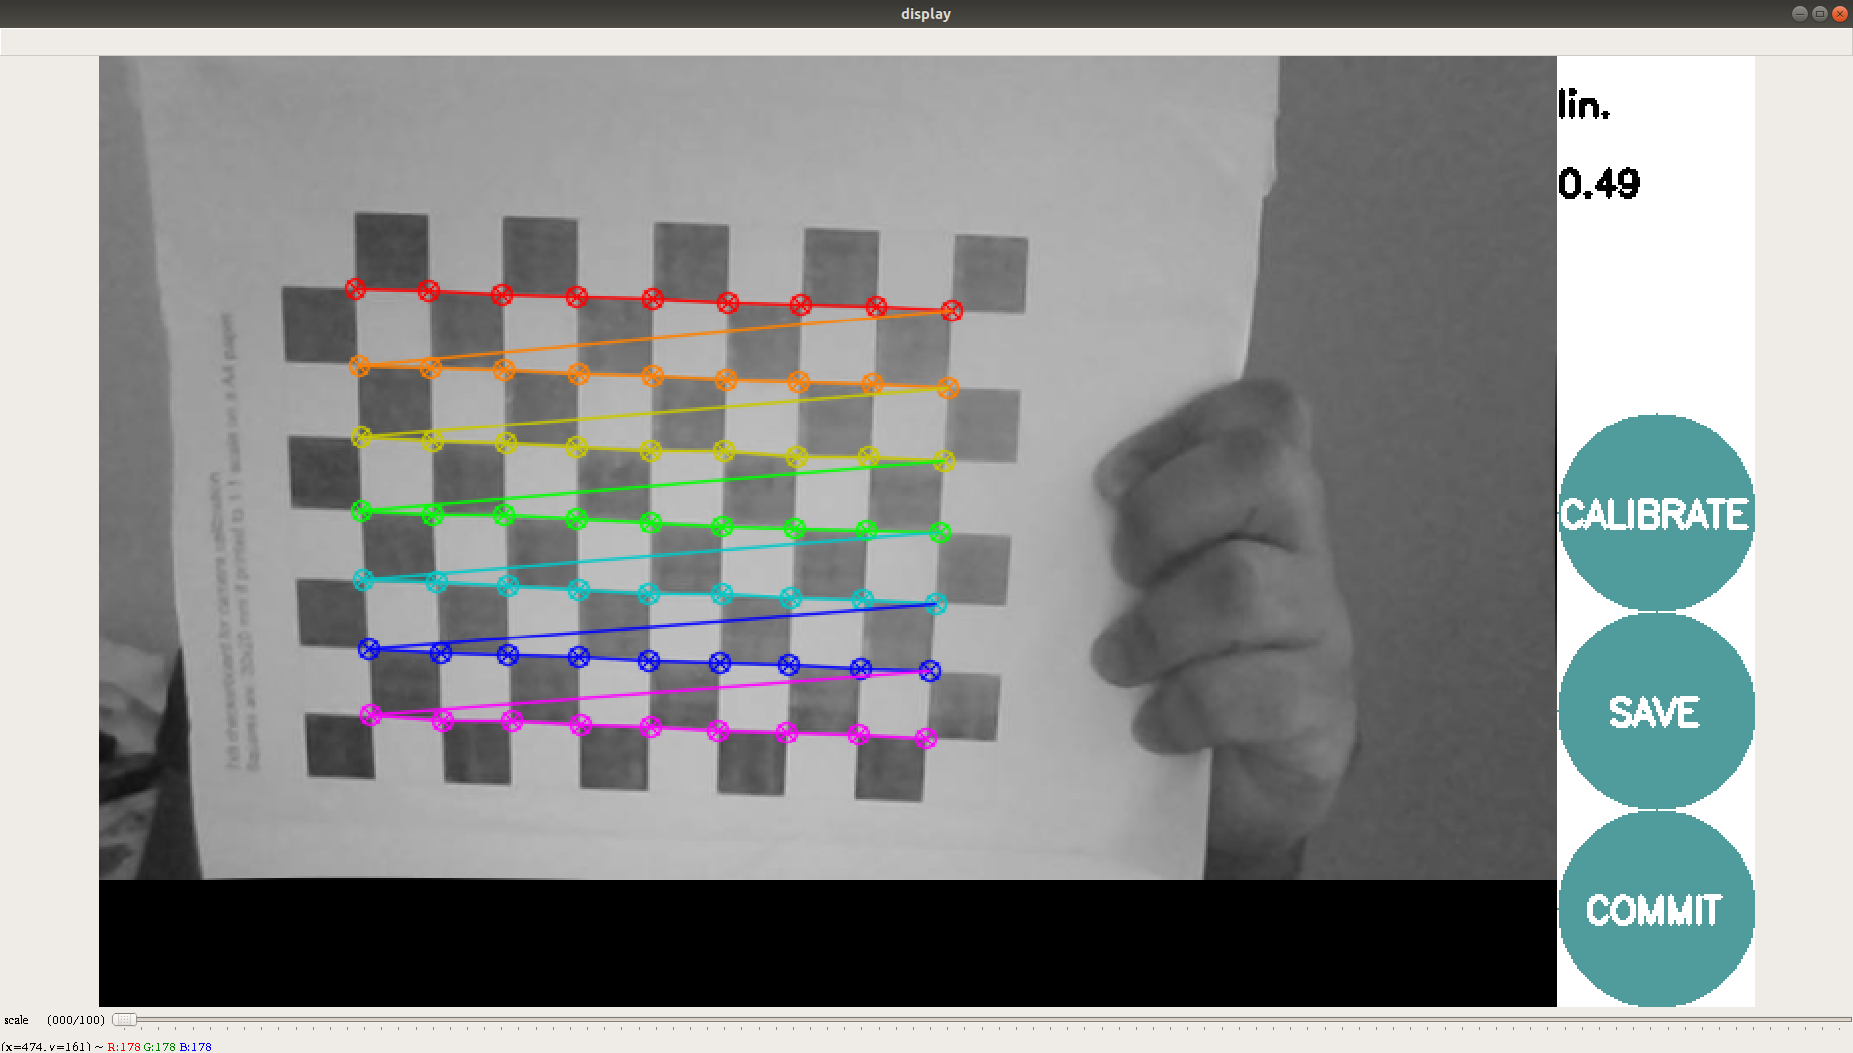
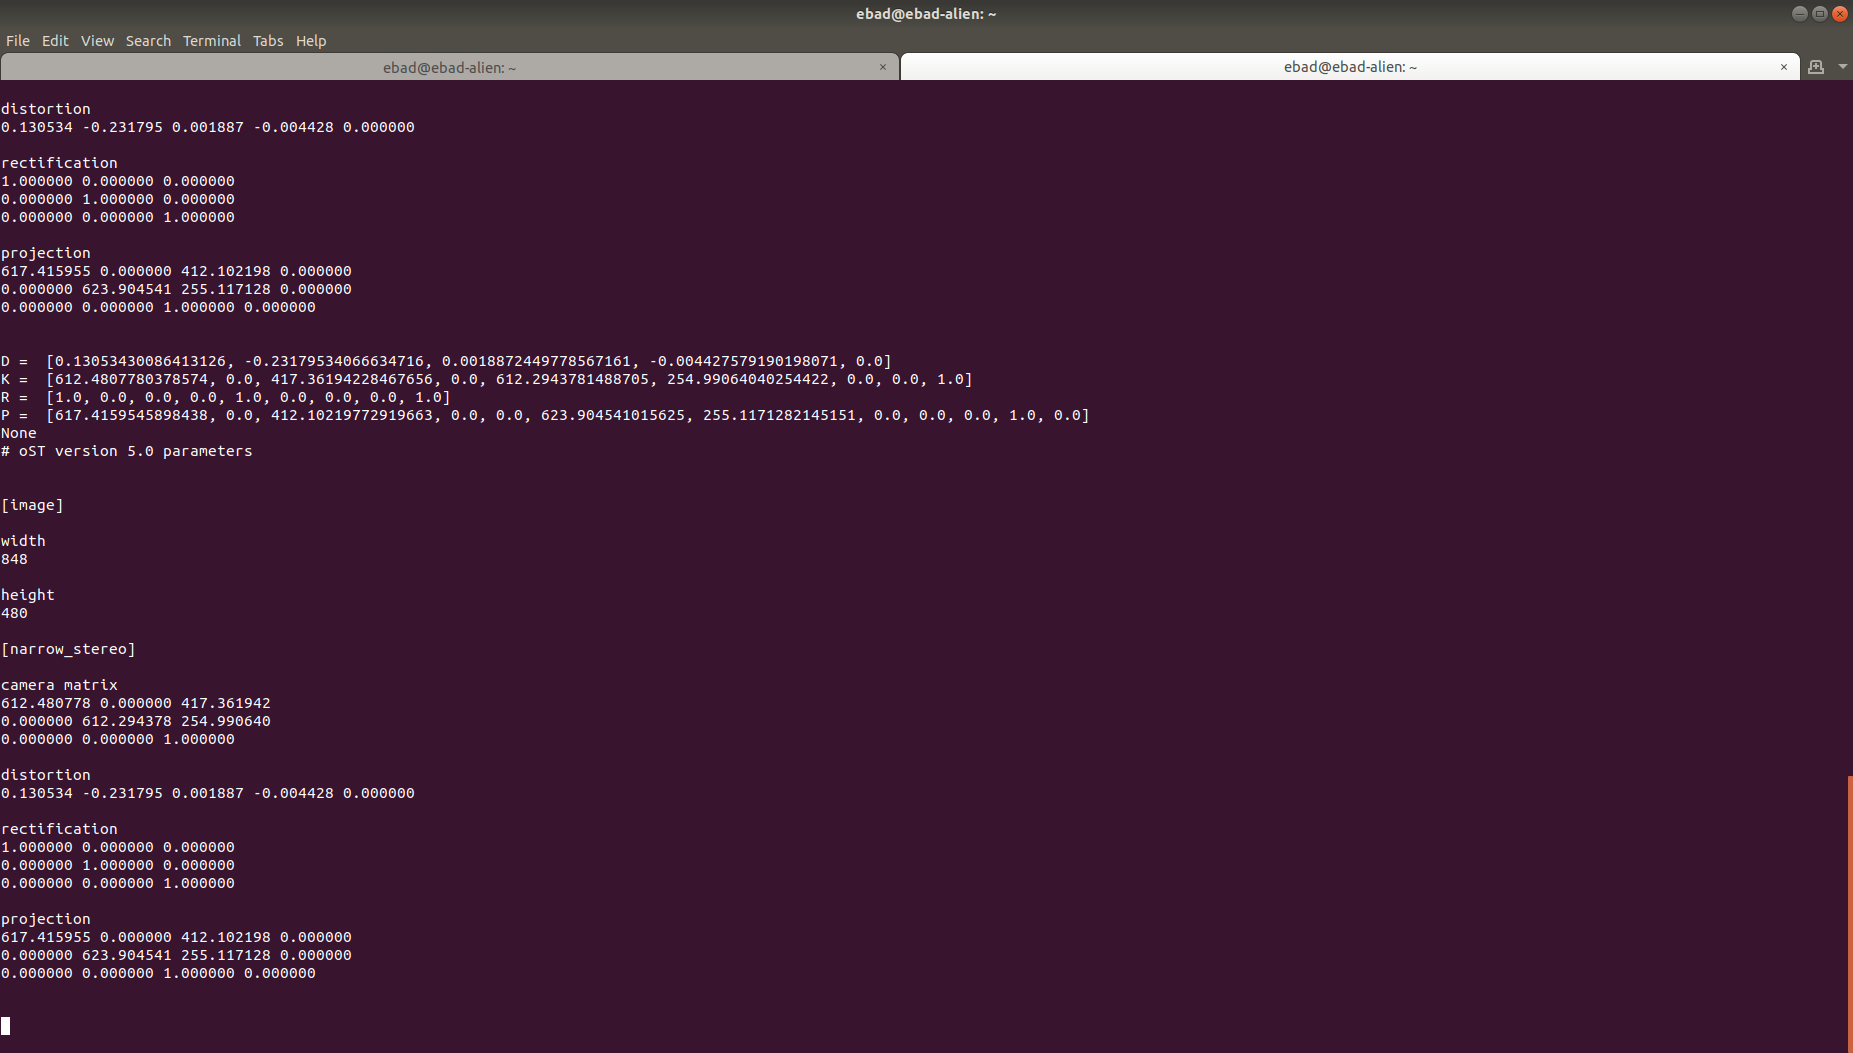
9- 点击 SAVE 按钮保存结果,数据将保存到 /tmp/calibrationdata.tar.gz
10- 要使用标定文件,请解压 calibrationdata.tar.gz:
tar -xvf calibrationdata.tar.gz
11- 解压后的文件夹中包含用于标定的图像,以及 ost.yaml 和 ost.txt 文件。可使用包含标定参数的 yaml 文件,并按照相机驱动的说明进行配置。