
move_group 接口
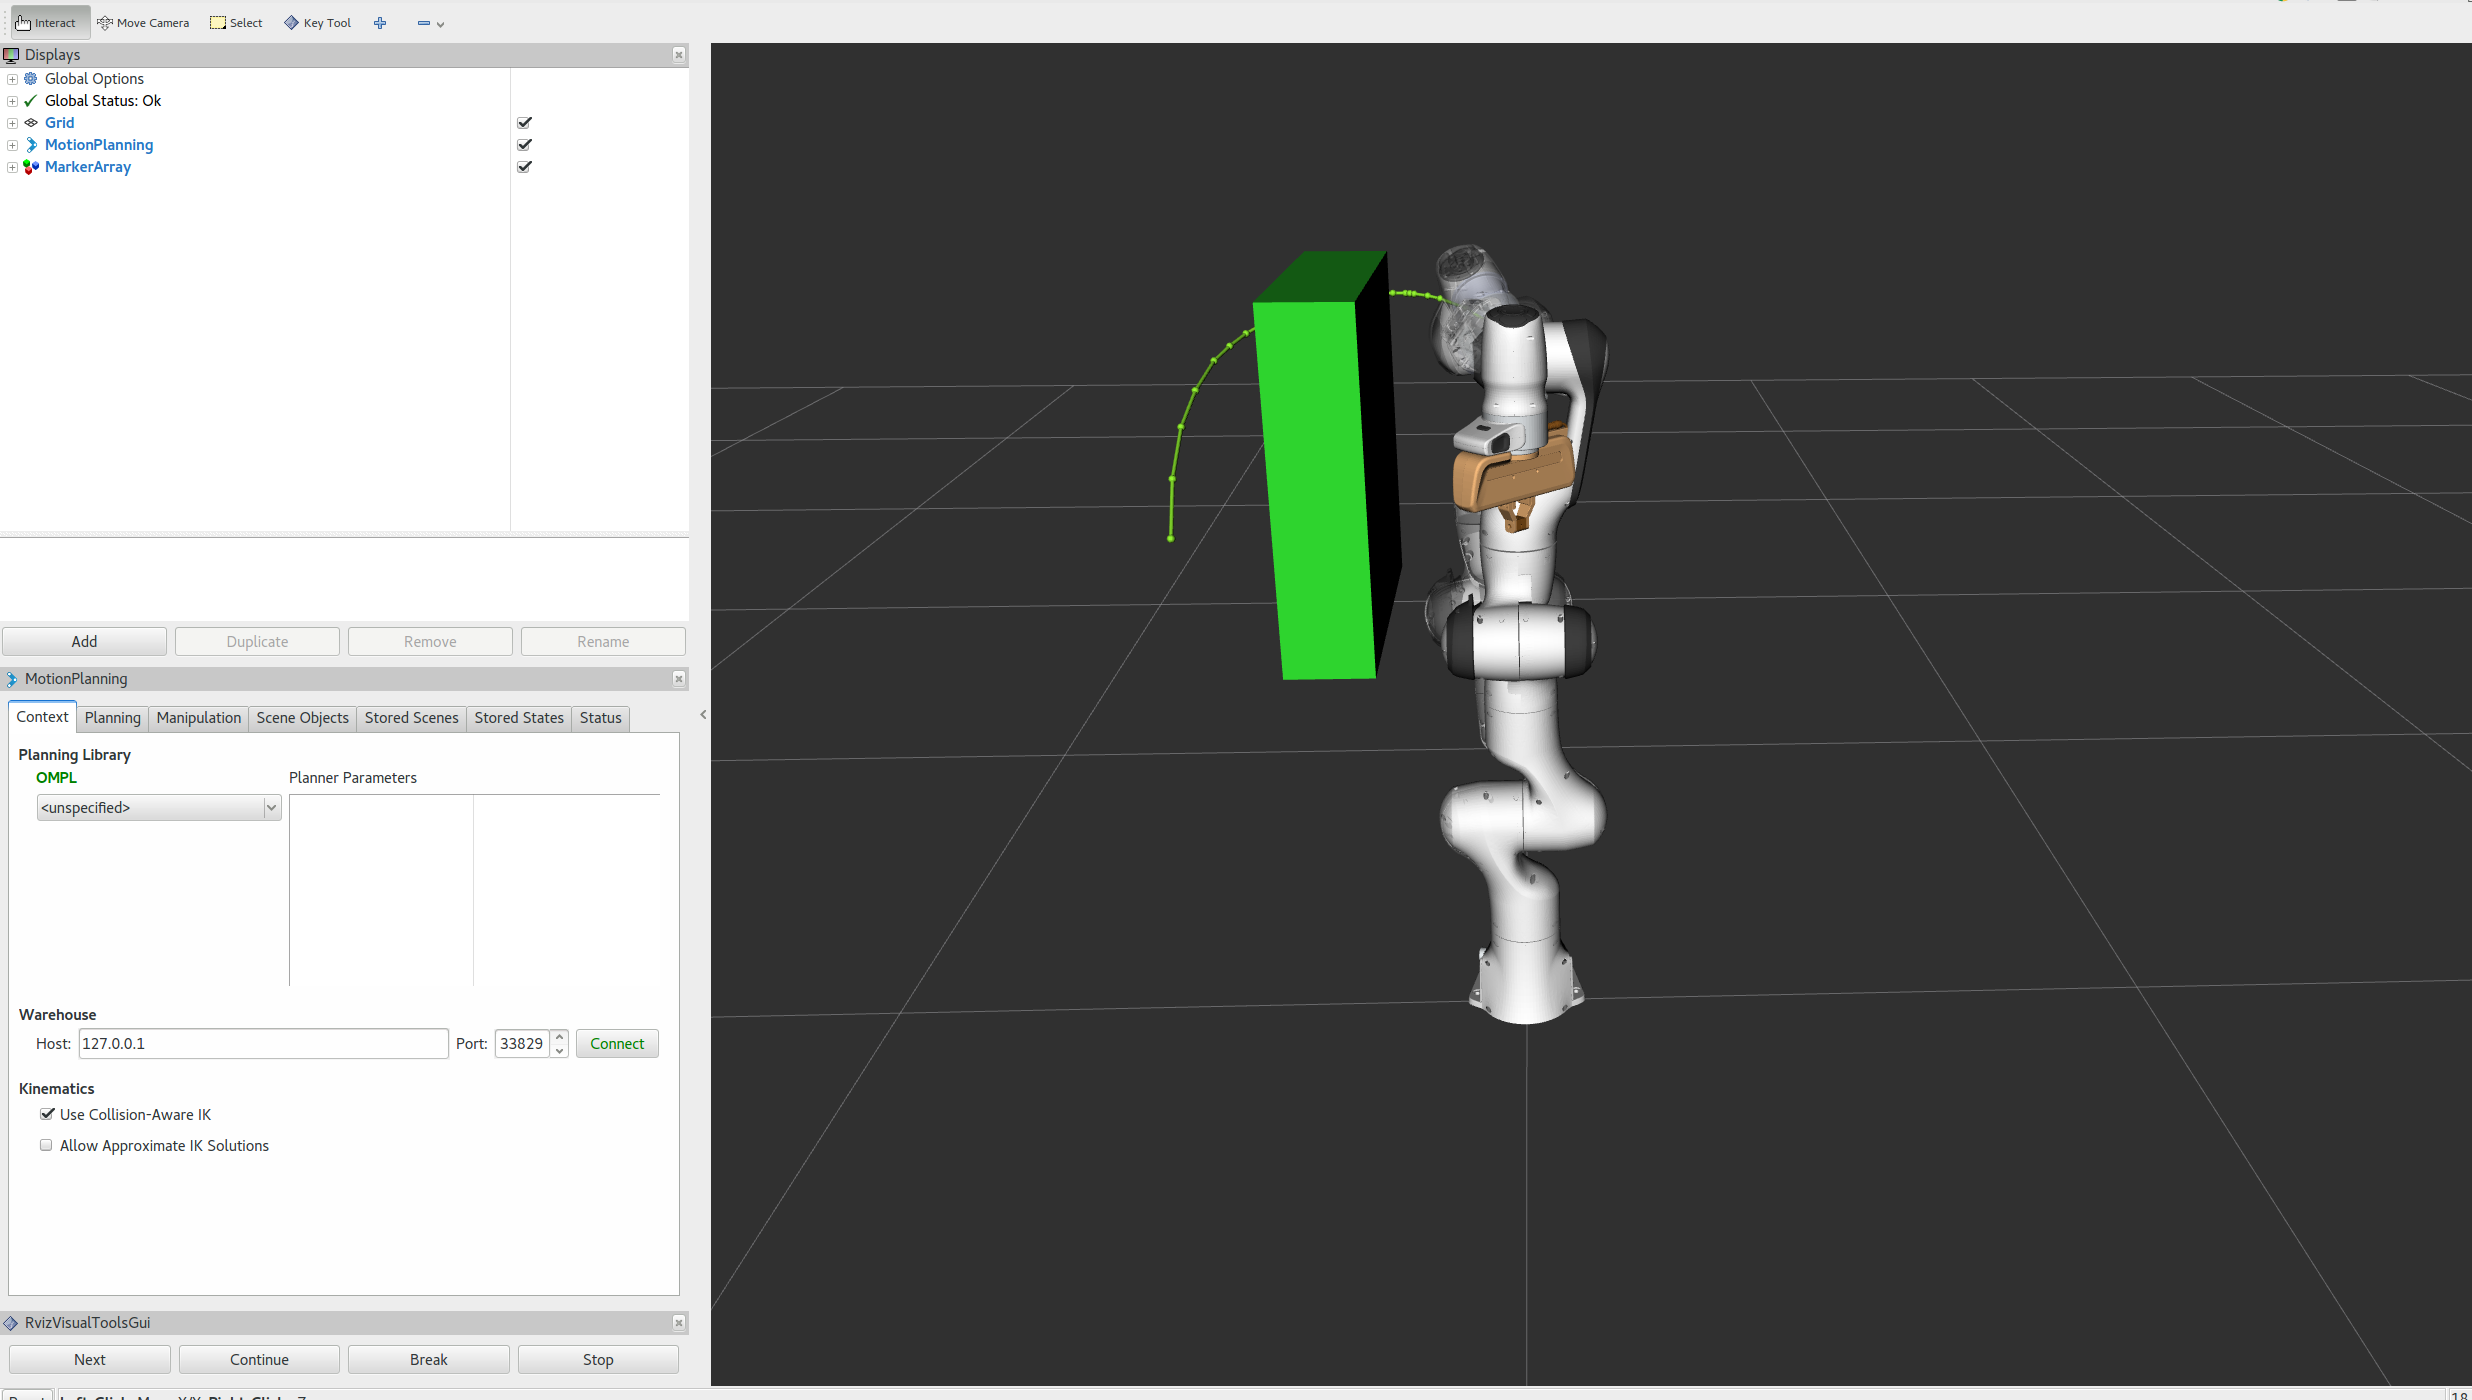
在 MoveIt 中,最简单的用户接口是 MoveGroupInterface 类。它为大多数常用操作提供了易用的功能,包括设置关节目标或位姿目标、创建运动规划、移动机器人、向环境中添加物体,以及将物体附着到机器人上或从中分离。该接口通过 ROS 话题、服务和 action 与 MoveGroup 节点通信。
观看这段简短的 YouTube 视频演示,了解 move group 接口的强大功能!
如果尚未完成,请先完成 Getting Started 中的步骤。
打开两个终端。在第一个终端中,启动 RViz 并等待所有内容加载完成:
ros2 launch moveit2_tutorials move_group.launch.py在第二个终端中,运行 launch 文件:
ros2 launch moveit2_tutorials move_group_interface_tutorial.launch.py片刻之后,RViz 窗口应该会出现,看起来与本页顶部的窗口类似。要逐步推进每个演示步骤,可以点击屏幕底部 RvizVisualToolsGui 面板中的 Next 按钮,或者在屏幕顶部 Tools 面板中选择 Key Tool,然后在 RViz 获得焦点时按键盘上的 0。
本教程顶部的 YouTube 视频 展示了预期输出。在 RViz 中,我们应该能够看到以下内容:
-
机器人将手臂移动到前方的位姿目标。
-
机器人将手臂移动到侧面的关节目标。
-
机器人将手臂移回一个新的位姿目标,同时保持末端执行器水平。
-
机器人沿笛卡尔路径移动手臂(一个向下、向右、向上加向左的三角形轨迹)。
-
机器人将手臂移动到一个没有障碍物的简单目标。
-
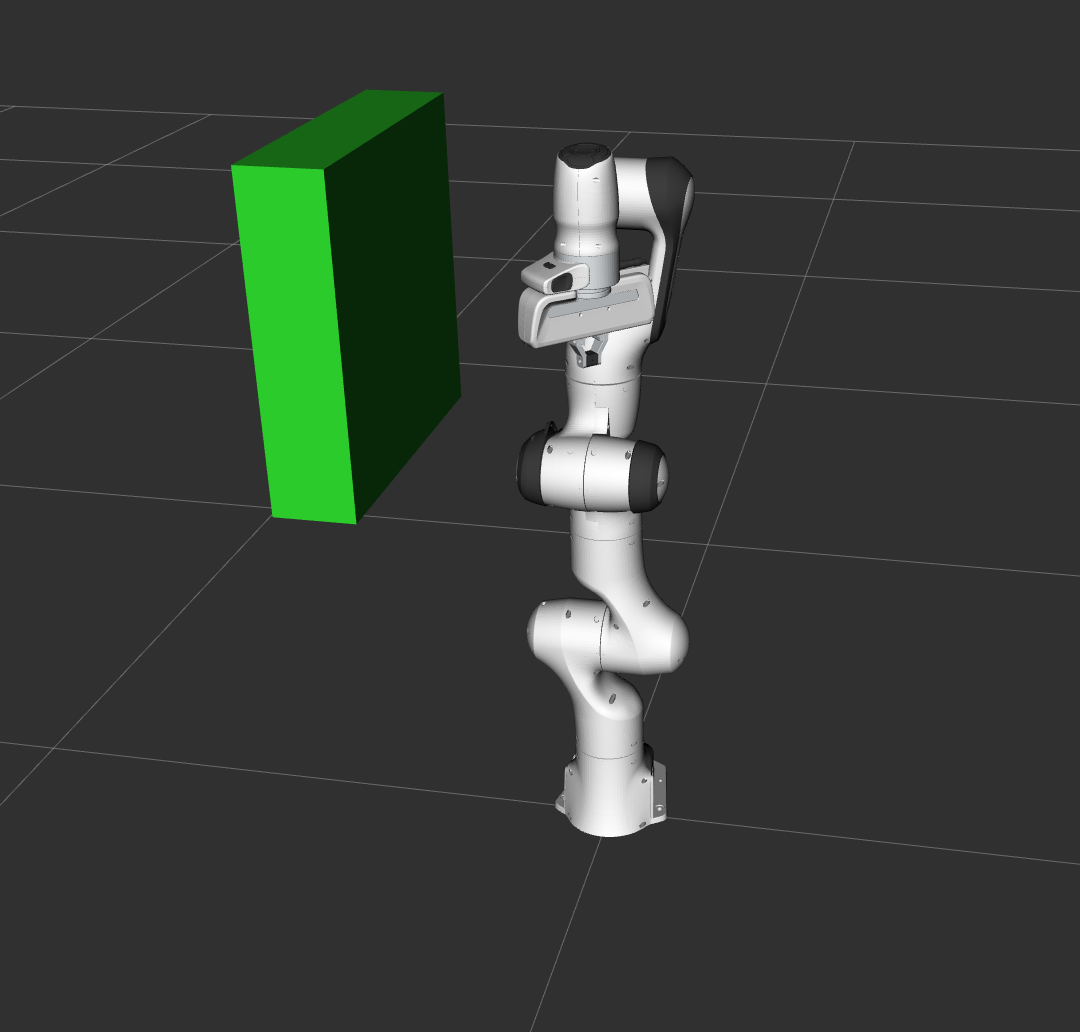
一个盒子物体被添加到环境中,位于机械臂的右侧。
-
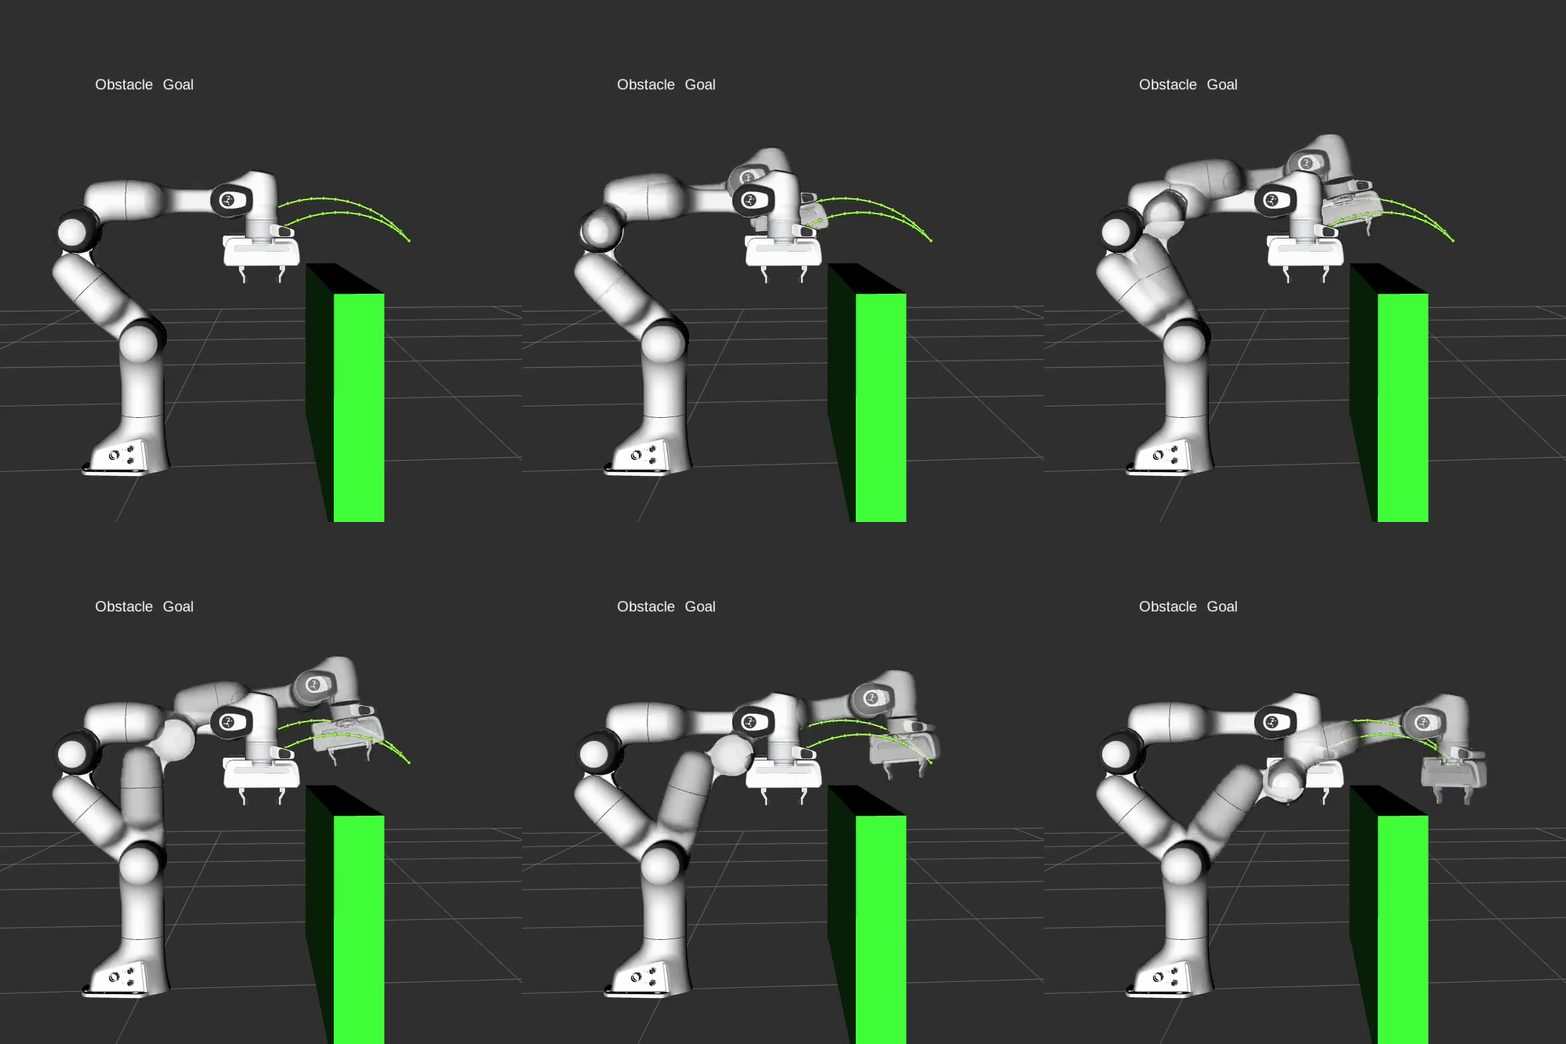
机器人移动手臂到位姿目标,同时避免与盒子发生碰撞。
-
物体被附着到手腕上(其颜色将变为紫色/橙色/绿色)。
-
机器人带着附着的物体移动手臂到位姿目标,同时避免与盒子发生碰撞。
-
物体从手腕上分离(其颜色将变回绿色)。
-
物体从环境中移除。
完整代码可以在 MoveIt GitHub 项目中查看。接下来,我们将逐段讲解代码,解释其功能。
MoveIt 操作一组被称为“规划组”(planning group)的关节集合,并将它们存储在一个名为 JointModelGroup 的对象中。在整个 MoveIt 中,“planning group”和“joint model group”这两个术语可以互换使用。
static const std::string PLANNING_GROUP = "panda_arm";只需提供你想控制和规划的规划组名称,即可轻松设置 MoveGroupInterface 类。
moveit::planning_interface::MoveGroupInterface move_group(move_group_node, PLANNING_GROUP);我们将使用 PlanningSceneInterface 类在“虚拟世界”场景中添加和移除碰撞物体。
moveit::planning_interface::PlanningSceneInterface planning_scene_interface;为了提高性能,我们经常使用原始指针来引用规划组。
const moveit::core::JointModelGroup* joint_model_group = move_group.getCurrentState()->getJointModelGroup(PLANNING_GROUP); namespace rvt = rviz_visual_tools; moveit_visual_tools::MoveItVisualTools visual_tools(move_group_node, "panda_link0", "move_group_tutorial", move_group.getRobotModel()); visual_tools.deleteAllMarkers();
/* Remote control is an introspection tool that allows users to step through a high level script */ /* via buttons and keyboard shortcuts in RViz */ visual_tools.loadRemoteControl();RViz 提供了多种类型的标记,在本演示中我们将使用文本、圆柱体和球体。
Eigen::Isometry3d text_pose = Eigen::Isometry3d::Identity(); text_pose.translation().z() = 1.0; visual_tools.publishText(text_pose, "MoveGroupInterface_Demo", rvt::WHITE, rvt::XLARGE);批量发布用于减少大型可视化中发送到 RViz 的消息数量。
visual_tools.trigger();获取基本信息
Section titled “获取基本信息”我们可以打印该机器人参考坐标系的名称。
RCLCPP_INFO(LOGGER, "Planning frame: %s", move_group.getPlanningFrame().c_str());我们还可以打印该组末端执行器连杆的名称。
RCLCPP_INFO(LOGGER, "End effector link: %s", move_group.getEndEffectorLink().c_str());我们可以获取机器人中所有规划组的列表:
RCLCPP_INFO(LOGGER, "Available Planning Groups:"); std::copy(move_group.getJointModelGroupNames().begin(), move_group.getJointModelGroupNames().end(), std::ostream_iterator<std::string>(std::cout, ", ")); visual_tools.prompt("Press 'next' in the RvizVisualToolsGui window to start the demo");规划到位姿目标
Section titled “规划到位姿目标”我们可以为规划组规划一个运动,使末端执行器到达期望的位姿。
geometry_msgs::msg::Pose target_pose1; target_pose1.orientation.w = 1.0; target_pose1.position.x = 0.28; target_pose1.position.y = -0.2; target_pose1.position.z = 0.5; move_group.setPoseTarget(target_pose1);现在,我们调用规划器计算规划并进行可视化。请注意,我们只是在规划,并没有要求 move_group 实际移动机器人。
  moveit::planning_interface::MoveGroupInterface::Plan my_plan;
  bool success = (move_group.plan(my_plan) == moveit::core::MoveItErrorCode::SUCCESS);
RCLCPP_INFO(LOGGER, "Visualizing plan 1 (pose goal) %s", success ? "" : "FAILED");我们还可以在 RViz 中把该规划可视化为带标记的线条。
RCLCPP_INFO(LOGGER, "Visualizing plan 1 as trajectory line"); visual_tools.publishAxisLabeled(target_pose1, "pose1"); visual_tools.publishText(text_pose, "Pose_Goal", rvt::WHITE, rvt::XLARGE); visual_tools.publishTrajectoryLine(my_plan.trajectory, joint_model_group); visual_tools.trigger(); visual_tools.prompt("Press 'next' in the RvizVisualToolsGui window to continue the demo");移动到位姿目标
Section titled “移动到位姿目标”移动到位姿目标与上一步类似,区别在于现在我们使用 move() 函数。请注意,我们之前设置的位姿目标仍然有效,因此机器人将尝试移动到该目标。我们不会在本教程中使用该函数,因为它是一个阻塞式函数,需要控制器处于活动状态,并在轨迹执行时报告成功。
/* Uncomment below line when working with a real robot */ /* move_group.move(); */规划到关节空间目标
Section titled “规划到关节空间目标”让我们设置一个关节空间目标并朝它移动。这将替换我们上面设置的位姿目标。
首先,我们将创建一个引用当前机器人状态的指针。RobotState 是包含所有位置、速度和加速度数据的对象。
moveit::core::RobotStatePtr current_state = move_group.getCurrentState(10);接下来,获取该规划组当前的关节值集合。
std::vector<double> joint_group_positions; current_state->copyJointGroupPositions(joint_model_group, joint_group_positions);现在,让我们修改其中一个关节,规划到新的关节空间目标,并将该规划可视化。
joint_group_positions[0] = -1.0; // radians bool within_bounds = move_group.setJointValueTarget(joint_group_positions); if (!within_bounds) { RCLCPP_WARN(LOGGER, "Target joint position(s) were outside of limits, but we will plan and clamp to the limits "); }我们将允许的最大速度和加速度降低到其最大值的 5%。默认值为 10%(0.1)。你可以在机器人 moveit_config 的 joint_limits.yaml 文件中设置偏好的默认值;如果需要机器人移动得更快,也可以在代码中显式设置系数。
  move_group.setMaxVelocityScalingFactor(0.05);  move_group.setMaxAccelerationScalingFactor(0.05);
  success = (move_group.plan(my_plan) == moveit::core::MoveItErrorCode::SUCCESS);  RCLCPP_INFO(LOGGER, "Visualizing plan 2 (joint space goal) %s", success ? "" : "FAILED");
在 RViz 中可视化该规划:
visual_tools.deleteAllMarkers(); visual_tools.publishText(text_pose, "Joint_Space_Goal", rvt::WHITE, rvt::XLARGE); visual_tools.publishTrajectoryLine(my_plan.trajectory, joint_model_group); visual_tools.trigger(); visual_tools.prompt("Press 'next' in the RvizVisualToolsGui window to continue the demo");带路径约束的规划
Section titled “带路径约束的规划”为机器人上的某个连杆指定路径约束非常简单。让我们为规划组指定一个路径约束和一个位姿目标。首先定义路径约束。
moveit_msgs::msg::OrientationConstraint ocm; ocm.link_name = "panda_link7"; ocm.header.frame_id = "panda_link0"; ocm.orientation.w = 1.0; ocm.absolute_x_axis_tolerance = 0.1; ocm.absolute_y_axis_tolerance = 0.1; ocm.absolute_z_axis_tolerance = 0.1; ocm.weight = 1.0;现在,将其设置为该规划组的路径约束。
moveit_msgs::msg::Constraints test_constraints; test_constraints.orientation_constraints.push_back(ocm); move_group.setPathConstraints(test_constraints);强制在关节空间中规划
Section titled “强制在关节空间中规划”根据规划问题的不同,MoveIt 会在 joint space(关节空间)和 cartesian space(笛卡尔空间)之间选择问题的表示方式。在 ompl_planning.yaml 文件中设置组参数 enforce_joint_model_state_space:true 会强制所有规划使用 joint space(关节空间)。
默认情况下,带有方向路径约束的规划请求会在 cartesian space(笛卡尔空间)中采样,这样调用逆运动学求解器即可充当生成式采样器。
通过强制使用 joint space(关节空间),规划过程将使用拒绝采样来寻找有效的请求。请注意,这可能会显著增加规划时间。
我们将复用之前的目标并规划到该目标。请注意,只有当当前状态已经满足路径约束时才有效。因此,我们需要将起始状态设置为一个新位姿。
moveit::core::RobotState start_state(*move_group.getCurrentState()); geometry_msgs::msg::Pose start_pose2; start_pose2.orientation.w = 1.0; start_pose2.position.x = 0.55; start_pose2.position.y = -0.05; start_pose2.position.z = 0.8; start_state.setFromIK(joint_model_group, start_pose2); move_group.setStartState(start_state);现在,我们将从刚刚创建的新起始状态规划到之前的位姿目标。
move_group.setPoseTarget(target_pose1);带约束的规划可能会很慢,因为每个采样都需要调用逆运动学求解器。让我们把规划时间从默认的 5 秒调大,以确保规划器有足够的时间成功完成。
  move_group.setPlanningTime(10.0);
  success = (move_group.plan(my_plan) == moveit::core::MoveItErrorCode::SUCCESS);  RCLCPP_INFO(LOGGER, "Visualizing plan 3 (constraints) %s", success ? "" : "FAILED");
在 RViz 中可视化该规划:
visual_tools.deleteAllMarkers(); visual_tools.publishAxisLabeled(start_pose2, "start"); visual_tools.publishAxisLabeled(target_pose1, "goal"); visual_tools.publishText(text_pose, "Constrained_Goal", rvt::WHITE, rvt::XLARGE); visual_tools.publishTrajectoryLine(my_plan.trajectory, joint_model_group); visual_tools.trigger(); visual_tools.prompt("Press 'next' in the RvizVisualToolsGui window to continue the demo");使用完路径约束后,务必将其清除。
move_group.clearPathConstraints();你可以直接指定末端执行器需要经过的途经点列表来规划笛卡尔路径。请注意,我们是从上面那个新的起始状态开始的。起始位姿不需要添加到途经点列表中,但添加它有助于可视化。
  std::vector<geometry_msgs::msg::Pose> waypoints;  waypoints.push_back(start_pose2);
  geometry_msgs::msg::Pose target_pose3 = start_pose2;
  target_pose3.position.z -= 0.2;  waypoints.push_back(target_pose3);  // down
  target_pose3.position.y -= 0.2;  waypoints.push_back(target_pose3);  // right
  target_pose3.position.z += 0.2;  target_pose3.position.y += 0.2;  target_pose3.position.x -= 0.2;  waypoints.push_back(target_pose3);  // up and left
我们希望笛卡尔路径以 1 cm 的分辨率进行插值,因此将 0.01 指定为笛卡尔平移的最大步长。
const double eef_step = 0.01; moveit_msgs::msg::RobotTrajectory trajectory; double fraction = move_group.computeCartesianPath(waypoints, eef_step, trajectory); RCLCPP_INFO(LOGGER, "Visualizing plan 4 (Cartesian path) (%.2f%% achieved)", fraction * 100.0);在 RViz 中可视化该规划:
visual_tools.deleteAllMarkers(); visual_tools.publishText(text_pose, "Cartesian_Path", rvt::WHITE, rvt::XLARGE); visual_tools.publishPath(waypoints, rvt::LIME_GREEN, rvt::SMALL); for (std::size_t i = 0; i < waypoints.size(); ++i) visual_tools.publishAxisLabeled(waypoints[i], "pt" + std::to_string(i), rvt::SMALL); visual_tools.trigger(); visual_tools.prompt("Press 'next' in the RvizVisualToolsGui window to continue the demo");笛卡尔运动通常应该较慢,例如在接近物体时。笛卡尔规划的速度目前无法通过 maxVelocityScalingFactor 设置,而需要你手动对轨迹进行计时,具体方法参见这里的讨论。欢迎提交 pull request。
你可以这样执行轨迹。
/* move_group.execute(trajectory); */向环境中添加物体
Section titled “向环境中添加物体”首先,让我们规划到另一个没有障碍物的简单目标。
  move_group.setStartState(*move_group.getCurrentState());  geometry_msgs::msg::Pose another_pose;  another_pose.orientation.w = 0;  another_pose.orientation.x = -1.0;  another_pose.position.x = 0.7;  another_pose.position.y = 0.0;  another_pose.position.z = 0.59;  move_group.setPoseTarget(another_pose);
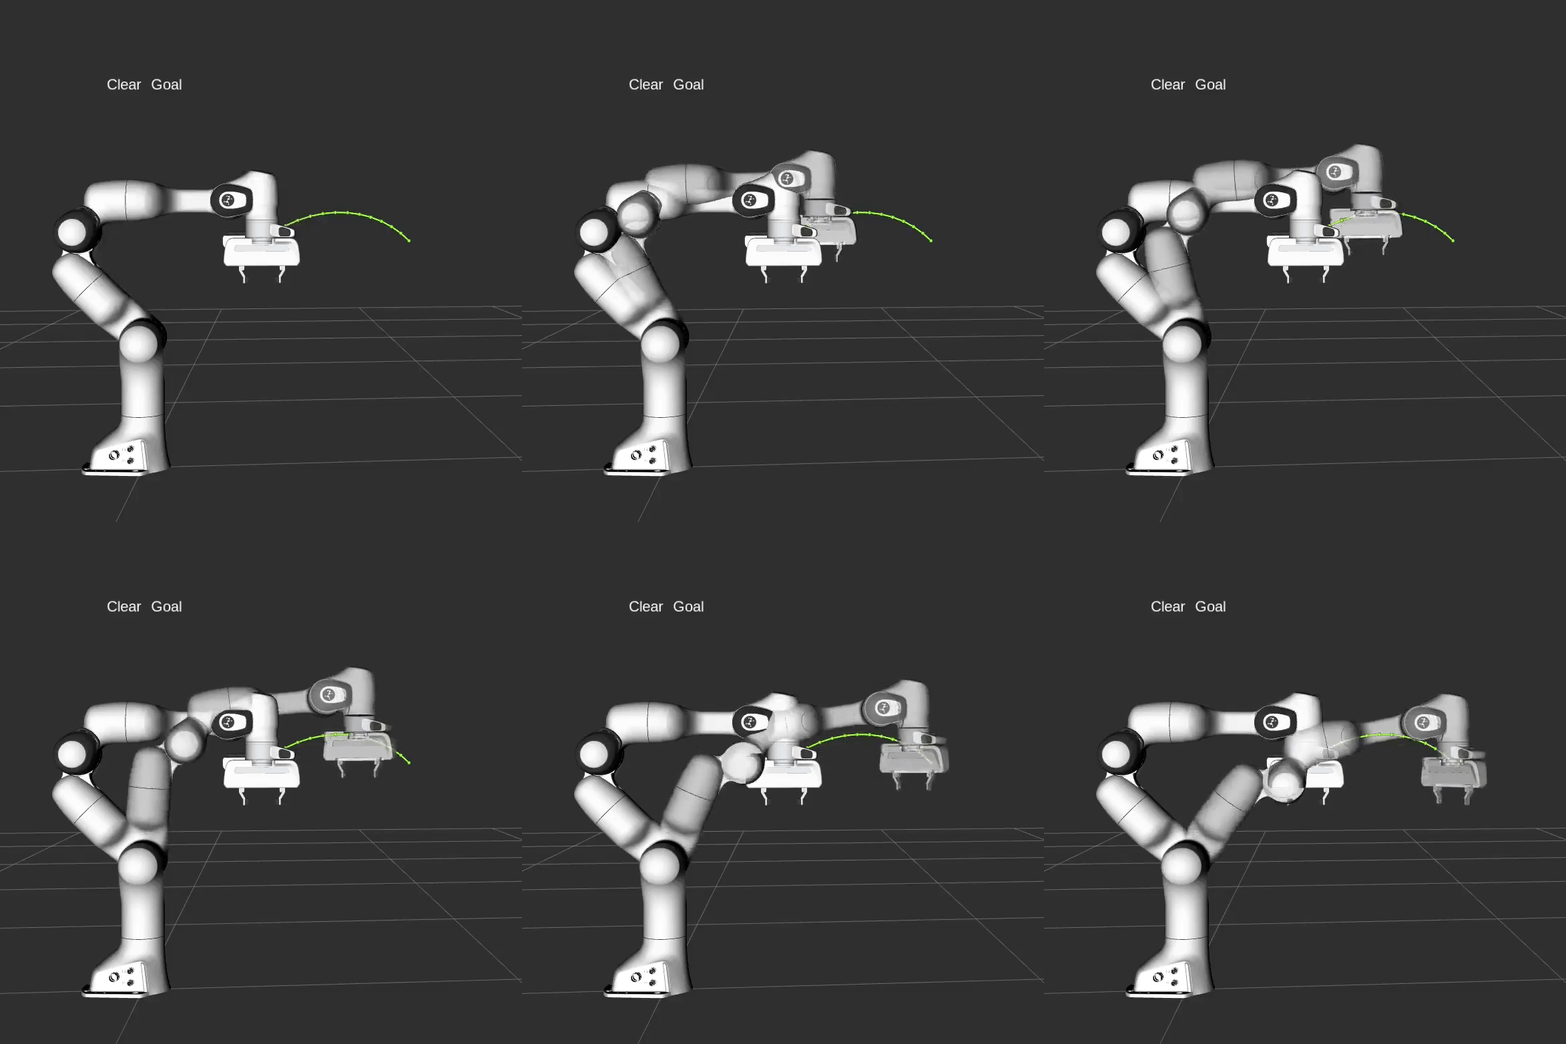
  success = (move_group.plan(my_plan) == moveit::core::MoveItErrorCode::SUCCESS);  RCLCPP_INFO(LOGGER, "Visualizing plan 5 (with no obstacles) %s", success ? "" : "FAILED");
  visual_tools.deleteAllMarkers();  visual_tools.publishText(text_pose, "Clear_Goal", rvt::WHITE, rvt::XLARGE);  visual_tools.publishAxisLabeled(another_pose, "goal");  visual_tools.publishTrajectoryLine(my_plan.trajectory, joint_model_group);  visual_tools.trigger();  visual_tools.prompt("Press 'next' in the RvizVisualToolsGui window to continue the demo");
结果可能如下所示:
现在,让我们定义一个碰撞物体的 ROS 消息,让机器人避开它。
moveit_msgs::msg::CollisionObject collision_object; collision_object.header.frame_id = move_group.getPlanningFrame();物体的 id 用于唯一标识它。
collision_object.id = "box1";定义一个要添加到世界中的盒子。
shape_msgs::msg::SolidPrimitive primitive; primitive.type = primitive.BOX; primitive.dimensions.resize(3); primitive.dimensions[primitive.BOX_X] = 0.1; primitive.dimensions[primitive.BOX_Y] = 1.5; primitive.dimensions[primitive.BOX_Z] = 0.5;为盒子定义一个位姿(相对于 frame_id 指定)。
  geometry_msgs::msg::Pose box_pose;  box_pose.orientation.w = 1.0;  box_pose.position.x = 0.48;  box_pose.position.y = 0.0;  box_pose.position.z = 0.25;
  collision_object.primitives.push_back(primitive);  collision_object.primitive_poses.push_back(box_pose);  collision_object.operation = collision_object.ADD;
  std::vector<moveit_msgs::msg::CollisionObject> collision_objects;  collision_objects.push_back(collision_object);
现在,让我们将碰撞物体添加到世界中(使用一个可以包含多个物体的向量):
RCLCPP_INFO(LOGGER, "Add an object into the world"); planning_scene_interface.addCollisionObjects(collision_objects);在 RViz 中显示状态文本,并等待 MoveGroup 接收和处理碰撞物体消息:
visual_tools.publishText(text_pose, "Add_object", rvt::WHITE, rvt::XLARGE); visual_tools.trigger(); visual_tools.prompt("Press 'next' in the RvizVisualToolsGui window to once the collision object appears in RViz");现在,当我们规划轨迹时,它将避开障碍物。
success = (move_group.plan(my_plan) == moveit::core::MoveItErrorCode::SUCCESS); RCLCPP_INFO(LOGGER, "Visualizing plan 6 (pose goal move around cuboid) %s", success ? "" : "FAILED"); visual_tools.publishText(text_pose, "Obstacle_Goal", rvt::WHITE, rvt::XLARGE); visual_tools.publishTrajectoryLine(my_plan.trajectory, joint_model_group); visual_tools.trigger(); visual_tools.prompt("Press 'next' in the RvizVisualToolsGui window once the plan is complete");结果可能如下所示:
将物体附着到机器人上
Section titled “将物体附着到机器人上”你可以将一个物体附着到机器人上,使其随机器人几何结构一起移动。这模拟了拾起物体以便对其进行操作的过程。运动规划也应避免物体与其他物体之间发生碰撞。
  moveit_msgs::msg::CollisionObject object_to_attach;  object_to_attach.id = "cylinder1";
  shape_msgs::msg::SolidPrimitive cylinder_primitive;  cylinder_primitive.type = primitive.CYLINDER;  cylinder_primitive.dimensions.resize(2);  cylinder_primitive.dimensions[primitive.CYLINDER_HEIGHT] = 0.20;  cylinder_primitive.dimensions[primitive.CYLINDER_RADIUS] = 0.04;
我们为这个圆柱体定义坐标系和位姿,使其出现在夹爪中。
object_to_attach.header.frame_id = move_group.getEndEffectorLink(); geometry_msgs::msg::Pose grab_pose; grab_pose.orientation.w = 1.0; grab_pose.position.z = 0.2;首先,我们将物体添加到世界中(不使用向量):
object_to_attach.primitives.push_back(cylinder_primitive); object_to_attach.primitive_poses.push_back(grab_pose); object_to_attach.operation = object_to_attach.ADD; planning_scene_interface.applyCollisionObject(object_to_attach);然后,我们将物体“附着”到机器人上。它使用 frame_id 来确定物体附着到哪个机器人连杆上。我们还需要告诉 MoveIt,该物体允许与夹爪的指节连杆发生碰撞。你也可以使用 applyAttachedCollisionObject 直接将物体附着到机器人上。
  RCLCPP_INFO(LOGGER, "Attach the object to the robot");  std::vector<std::string> touch_links;  touch_links.push_back("panda_rightfinger");  touch_links.push_back("panda_leftfinger");  move_group.attachObject(object_to_attach.id, "panda_hand", touch_links);
  visual_tools.publishText(text_pose, "Object_attached_to_robot", rvt::WHITE, rvt::XLARGE);  visual_tools.trigger();
  /* Wait for MoveGroup to receive and process the attached collision object message */  visual_tools.prompt("Press 'next' in the RvizVisualToolsGui window once the new object is attached to the robot");
重新规划,但这次物体已在手中。
move_group.setStartStateToCurrentState(); success = (move_group.plan(my_plan) == moveit::core::MoveItErrorCode::SUCCESS); RCLCPP_INFO(LOGGER, "Visualizing plan 7 (move around cuboid with cylinder) %s", success ? "" : "FAILED"); visual_tools.publishTrajectoryLine(my_plan.trajectory, joint_model_group); visual_tools.trigger(); visual_tools.prompt("Press 'next' in the RvizVisualToolsGui window once the plan is complete");结果可能如下所示:
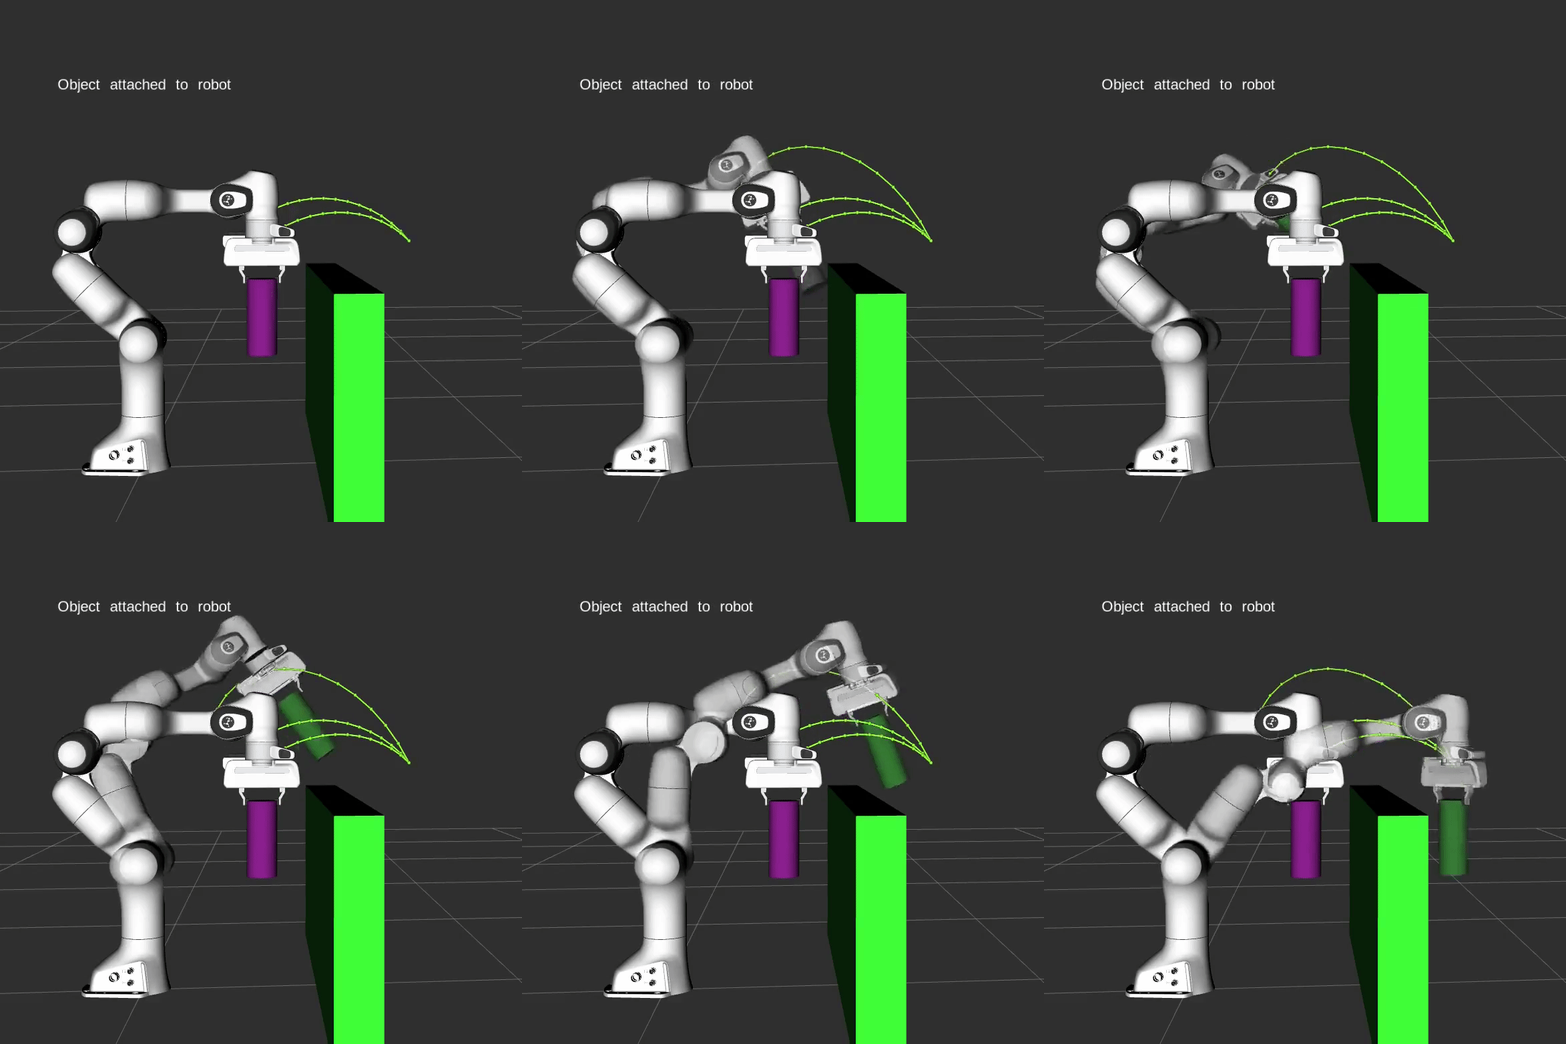
分离并移除物体
Section titled “分离并移除物体”现在,让我们将圆柱体从机器人的夹爪上分离。
RCLCPP_INFO(LOGGER, "Detach the object from the robot"); move_group.detachObject(object_to_attach.id);在 RViz 中显示状态文本:
  visual_tools.deleteAllMarkers();  visual_tools.publishText(text_pose, "Object_detached_from_robot", rvt::WHITE, rvt::XLARGE);  visual_tools.trigger();
  /* Wait for MoveGroup to receive and process the attached collision object message */  visual_tools.prompt("Press 'next' in the RvizVisualToolsGui window once the new object is detached from the robot");
现在,让我们从世界中移除这些物体。
RCLCPP_INFO(LOGGER, "Remove the objects from the world"); std::vector<std::string> object_ids; object_ids.push_back(collision_object.id); object_ids.push_back(object_to_attach.id); planning_scene_interface.removeCollisionObjects(object_ids);在 RViz 中显示状态文本:
  visual_tools.publishText(text_pose, "Objects_removed", rvt::WHITE, rvt::XLARGE);  visual_tools.trigger();
/* Wait for MoveGroup to receive and process the attached collision object message */ visual_tools.prompt("Press 'next' in the RvizVisualToolsGui window to once the collision object disappears");完整的 launch 文件可以在 GitHub上查看。本教程中的所有代码都可以从 moveit2_tutorials 包中运行,该包是 MoveIt 安装的一部分。
关于设置容差的说明
Section titled “关于设置容差的说明”请注意,MoveGroupInterface 的 setGoalTolerance() 及相关方法设置的是规划容差,而不是执行容差。
如果你想配置执行容差,在使用 FollowJointTrajectory 控制器时,必须编辑 controller.yaml 文件,或者手动将其添加到规划器生成的轨迹消息中。