
在物体周围规划
本教程将向你介绍如何将物体添加到规划场景中,并让机器人在规划时绕开这些物体。
如果你还没有完成 在 RViz 中可视化 中的步骤,请先完成。本教程假定你从上一个教程结束时的 hello_moveit 项目开始。如果你只想运行本教程,可以按照 Docker 指南 启动一个包含已完成教程的容器。
1 添加 Planning Scene Interface 的头文件
Section titled “1 添加 Planning Scene Interface 的头文件”在源文件顶部,将以下内容添加到 include 列表中:
#include <moveit/planning_scene_interface/planning_scene_interface.hpp>2 更改目标位姿
Section titled “2 更改目标位姿”首先,更新目标位姿,使机器人规划到不同的位置:
// Set a target Pose with updated values !!!auto const target_pose = [] { geometry_msgs::msg::Pose msg; msg.orientation.y = 0.8; msg.orientation.w = 0.6; msg.position.x = 0.1; msg.position.y = 0.4; msg.position.z = 0.4; return msg;}();move_group_interface.setPoseTarget(target_pose);3 创建碰撞物体
Section titled “3 创建碰撞物体”接下来,我们创建一个碰撞物体。首先需要注意的是,该物体的位姿定义在机器人的参考坐标系中。如果有一个感知系统能够报告场景中障碍物的位置,输出的就是这种消息类型。由于这只是示例,我们手动创建。另一个要点是,我们在消息上设置了 ADD 操作,表示将该物体添加到碰撞场景中。请将这段代码放在上一步设置目标位姿和创建规划之间。
// Create collision object for the robot to avoidauto const collision_object = [frame_id =                                 move_group_interface.getPlanningFrame()] {  moveit_msgs::msg::CollisionObject collision_object;  collision_object.header.frame_id = frame_id;  collision_object.id = "box1";  shape_msgs::msg::SolidPrimitive primitive;
  // Define the size of the box in meters  primitive.type = primitive.BOX;  primitive.dimensions.resize(3);  primitive.dimensions[primitive.BOX_X] = 0.5;  primitive.dimensions[primitive.BOX_Y] = 0.1;  primitive.dimensions[primitive.BOX_Z] = 0.5;
  // Define the pose of the box (relative to the frame_id)  geometry_msgs::msg::Pose box_pose;  box_pose.orientation.w = 1.0;  // We can leave out the x, y, and z components of the quaternion since they are initialized to 0  box_pose.position.x = 0.2;  box_pose.position.y = 0.2;  box_pose.position.z = 0.25;
  collision_object.primitives.push_back(primitive);  collision_object.primitive_poses.push_back(box_pose);  collision_object.operation = collision_object.ADD;
  return collision_object;}();
4 将物体添加到规划场景
Section titled “4 将物体添加到规划场景”最后,我们需要将此物体添加到碰撞场景中。为此,我们使用一个名为 PlanningSceneInterface 的对象,它通过 ROS 接口将对规划场景的修改传达给 MoveGroup。这段代码应该紧跟在创建碰撞物体的代码块之后。
// Add the collision object to the scenemoveit::planning_interface::PlanningSceneInterface planning_scene_interface;planning_scene_interface.applyCollisionObject(collision_object);5 运行程序并观察变化
Section titled “5 运行程序并观察变化”和上一个教程一样,使用 demo.launch.py 脚本启动 RViz,然后运行我们的程序。如果你使用的是 Docker 教程容器,可以用以下命令指定一个已添加 RvizVisualToolsGui 面板的不同 RViz 配置:
ros2 launch moveit2_tutorials demo.launch.py rviz_config:=kinova_hello_moveit.rviz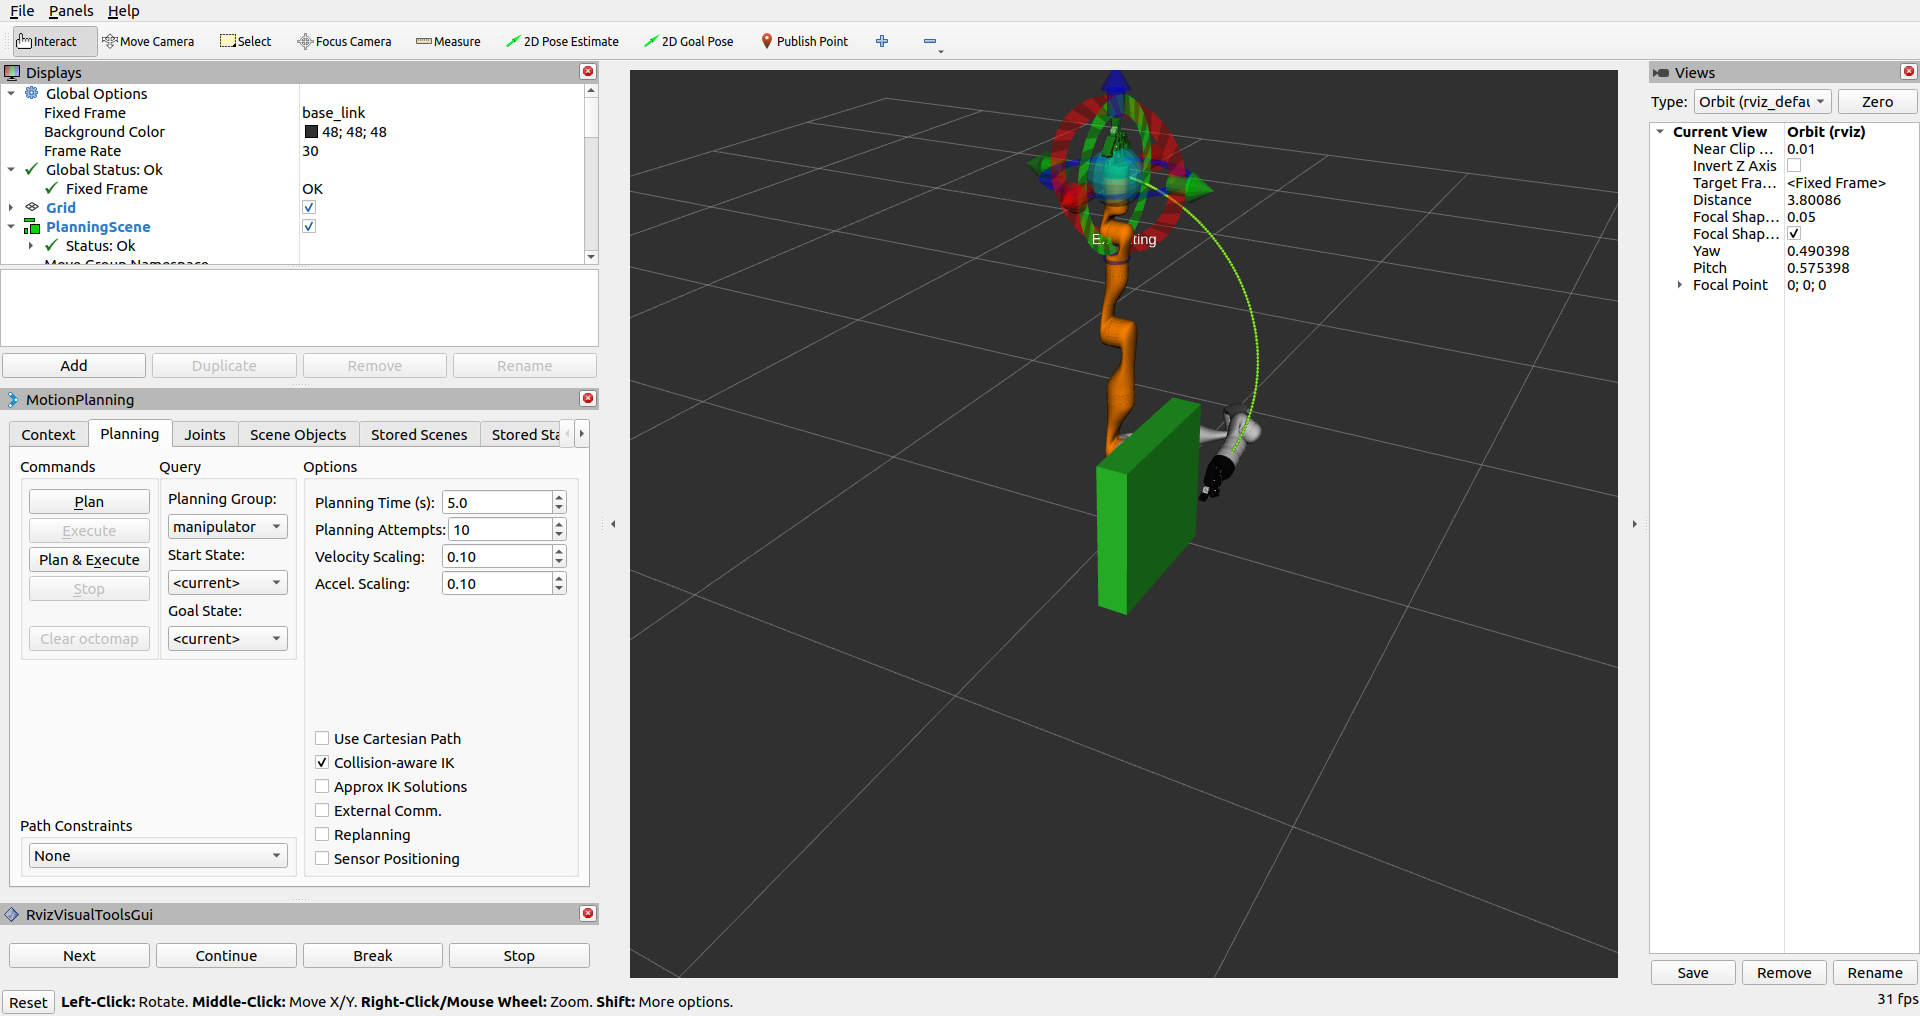
- 你扩展了 MoveIt 程序,使其能够在规划时绕开场景中的物体。
- 这里是完整的 hello_moveit.cpp 源码。
在下一个教程 使用 MoveIt Task Constructor 实现抓取与放置 中,你将接触到一种更高级的工具,专门用于解决更复杂的运动规划问题。你将创建一个程序来抓取和放置物体。