
使用 OpenCV 的随机数生成器与文本绘制
在本教程中,你将学到:
- 如何使用随机数生成器类(cv::RNG),以及如何从均匀分布中获取一个随机数;
- 如何使用函数 cv::putText 在 OpenCV 窗口中显示文本。
- 在上一篇教程(基本几何图形绘制)中,我们绘制了各种几何图形,并给出了坐标(以 cv::Point 的形式)、颜色、粗细等输入参数。你可能已经注意到,我们为这些参数给出的都是具体的值。
- 在本教程中,我们打算为绘制参数使用随机值。同时,我们打算用大量的几何图形填充图像。由于我们将以随机方式初始化它们,这个过程将是自动的,并通过循环来完成。
- 这段代码位于你的 OpenCV samples 文件夹中。你也可以从 这里 获取。
/** * @file Drawing_2.cpp * @brief Simple sample code */
#include <opencv2/core.hpp>#include <opencv2/imgproc.hpp>#include <opencv2/highgui.hpp>#include <iostream>#include <stdio.h>
using namespace cv;
/// Global Variablesconst int NUMBER = 100;const int DELAY = 5;
const int window_width = 900;const int window_height = 600;int x_1 = -window_width/2;int x_2 = window_width*3/2;int y_1 = -window_width/2;int y_2 = window_width*3/2;
/// Function headersstatic Scalar randomColor( RNG& rng );int Drawing_Random_Lines( Mat image, char* window_name, RNG rng );int Drawing_Random_Rectangles( Mat image, char* window_name, RNG rng );int Drawing_Random_Ellipses( Mat image, char* window_name, RNG rng );int Drawing_Random_Polylines( Mat image, char* window_name, RNG rng );int Drawing_Random_Filled_Polygons( Mat image, char* window_name, RNG rng );int Drawing_Random_Circles( Mat image, char* window_name, RNG rng );int Displaying_Random_Text( Mat image, char* window_name, RNG rng );int Displaying_Big_End( Mat image, char* window_name, RNG rng );

/** * @function main */int main( void ){  int c;
  /// Start creating a window  char window_name[] = "Drawing_2 Tutorial";
  /// Also create a random object (RNG)  RNG rng( 0xFFFFFFFF );
  /// Initialize a matrix filled with zeros  Mat image = Mat::zeros( window_height, window_width, CV_8UC3 );  /// Show it in a window during DELAY ms  imshow( window_name, image );  waitKey( DELAY );
  /// Now, let's draw some lines  c = Drawing_Random_Lines(image, window_name, rng);  if( c != 0 ) return 0;
  /// Go on drawing, this time nice rectangles  c = Drawing_Random_Rectangles(image, window_name, rng);  if( c != 0 ) return 0;
  /// Draw some ellipses  c = Drawing_Random_Ellipses( image, window_name, rng );  if( c != 0 ) return 0;
  /// Now some polylines  c = Drawing_Random_Polylines( image, window_name, rng );  if( c != 0 ) return 0;
  /// Draw filled polygons  c = Drawing_Random_Filled_Polygons( image, window_name, rng );  if( c != 0 ) return 0;
  /// Draw circles  c = Drawing_Random_Circles( image, window_name, rng );  if( c != 0 ) return 0;
  /// Display text in random positions  c = Displaying_Random_Text( image, window_name, rng );  if( c != 0 ) return 0;
  /// Displaying the big end!  c = Displaying_Big_End( image, window_name, rng );  if( c != 0 ) return 0;
  waitKey(0);  return 0;}
/// Function definitions
/** * @function randomColor * @brief Produces a random color given a random object */static Scalar randomColor( RNG& rng ){  int icolor = (unsigned) rng;  return Scalar( icolor&255, (icolor>>8)&255, (icolor>>16)&255 );}

/** * @function Drawing_Random_Lines */int Drawing_Random_Lines( Mat image, char* window_name, RNG rng ){  Point pt1, pt2;
  for( int i = 0; i < NUMBER; i++ )  {    pt1.x = rng.uniform( x_1, x_2 );    pt1.y = rng.uniform( y_1, y_2 );    pt2.x = rng.uniform( x_1, x_2 );    pt2.y = rng.uniform( y_1, y_2 );
    line( image, pt1, pt2, randomColor(rng), rng.uniform(1, 10), 8 );    imshow( window_name, image );    if( waitKey( DELAY ) >= 0 )      { return -1; }  }
  return 0;}
/** * @function Drawing_Rectangles */int Drawing_Random_Rectangles( Mat image, char* window_name, RNG rng ){  Point pt1, pt2;  int lineType = 8;  int thickness = rng.uniform( -3, 10 );
  for( int i = 0; i < NUMBER; i++ )  {    pt1.x = rng.uniform( x_1, x_2 );    pt1.y = rng.uniform( y_1, y_2 );    pt2.x = rng.uniform( x_1, x_2 );    pt2.y = rng.uniform( y_1, y_2 );
    rectangle( image, pt1, pt2, randomColor(rng), MAX( thickness, -1 ), lineType );
    imshow( window_name, image );    if( waitKey( DELAY ) >= 0 )      { return -1; }  }
  return 0;}
/** * @function Drawing_Random_Ellipses */int Drawing_Random_Ellipses( Mat image, char* window_name, RNG rng ){  int lineType = 8;
  for ( int i = 0; i < NUMBER; i++ )  {    Point center;    center.x = rng.uniform(x_1, x_2);    center.y = rng.uniform(y_1, y_2);
    Size axes;    axes.width = rng.uniform(0, 200);    axes.height = rng.uniform(0, 200);
    double angle = rng.uniform(0, 180);
    ellipse( image, center, axes, angle, angle - 100, angle + 200,             randomColor(rng), rng.uniform(-1,9), lineType );
    imshow( window_name, image );
    if( waitKey(DELAY) >= 0 )      { return -1; }  }
  return 0;}
/** * @function Drawing_Random_Polylines */int Drawing_Random_Polylines( Mat image, char* window_name, RNG rng ){  int lineType = 8;
  for ( int i = 0; i< NUMBER; i++ )  {    Point pt[2][3];    pt[0][0].x = rng.uniform(x_1, x_2);    pt[0][0].y = rng.uniform(y_1, y_2);    pt[0][1].x = rng.uniform(x_1, x_2);    pt[0][1].y = rng.uniform(y_1, y_2);    pt[0][2].x = rng.uniform(x_1, x_2);    pt[0][2].y = rng.uniform(y_1, y_2);    pt[1][0].x = rng.uniform(x_1, x_2);    pt[1][0].y = rng.uniform(y_1, y_2);    pt[1][1].x = rng.uniform(x_1, x_2);    pt[1][1].y = rng.uniform(y_1, y_2);    pt[1][2].x = rng.uniform(x_1, x_2);    pt[1][2].y = rng.uniform(y_1, y_2);
    const Point* ppt[2] = {pt[0], pt[1]};    int npt[] = {3, 3};
    polylines(image, ppt, npt, 2, true, randomColor(rng), rng.uniform(1,10), lineType);
    imshow( window_name, image );    if( waitKey(DELAY) >= 0 )      { return -1; }  }  return 0;}
/** * @function Drawing_Random_Filled_Polygons */int Drawing_Random_Filled_Polygons( Mat image, char* window_name, RNG rng ){  int lineType = 8;
  for ( int i = 0; i < NUMBER; i++ )  {    Point pt[2][3];    pt[0][0].x = rng.uniform(x_1, x_2);    pt[0][0].y = rng.uniform(y_1, y_2);    pt[0][1].x = rng.uniform(x_1, x_2);    pt[0][1].y = rng.uniform(y_1, y_2);    pt[0][2].x = rng.uniform(x_1, x_2);    pt[0][2].y = rng.uniform(y_1, y_2);    pt[1][0].x = rng.uniform(x_1, x_2);    pt[1][0].y = rng.uniform(y_1, y_2);    pt[1][1].x = rng.uniform(x_1, x_2);    pt[1][1].y = rng.uniform(y_1, y_2);    pt[1][2].x = rng.uniform(x_1, x_2);    pt[1][2].y = rng.uniform(y_1, y_2);
    const Point* ppt[2] = {pt[0], pt[1]};    int npt[] = {3, 3};
    fillPoly( image, ppt, npt, 2, randomColor(rng), lineType );
    imshow( window_name, image );    if( waitKey(DELAY) >= 0 )       { return -1; }  }  return 0;}
/** * @function Drawing_Random_Circles */int Drawing_Random_Circles( Mat image, char* window_name, RNG rng ){  int lineType = 8;
  for (int i = 0; i < NUMBER; i++)  {    Point center;    center.x = rng.uniform(x_1, x_2);    center.y = rng.uniform(y_1, y_2);
    circle( image, center, rng.uniform(0, 300), randomColor(rng),            rng.uniform(-1, 9), lineType );
    imshow( window_name, image );    if( waitKey(DELAY) >= 0 )      { return -1; }  }
  return 0;}
/** * @function Displaying_Random_Text */int Displaying_Random_Text( Mat image, char* window_name, RNG rng ){  int lineType = 8;
  for ( int i = 1; i < NUMBER; i++ )  {    Point org;    org.x = rng.uniform(x_1, x_2);    org.y = rng.uniform(y_1, y_2);
    putText( image, "Testing text rendering", org, rng.uniform(0,8),             rng.uniform(0,100)*0.05+0.1, randomColor(rng), rng.uniform(1, 10), lineType);
    imshow( window_name, image );    if( waitKey(DELAY) >= 0 )      { return -1; }  }
  return 0;}
/** * @function Displaying_Big_End */int Displaying_Big_End( Mat image, char* window_name, RNG ){  Size textsize = getTextSize("OpenCV forever!", FONT_HERSHEY_COMPLEX, 3, 5, 0);  Point org((window_width - textsize.width)/2, (window_height - textsize.height)/2);  int lineType = 8;
  Mat image2;
  for( int i = 0; i < 255; i += 2 )  {    image2 = image - Scalar::all(i);    putText( image2, "OpenCV forever!", org, FONT_HERSHEY_COMPLEX, 3,             Scalar(i, i, 255), 5, lineType );
    imshow( window_name, image2 );    if( waitKey(DELAY) >= 0 )       { return -1; }  }
return 0;}-
我们先来看一下 main 函数。可以看到,我们做的第一件事就是创建一个随机数生成器对象(RNG):
RNG rng( 0xFFFFFFFF );RNG 实现了一个随机数生成器。在这个例子中,rng 是一个用值 0xFFFFFFFF 初始化的 RNG 对象。
-
然后我们创建一个初始化为零的矩阵(这意味着它会显示为黑色),并指定它的高度、宽度和类型:
/// Initialize a matrix filled with zerosMat image = Mat::zeros( window_height, window_width, CV_8UC3 );/// Show it in a window during DELAY msimshow( window_name, image ); -
接着我们开始绘制各种疯狂的东西。浏览代码后你会发现,它主要分为 8 个部分,每个部分定义为一个函数:
/// Now, let's draw some linesc = Drawing_Random_Lines(image, window_name, rng);if( c != 0 ) return 0;/// Go on drawing, this time nice rectanglesc = Drawing_Random_Rectangles(image, window_name, rng);if( c != 0 ) return 0;/// Draw some ellipsesc = Drawing_Random_Ellipses( image, window_name, rng );if( c != 0 ) return 0;/// Now some polylinesc = Drawing_Random_Polylines( image, window_name, rng );if( c != 0 ) return 0;/// Draw filled polygonsc = Drawing_Random_Filled_Polygons( image, window_name, rng );if( c != 0 ) return 0;/// Draw circlesc = Drawing_Random_Circles( image, window_name, rng );if( c != 0 ) return 0;/// Display text in random positionsc = Displaying_Random_Text( image, window_name, rng );if( c != 0 ) return 0;/// Displaying the big end!c = Displaying_Big_End( image, window_name, rng );所有这些函数都遵循相同的模式,所以我们只分析其中几个,因为同样的说明适用于所有函数。
-
来看一下函数 Drawing_Random_Lines:
int Drawing_Random_Lines( Mat image, char* window_name, RNG rng ){int lineType = 8;Point pt1, pt2;for( int i = 0; i < NUMBER; i++ ){pt1.x = rng.uniform( x_1, x_2 );pt1.y = rng.uniform( y_1, y_2 );pt2.x = rng.uniform( x_1, x_2 );pt2.y = rng.uniform( y_1, y_2 );line( image, pt1, pt2, randomColor(rng), rng.uniform(1, 10), 8 );imshow( window_name, image );if( waitKey( DELAY ) >= 0 ){ return -1; }}return 0;}我们可以观察到以下几点:
-
for 循环会重复 NUMBER 次。由于函数 cv::line 位于这个循环内,这意味着将生成 NUMBER 条直线。
-
直线的两个端点由 pt1 和 pt2 给出。对于 pt1,我们可以看到:
pt1.x = rng.uniform( x_1, x_2 );pt1.y = rng.uniform( y_1, y_2 );-
我们知道 rng 是一个随机数生成器对象。在上面的代码中我们调用了
rng.uniform(a,b)。这会生成一个在 a 和 b 之间均匀分布的随机数(包含 a,不包含 b)。 -
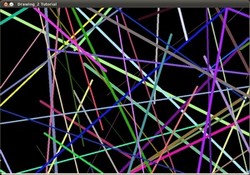
由上面的说明可以推断,端点 pt1 和 pt2 将是随机值,因此直线的位置会相当难以预测,从而产生漂亮的视觉效果(见下文的结果一节)。
-
另一个值得注意的地方是,在 cv::line 的参数中,我们为 color 输入传入了:
randomColor(rng)来看一下这个函数的实现:
static Scalar randomColor( RNG& rng ){int icolor = (unsigned) rng;return Scalar( icolor&255, (icolor>>8)&255, (icolor>>16)&255 );}可以看到,返回值是一个带有 3 个随机初始化值的 Scalar,它们分别被用作直线颜色的 R、G 和 B 参数。因此,直线的颜色也将是随机的!
-
-
-
上面的说明同样适用于其他生成圆、椭圆、多边形等的函数。center(中心)和 vertices(顶点)等参数也是随机生成的。
-
在结束之前,我们还应该看一下函数 Display_Random_Text 和 Displaying_Big_End,因为它们都有一些有趣的特性。
-
Display_Random_Text:
int Displaying_Random_Text( Mat image, char* window_name, RNG rng ){int lineType = 8;for ( int i = 1; i < NUMBER; i++ ){Point org;org.x = rng.uniform(x_1, x_2);org.y = rng.uniform(y_1, y_2);putText( image, "Testing text rendering", org, rng.uniform(0,8),rng.uniform(0,100)*0.05+0.1, randomColor(rng), rng.uniform(1, 10), lineType);imshow( window_name, image );if( waitKey(DELAY) >= 0 ){ return -1; }}return 0;}一切看起来都很熟悉,除了这个表达式:
putText( image, "Testing text rendering", org, rng.uniform(0,8),rng.uniform(0,100)*0.05+0.1, randomColor(rng), rng.uniform(1, 10), lineType);那么,函数 cv::putText 是做什么的?在我们的例子中:
- 在 image 中绘制文本 “Testing text rendering”;
- 文本的左下角位于 Point org;
- 字体类型是范围 内的一个随机整数值;
- 字体的缩放比例由表达式
rng.uniform(0, 100)x0.05 + 0.1给出(意味着其范围是 ); - 文本颜色是随机的(由
randomColor(rng)给出); - 文本粗细在 1 到 10 之间,由
rng.uniform(1,10)指定。
最终,我们会得到(与其他绘制函数类似地)叠加在图像上的 NUMBER 个随机位置的文本。
-
Displaying_Big_End:
int Displaying_Big_End( Mat image, char* window_name, RNG rng ){Size textsize = getTextSize("OpenCV forever!", FONT_HERSHEY_COMPLEX, 3, 5, 0);Point org((window_width - textsize.width)/2, (window_height - textsize.height)/2);int lineType = 8;Mat image2;for( int i = 0; i < 255; i += 2 ){image2 = image - Scalar::all(i);putText( image2, "OpenCV forever!", org, FONT_HERSHEY_COMPLEX, 3,Scalar(i, i, 255), 5, lineType );imshow( window_name, image2 );if( waitKey(DELAY) >= 0 ){ return -1; }}return 0;}除了函数 getTextSize(它获取参数文本的大小)之外,我们还可以观察到 for 循环内部的新操作:
image2 = image - Scalar::all(i)
也就是说,**image2** 是 **image** 减去 **Scalar::all(i)** 的结果。实际上,这里发生的事情是:**image2** 的每个像素都等于 **image** 的对应像素减去 **i** 的值(请记住,每个像素我们考虑的是 R、G、B 三个值,所以它们每一个都会受到影响)。
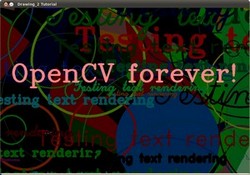
另外请记住,减法操作*总是*在内部执行**饱和**(saturate)操作,这意味着得到的结果将始终位于允许的范围内(在我们的例子中不会出现负值,且介于 0 和 255 之间)。正如你在代码一节中看到的,程序将依次执行各种绘制函数,产生如下效果:
- 首先,屏幕上会出现一组随机的 NUMBER 条直线。
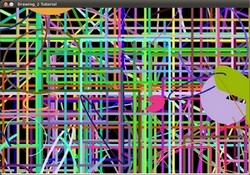
- 然后,会出现一组新的图形,这次是矩形。
- 接着会出现一些椭圆,每个椭圆的位置、大小、粗细和弧长都是随机的。
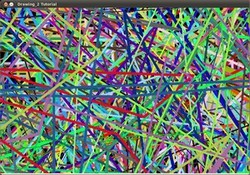
- 然后,屏幕上会出现带有 3 个线段的折线(polylines),同样是随机配置的。
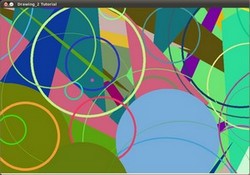
- 随后是填充多边形(在本例中是三角形)。
- 最后出现的几何图形:圆!
- 接近尾声时,文本 “Testing Text Rendering” 会以各种字体、大小、颜色和位置出现。
- 最后是大结局(顺便说一句,它也道出了一个伟大的真理):“OpenCV forever!”。