测试
本节介绍如何在各种机器人上测试对 MoveIt 的修改,涵盖单元测试和集成测试。
注意:这是一篇占位教程(stub tutorial),未来将进行扩充。
如果尚未完成,请先完成 Getting Started 中的步骤。
MoveIt 提供了一个基于 Python 的集成测试,用于测试更高层级的 move_group 功能。运行方式如下:
rostest moveit_ros_planning_interface python_move_group.testPanda
来自 panda_moveit_config 软件包:
roslaunch panda_moveit_config demo.launchFanuc M-10iA
来自 moveit_resources 软件包:
roslaunch moveit_resources demo.launch编写单元测试
Section titled “编写单元测试”完整的测试文件(含所有 include)可以在 moveit_tutorials GitHub 项目的此处查看。
MoveIt 使用 Google Test 作为测试框架。
// Google Test has two kinds of testing functions. The first, *TEST*, simply runs the code inside.// It takes two names: the name of the test case, also called a test suite, which is a group of several tests that are// all related to the same component, and the name of the test.// To actually check that your code does what is expected, you can add assertions.// ASSERT will stop the test if it fails, and EXPECT will continue running, although the test will still fail.
TEST(MyFirstTestCase, TestName){  int x = 0;  x = 5 * 10 + 4;
  ASSERT_NE(x, 0); /* NE is 'not equal' */  EXPECT_EQ(x, 54);}
// A Test Fixture loads the same data repeatedly for multiple tests, so common setup code doesn't have to be duplicated.// To make a test fixture, first make a class that derives from ::testing::Test.// You can use either the constructor or SetUp to load the information.// Let's use MoveIt's testing utilities to load a robot model.
class MyTestFixture : public ::testing::Test{  /* Everything in the class can be protected:. */protected:  void SetUp() override  {    robot_model_ = moveit::core::loadTestingRobotModel("panda");  }
  /* If you need to cleanup the resources any tests are using, you can do it in TearDown(). */  void TearDown() override  {  }
  moveit::core::RobotModelConstPtr robot_model_;};
// To make a test that uses the data loaded by this fixture, use TEST_F.TEST_F(MyTestFixture, InitOK){  ASSERT_EQ(robot_model_->getURDF()->getName(), "panda");  ASSERT_EQ(robot_model_->getSRDF()->getName(), "panda");}
// MoveIt also provides a RobotModelBuilder class that helps you build simple robots with the link and joint structure// that you need for a specific test.// Let's make a robot that has one branch, making a Y shape.
TEST(MyFirstTestCase, SimpleYRobot){  moveit::core::RobotModelBuilder builder("one_robot", "base_link");  builder.addChain("base_link->a", "continuous");  builder.addChain("a->b->c", "fixed");  builder.addChain("a->d", "fixed");  builder.addChain("d->e", "continuous");  builder.addVirtualJoint("odom", "base_link", "planar", "base_joint");  builder.addGroup({}, { "base_joint" }, "base_joint");  ASSERT_TRUE(builder.isValid());  moveit::core::RobotModelConstPtr robot_model = builder.build();
  /* Let's check that the link c is rigidly connected to link d, as it should be. */  const moveit::core::LinkTransformMap transforms = robot_model->getLinkModel("c")->getAssociatedFixedTransforms();  auto maybe_link_d = transforms.find(robot_model->getLinkModel("d"));  ASSERT_NE(maybe_link_d, transforms.end());}
int main(int argc, char** argv){  testing::InitGoogleTest(&argc, argv);  return RUN_ALL_TESTS();}
运行单元测试
Section titled “运行单元测试”要使用 catkin-tools 在本地对整个 MoveIt catkin 工作空间运行单元测试,执行以下命令:
catkin run_tests -iv只对单个软件包运行测试:
catkin run_tests --no-deps --this -iv减少测试过程中的日志输出:
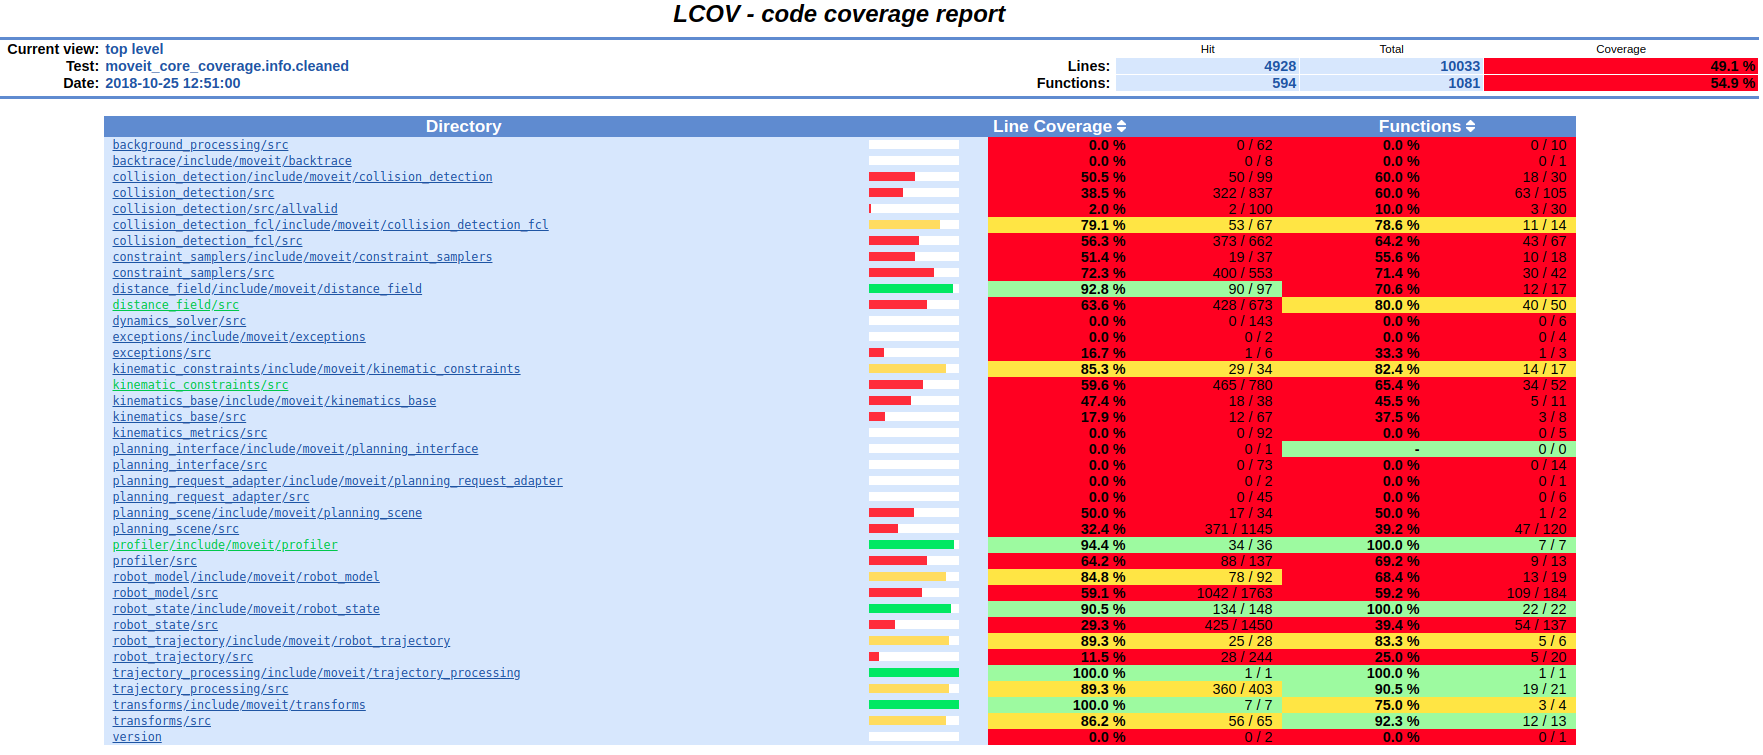
catkin run_tests --no-status --summarize --no-deps --this代码覆盖率衡量的是运行测试套件时被执行的代码行数。要汇总统计信息并生成 HTML 格式的覆盖率报告,请在不进行优化的情况下构建代码,并运行特殊的 _coverage 目标:
sudo apt install ros-noetic-code-coveragecatkin config --cmake-args -DENABLE_COVERAGE_TESTING=ON -DCMAKE_BUILD_TYPE=Debugcatkin buildcatkin build moveit_core -v --no-deps --catkin-make-args moveit_core_coverage输出会指示覆盖率报告的位置,效果与下图类似: