图像金字塔
在本教程中,你将学到如何:
- 使用 OpenCV 函数
pyrUp()和pyrDown()对给定图像进行下采样或上采样。
注: 以下说明取自 Bradski 与 Kaehler 所著的 Learning OpenCV 一书。
- 通常我们需要把图像转换到与原始尺寸不同的尺寸。为此有两种可选方式:
- 放大图像(zoom in),或
- 缩小图像(zoom out)。
- 尽管 OpenCV 中有一个几何变换函数可以字面意义上地调整图像尺寸(即
resize,我们将在后续教程中介绍),但在本节中,我们先分析**图像金字塔(Image Pyramids)**的用法,它在大量的视觉应用中被广泛采用。
- 图像金字塔是一组图像的集合——它们全部由同一幅原始图像派生而来——通过逐次下采样,直到达到某个期望的终止点。
- 常见的图像金字塔有两类:
- 高斯金字塔(Gaussian pyramid): 用于对图像下采样
- 拉普拉斯金字塔(Laplacian pyramid): 用于从金字塔中较低层(分辨率较低)的图像重建一幅上采样图像
- 在本教程中我们将使用高斯金字塔。
- 把金字塔想象成一组层叠的层:层越高,尺寸越小。
- 每一层从下到上编号,因此第 层(记作 )比第 层()更小。
- 要在高斯金字塔中生成第 层,我们执行如下操作:
- 用一个高斯核对 进行卷积:
- 去掉所有偶数行和偶数列。- 不难发现,得到的图像面积恰好是其前一层的四分之一。在输入图像 (原始图像)上反复执行该过程即可生成整个金字塔。
- 上述过程用于对图像进行下采样。如果我们想把图像放大呢?
- 首先,将图像在每个维度上放大到原来的两倍,新增的偶数行和偶数列用 填充。
- 用上面所示的同一个核(乘以 4)进行卷积,以近似「缺失像素」的值。
- 上述两个过程(如上所述的下采样与上采样)由 OpenCV 函数
pyrUp()和pyrDown()实现,我们将在下面的代码示例中看到。
注: 当我们缩小图像尺寸时,实际上会丢失图像的信息。
下面是本教程的代码。
C++:
你也可以从 这里 下载。
/** * @file Pyramids.cpp * @brief Sample code of image pyramids (pyrDown and pyrUp) * @author OpenCV team */
#include "iostream"#include "opencv2/imgproc.hpp"#include "opencv2/imgcodecs.hpp"#include "opencv2/highgui.hpp"
using namespace std;using namespace cv;
const char* window_name = "Pyramids Demo";
/** * @function main */int main( int argc, char** argv ){    /// General instructions    cout << "\n Zoom In-Out demo \n "            "------------------  \n"            " * [i] -> Zoom in   \n"            " * [o] -> Zoom out  \n"            " * [ESC] -> Close program \n" << endl;
    const char* filename = argc >=2 ? argv[1] : "chicky_512.png";
    // Loads an image    Mat src = imread( samples::findFile( filename ) );
    // Check if image is loaded fine    if(src.empty()){        printf(" Error opening image\n");        printf(" Program Arguments: [image_name -- default chicky_512.png] \n");        return EXIT_FAILURE;    }
    for(;;)    {        imshow( window_name, src );        char c = (char)waitKey(0);
        if( c == 27 )        { break; }        else if( c == 'i' )        { pyrUp( src, src, Size( src.cols*2, src.rows*2 ) );            printf( "** Zoom In: Image x 2 \n" );        }        else if( c == 'o' )        { pyrDown( src, src, Size( src.cols/2, src.rows/2 ) );            printf( "** Zoom Out: Image / 2 \n" );        }    }
    return EXIT_SUCCESS;}
Java:
你也可以从 这里 下载。
import org.opencv.core.*;import org.opencv.highgui.HighGui;import org.opencv.imgcodecs.Imgcodecs;import org.opencv.imgproc.Imgproc;
class PyramidsRun {
    String window_name = "Pyramids Demo";
    public void run(String[] args) {        /// General instructions        System.out.println("\n" +                " Zoom In-Out demo    \n" +                "------------------   \n" +                " * [i] -> Zoom [i]n  \n" +                " * [o] -> Zoom [o]ut \n" +                " * [ESC] -> Close program \n");
        String filename = ((args.length > 0) ? args[0] : "../data/chicky_512.png");
        // Load the image        Mat src = Imgcodecs.imread(filename);
        // Check if image is loaded fine        if( src.empty() ) {            System.out.println("Error opening image!");            System.out.println("Program Arguments: [image_name -- default ../data/chicky_512.png] \n");            System.exit(-1);        }
        while (true){            HighGui.imshow( window_name, src );            char c = (char) HighGui.waitKey(0);            c = Character.toLowerCase(c);
            if( c == 27 ){                break;            }else if( c == 'i'){                Imgproc.pyrUp( src, src, new Size( src.cols()*2, src.rows()*2 ) );                System.out.println( "** Zoom In: Image x 2" );            }else if( c == 'o'){                Imgproc.pyrDown( src, src, new Size( src.cols()/2, src.rows()/2 ) );                System.out.println( "** Zoom Out: Image / 2" );            }        }
        System.exit(0);    }}
public class Pyramids {    public static void main(String[] args) {        // Load the native library.        System.loadLibrary(Core.NATIVE_LIBRARY_NAME);        new PyramidsRun().run(args);    }}
Python:
你也可以从 这里 下载。
import sysimport cv2 as cv

def main(argv):    print("""    Zoom In-Out demo    ------------------    * [i] -> Zoom [i]n    * [o] -> Zoom [o]ut    * [ESC] -> Close program    """)
    filename = argv[0] if len(argv) > 0 else 'chicky_512.png'
    # Load the image    src = cv.imread(cv.samples.findFile(filename))
    # Check if image is loaded fine    if src is None:        print ('Error opening image!')        print ('Usage: pyramids.py [image_name -- default ../data/chicky_512.png] \n')        return -1
    while 1:        rows, cols, _channels = map(int, src.shape)        cv.imshow('Pyramids Demo', src)        k = cv.waitKey(0)
        if k == 27:            break        elif chr(k) == 'i':            src = cv.pyrUp(src, dstsize=(2 * cols, 2 * rows))            print ('** Zoom In: Image x 2')        elif chr(k) == 'o':            src = cv.pyrDown(src, dstsize=(cols // 2, rows // 2))            print ('** Zoom Out: Image / 2')
    cv.destroyAllWindows()    return 0
if __name__ == "__main__":    main(sys.argv[1:])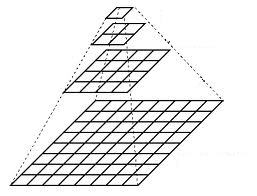
我们来查看程序的整体结构。
C++:
const char* filename = argc >=2 ? argv[1] : "chicky_512.png";
// Loads an imageMat src = imread( samples::findFile( filename ) );
// Check if image is loaded fineif(src.empty()){    printf(" Error opening image\n");    printf(" Program Arguments: [image_name -- default chicky_512.png] \n");    return EXIT_FAILURE;}
Java:
String filename = ((args.length > 0) ? args[0] : "../data/chicky_512.png");
// Load the imageMat src = Imgcodecs.imread(filename);
// Check if image is loaded fineif( src.empty() ) {    System.out.println("Error opening image!");    System.out.println("Program Arguments: [image_name -- default ../data/chicky_512.png] \n");    System.exit(-1);}
Python:
filename = argv[0] if len(argv) > 0 else 'chicky_512.png'
# Load the imagesrc = cv.imread(cv.samples.findFile(filename))
# Check if image is loaded fineif src is None: print ('Error opening image!') print ('Usage: pyramids.py [image_name -- default ../data/chicky_512.png] \n') return -1C++:
imshow( window_name, src );Java:
HighGui.imshow( window_name, src );Python:
cv.imshow('Pyramids Demo', src)C++:
for(;;){    imshow( window_name, src );    char c = (char)waitKey(0);
    if( c == 27 )    { break; }    else if( c == 'i' )    { pyrUp( src, src, Size( src.cols*2, src.rows*2 ) );        printf( "** Zoom In: Image x 2 \n" );    }    else if( c == 'o' )    { pyrDown( src, src, Size( src.cols/2, src.rows/2 ) );        printf( "** Zoom Out: Image / 2 \n" );    }}
Java:
while (true){    HighGui.imshow( window_name, src );    char c = (char) HighGui.waitKey(0);    c = Character.toLowerCase(c);
    if( c == 27 ){        break;    }else if( c == 'i'){        Imgproc.pyrUp( src, src, new Size( src.cols()*2, src.rows()*2 ) );        System.out.println( "** Zoom In: Image x 2" );    }else if( c == 'o'){        Imgproc.pyrDown( src, src, new Size( src.cols()/2, src.rows()/2 ) );        System.out.println( "** Zoom Out: Image / 2" );    }}
Python:
while 1:    rows, cols, _channels = map(int, src.shape)    cv.imshow('Pyramids Demo', src)    k = cv.waitKey(0)
    if k == 27:        break    elif chr(k) == 'i':        src = cv.pyrUp(src, dstsize=(2 * cols, 2 * rows))        print ('** Zoom In: Image x 2')    elif chr(k) == 'o':        src = cv.pyrDown(src, dstsize=(cols // 2, rows // 2))        print ('** Zoom Out: Image / 2')
程序执行一个无限循环,等待用户输入。如果用户按下 ESC,程序退出。此外,它还有两个选项:
-
执行上采样——放大(按 ‘i’ 键)
我们使用函数
pyrUp(),它带有三个参数:-
src:当前图像和目标图像(用于在屏幕上显示,尺寸假定为输入图像的两倍)
-
Size( tmp.cols*2, tmp.rows*2 ):目标尺寸。由于我们在上采样,pyrUp()期望的尺寸是输入图像(本例中为 src)的两倍。C++:
else if( c == 'i' ){ pyrUp( src, src, Size( src.cols*2, src.rows*2 ) );printf( "** Zoom In: Image x 2 \n" );}Java:
}else if( c == 'i'){Imgproc.pyrUp( src, src, new Size( src.cols()*2, src.rows()*2 ) );System.out.println( "** Zoom In: Image x 2" );Python:
elif chr(k) == 'i':src = cv.pyrUp(src, dstsize=(2 * cols, 2 * rows))print ('** Zoom In: Image x 2')
-
-
执行下采样——缩小(按 ‘o’ 键)
我们使用函数
pyrDown(),它带有三个参数(与pyrUp()类似):-
src:当前图像和目标图像(用于在屏幕上显示,尺寸假定为输入图像的一半)
-
Size( tmp.cols/2, tmp.rows/2 ):目标尺寸。由于我们在下采样,pyrDown()期望的尺寸是输入图像(本例中为 src)的一半。C++:
else if( c == 'o' ){ pyrDown( src, src, Size( src.cols/2, src.rows/2 ) );printf( "** Zoom Out: Image / 2 \n" );}Java:
}else if( c == 'o'){Imgproc.pyrDown( src, src, new Size( src.cols()/2, src.rows()/2 ) );System.out.println( "** Zoom Out: Image / 2" );
-
**Python:**
```pythonelif chr(k) == 'o':    src = cv.pyrDown(src, dstsize=(cols // 2, rows // 2))    print ('** Zoom Out: Image / 2')```
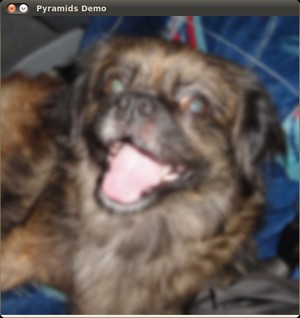
请注意,输入图像(在两个维度上)必须能被 2 整除,否则会报错。
-
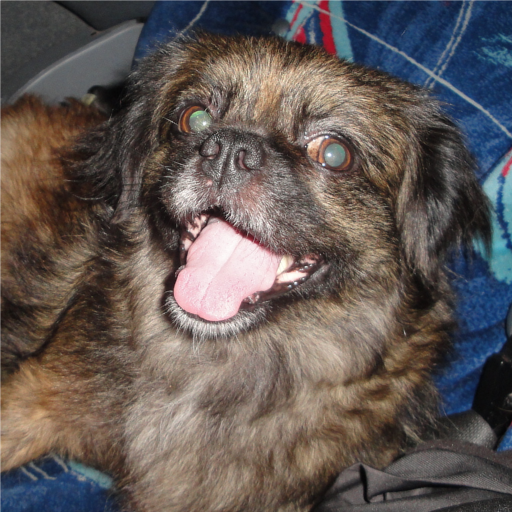
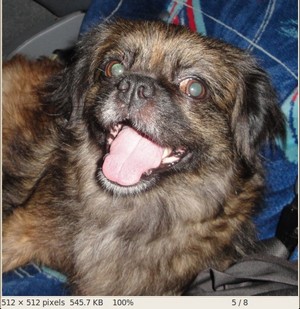
程序默认使用
samples/data文件夹中的图像 chicky_512.png。注意该图像为 ,因此下采样不会产生错误()。 -
首先我们按 ‘d’ 键连续执行两次
pyrDown()操作,图像尺寸逐次减半。 -
注意,由于我们缩小了图像尺寸,应该会损失一些分辨率。在我们连续执行两次
pyrUp()(按 ‘u’ 键)之后这一点就很明显了:恢复后的图像比原图更加模糊。