
在 RViz 中可视化
本教程将向你介绍一个可视化工具,它可以在 RViz 中渲染可视化效果,帮助你更直观地理解 MoveIt 应用程序的运行过程。
如果你还没有完成你的第一个 MoveIt 项目中的步骤,请务必先完成。
本教程假定你从上一个教程结束时的 hello_moveit 项目开始。
1 添加 moveit_visual_tools 依赖
Section titled “1 添加 moveit_visual_tools 依赖”在 hello_moveit 项目的 package.xml 中,在其他 <depend> 语句之后添加这一行:
<depend>moveit_visual_tools</depend>然后在 CMakeLists.txt 的 find_package 部分添加这一行:
find_package(moveit_visual_tools REQUIRED)再往下,扩展 ament_target_dependencies 宏调用以包含新依赖,如下所示:
ament_target_dependencies( hello_moveit "moveit_ros_planning_interface" "moveit_visual_tools" "rclcpp")为了验证依赖是否正确添加,请在源文件 hello_moveit.cpp 中添加所需的 include:
#include <moveit_visual_tools/moveit_visual_tools.h>测试是否一切正常:在工作区目录中打开终端(记得 source 你在 /opt 中安装的 ROS 环境),然后用 colcon 构建:
cd ~/ws_moveitcolcon build --mixin debug2 创建 ROS 执行器并在线程中运行节点
Section titled “2 创建 ROS 执行器并在线程中运行节点”在初始化 MoveItVisualTools 之前,我们需要一个执行器来让 ROS 节点持续 spin。 这是因为 MoveItVisualTools 需要与 ROS 服务和话题进行交互。首先,在顶部的 include 中添加线程库。
#include <thread> // \<---- add this to the set of includes at the top通过创建并命名日志器,我们可以保持程序输出的整洁有序。
// Create a ROS loggerauto const logger = rclcpp::get_logger("hello_moveit");接下来,在创建 MoveGroup 接口之前添加执行器:
// Spin up a SingleThreadedExecutor for MoveItVisualTools to interact with ROSrclcpp::executors::SingleThreadedExecutor executor;executor.add_node(node);auto spinner = std::thread([&executor]() { executor.spin(); });
// Create the MoveIt MoveGroup Interface
  ...
最后,确保在退出前 join 线程:
// Shutdown ROSrclcpp::shutdown(); // \<--- This will cause the spin function in the thread to returnspinner.join(); // \<--- Join the thread before exitingreturn 0;完成上述修改后,重新构建工作区,确保没有语法错误。
3 创建并初始化 MoveItVisualTools
Section titled “3 创建并初始化 MoveItVisualTools”接下来,我们在 MoveGroupInterface 构造之后,创建并初始化 MoveItVisualTools。
// Create the MoveIt MoveGroup Interfaceusing moveit::planning_interface::MoveGroupInterface;auto move_group_interface = MoveGroupInterface(node, "manipulator");
// Construct and initialize MoveItVisualToolsauto moveit_visual_tools = moveit_visual_tools::MoveItVisualTools{    node, "base_link", rviz_visual_tools::RVIZ_MARKER_TOPIC,    move_group_interface.getRobotModel()};moveit_visual_tools.deleteAllMarkers();moveit_visual_tools.loadRemoteControl();
我们向构造函数传递了以下参数:ROS 节点、机器人的 base link、要使用的标记话题(稍后详述),以及机器人模型(从 move_group_interface 获取)。
接下来,我们调用 deleteAllMarkers 清除所有标记,以清除上次运行留在 RViz 中的渲染状态。最后,我们加载远程控制功能。远程控制是一个非常简单的插件,它让我们可以在 RViz 中通过按钮与程序进行交互。
4 为可视化编写闭包
Section titled “4 为可视化编写闭包”构造并初始化之后,我们创建一些闭包(即可以访问当前作用域变量的函数对象),稍后在程序中可以用它们来帮助在 RViz 中渲染可视化效果。
// Create closures for visualizationauto const draw_title = [&moveit_visual_tools](auto text) { auto const text_pose = [] { auto msg = Eigen::Isometry3d::Identity(); msg.translation().z() = 1.0; // Place text 1m above the base link return msg; }(); moveit_visual_tools.publishText(text_pose, text, rviz_visual_tools::WHITE, rviz_visual_tools::XLARGE);};auto const prompt = [&moveit_visual_tools](auto text) { moveit_visual_tools.prompt(text);};auto const draw_trajectory_tool_path = [&moveit_visual_tools, jmg = move_group_interface.getRobotModel()->getJointModelGroup( "manipulator")](auto const trajectory) { moveit_visual_tools.publishTrajectoryLine(trajectory, jmg); };这三个闭包都通过引用捕获了 moveit_visual_tools,最后一个还额外捕获了我们规划时使用的关节模型组的指针。每个闭包都会调用 moveit_visual_tools 上的一个方法来改变 RViz 中的显示内容。
- 第一个闭包
draw_title在机器人基座上方一米处添加文本,这是一种直观展示程序运行状态的好方法。 - 第二个闭包调用名为
prompt的函数,该函数会暂停程序,直到用户在 RViz 中按下next按钮。这在调试时逐步执行程序非常有用。 - 最后一个闭包绘制已规划轨迹的工具路径,有助于从工具的角度理解规划出的轨迹。
你可能会问为什么要这样写 lambda,原因很简单:让后续代码更易读、更易理解。在编写软件时,将功能分解为命名函数通常很有帮助,这些函数可以轻松地单独复用和测试。下一节你将看到我们如何使用这些函数。
5 可视化程序的步骤
Section titled “5 可视化程序的步骤”现在我们来增强程序中间的代码。 更新规划和执行部分,加入这些新功能:
// Set a target Poseauto const target_pose = [] {  geometry_msgs::msg::Pose msg;  msg.orientation.w = 1.0;  msg.position.x = 0.28;  msg.position.y = -0.2;  msg.position.z = 0.5;  return msg;}();move_group_interface.setPoseTarget(target_pose);
// Create a plan to that target poseprompt("Press 'Next' in the RvizVisualToolsGui window to plan");draw_title("Planning");moveit_visual_tools.trigger();auto const [success, plan] = [&move_group_interface] {  moveit::planning_interface::MoveGroupInterface::Plan msg;  auto const ok = static_cast<bool>(move_group_interface.plan(msg));  return std::make_pair(ok, msg);}();
// Execute the planif (success) {  draw_trajectory_tool_path(plan.trajectory);  moveit_visual_tools.trigger();  prompt("Press 'Next' in the RvizVisualToolsGui window to execute");  draw_title("Executing");  moveit_visual_tools.trigger();  move_group_interface.execute(plan);} else {  draw_title("Planning Failed!");  moveit_visual_tools.trigger();  RCLCPP_ERROR(logger, "Planning failed!");}
你很快会注意到,每次在 moveit_visual_tools 上调用改变 RViz 渲染内容的方法之后,都必须再调用一次名为 trigger 的方法。
这是因为发送到 RViz 的消息会被批量处理,只有在你调用 trigger 时才会统一发送,从而减少标记话题的带宽消耗。
最后,再次构建你的项目,确保所有代码修改都是正确的。
cd ~/ws_moveitsource /opt/ros/rolling/setup.bashcolcon build --mixin debug6 在 RViz 中启用可视化
Section titled “6 在 RViz 中启用可视化”打开一个新终端,source 工作区,然后启动演示启动文件来打开 RViz。
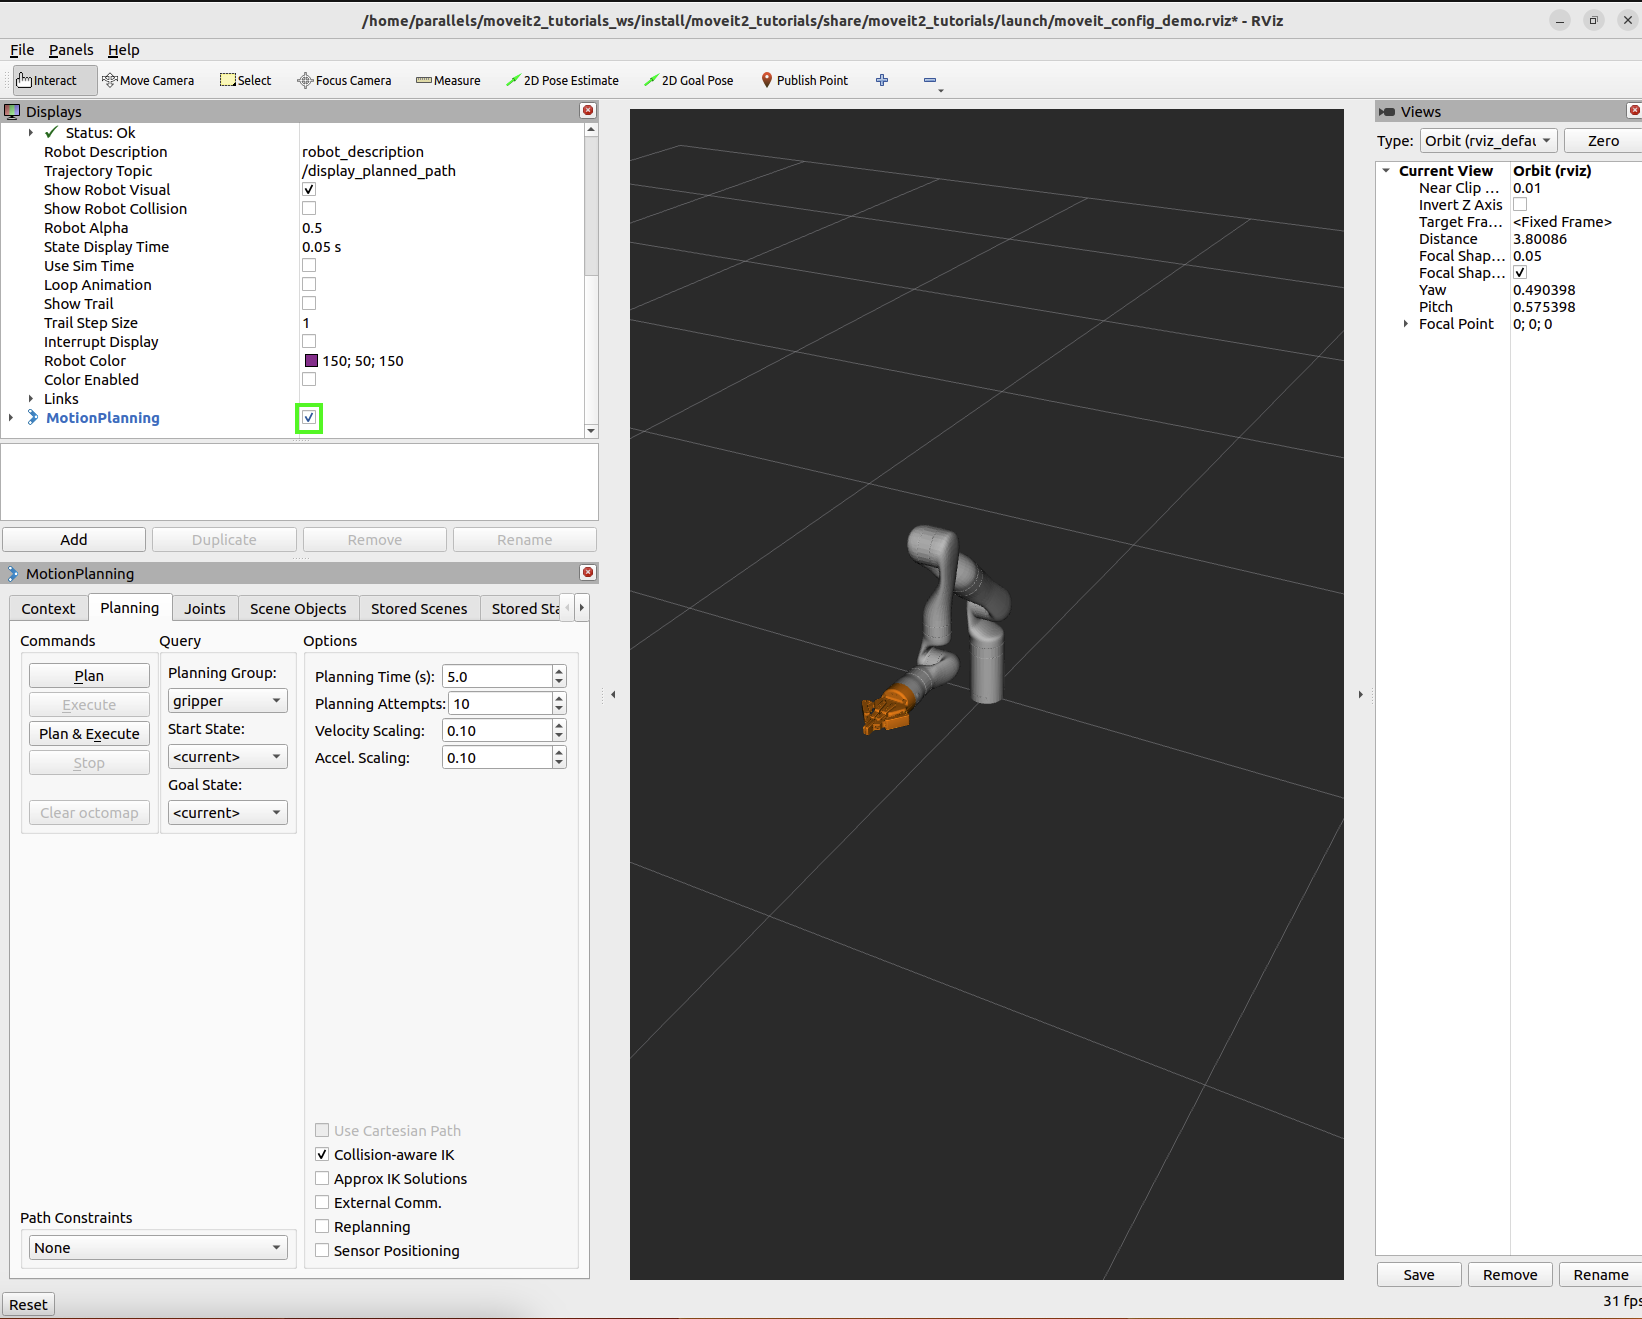
cd ~/ws_moveitsource install/setup.bashros2 launch moveit2_tutorials demo.launch.py在 “Displays” 选项卡中取消勾选 “MotionPlanning” 以隐藏它。 接下来的部分我们不会使用 “MotionPlanning” 插件。
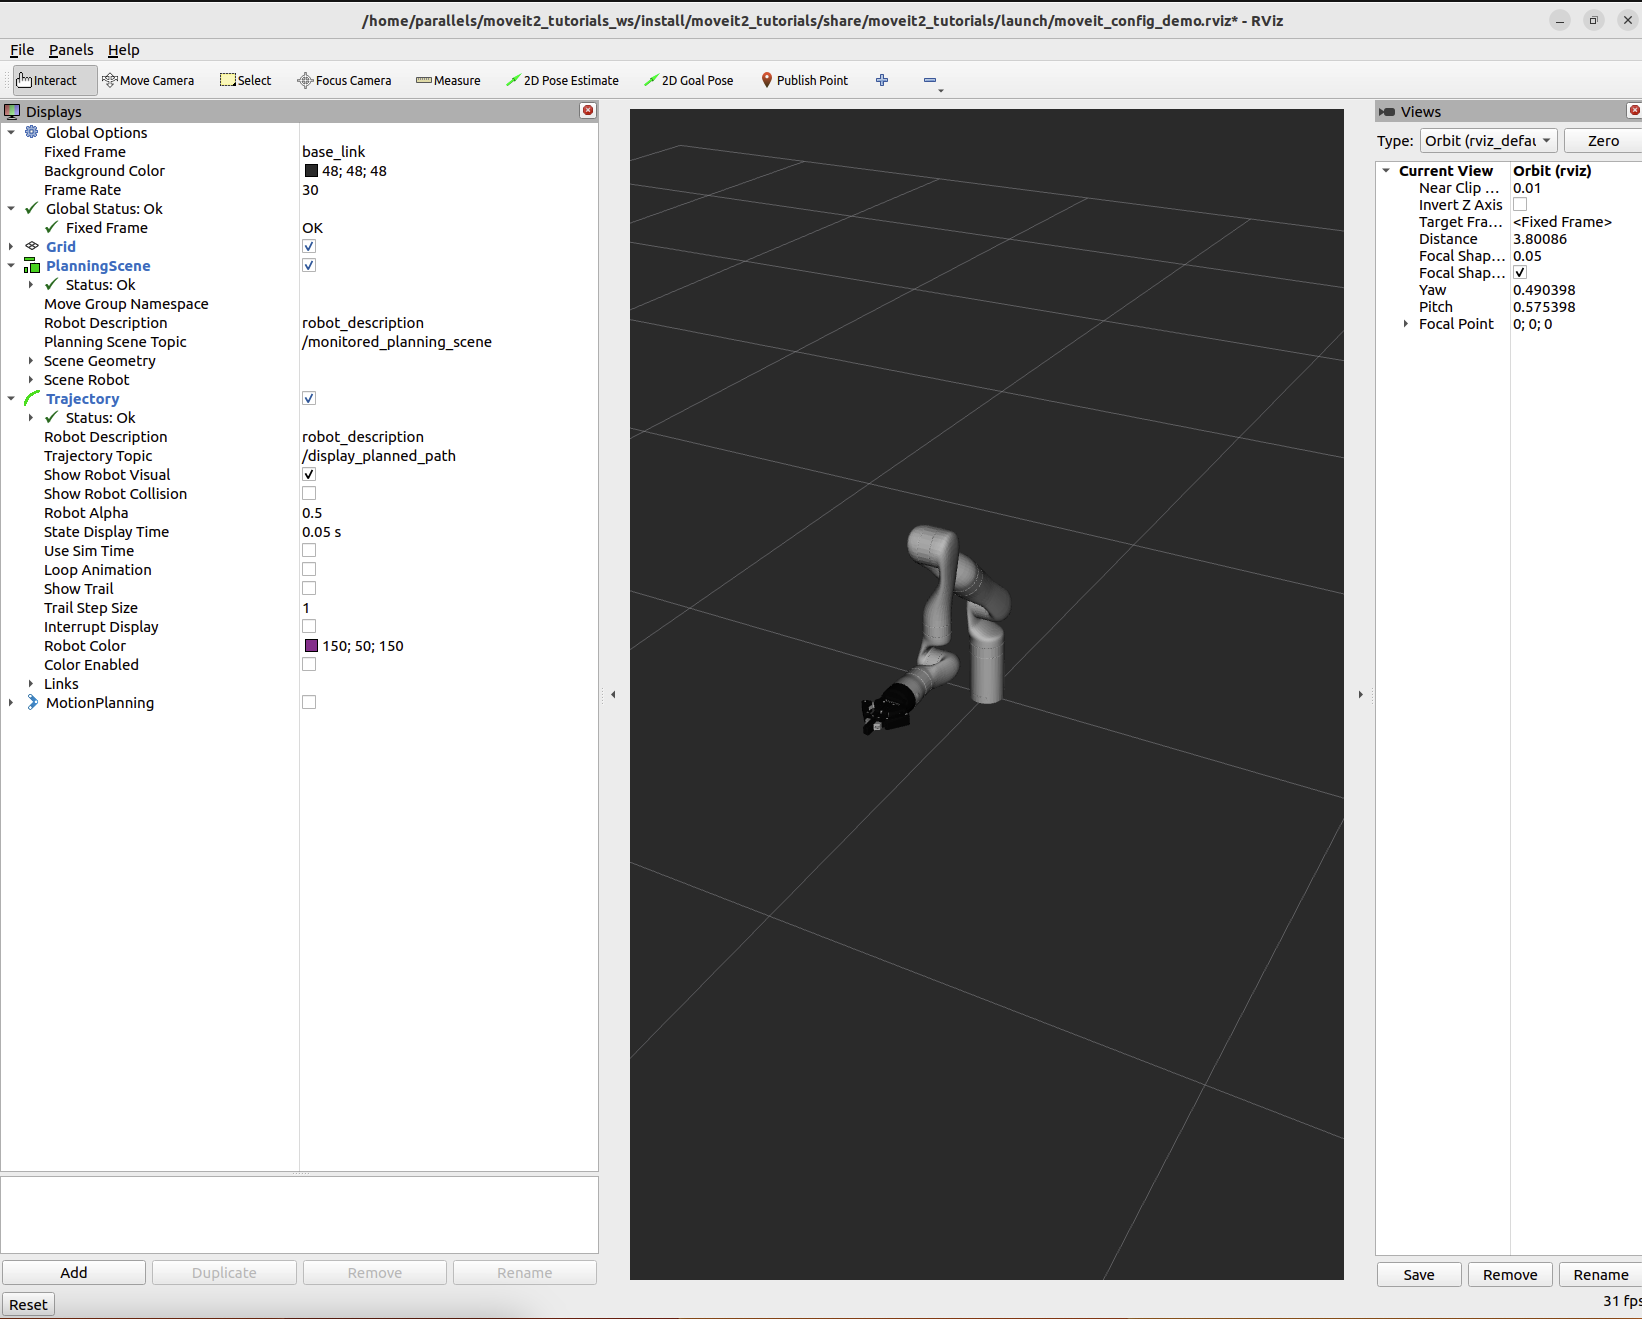
要添加与程序中提示进行交互的按钮,请通过 “Panels/Add New Panel” 菜单打开对话框:
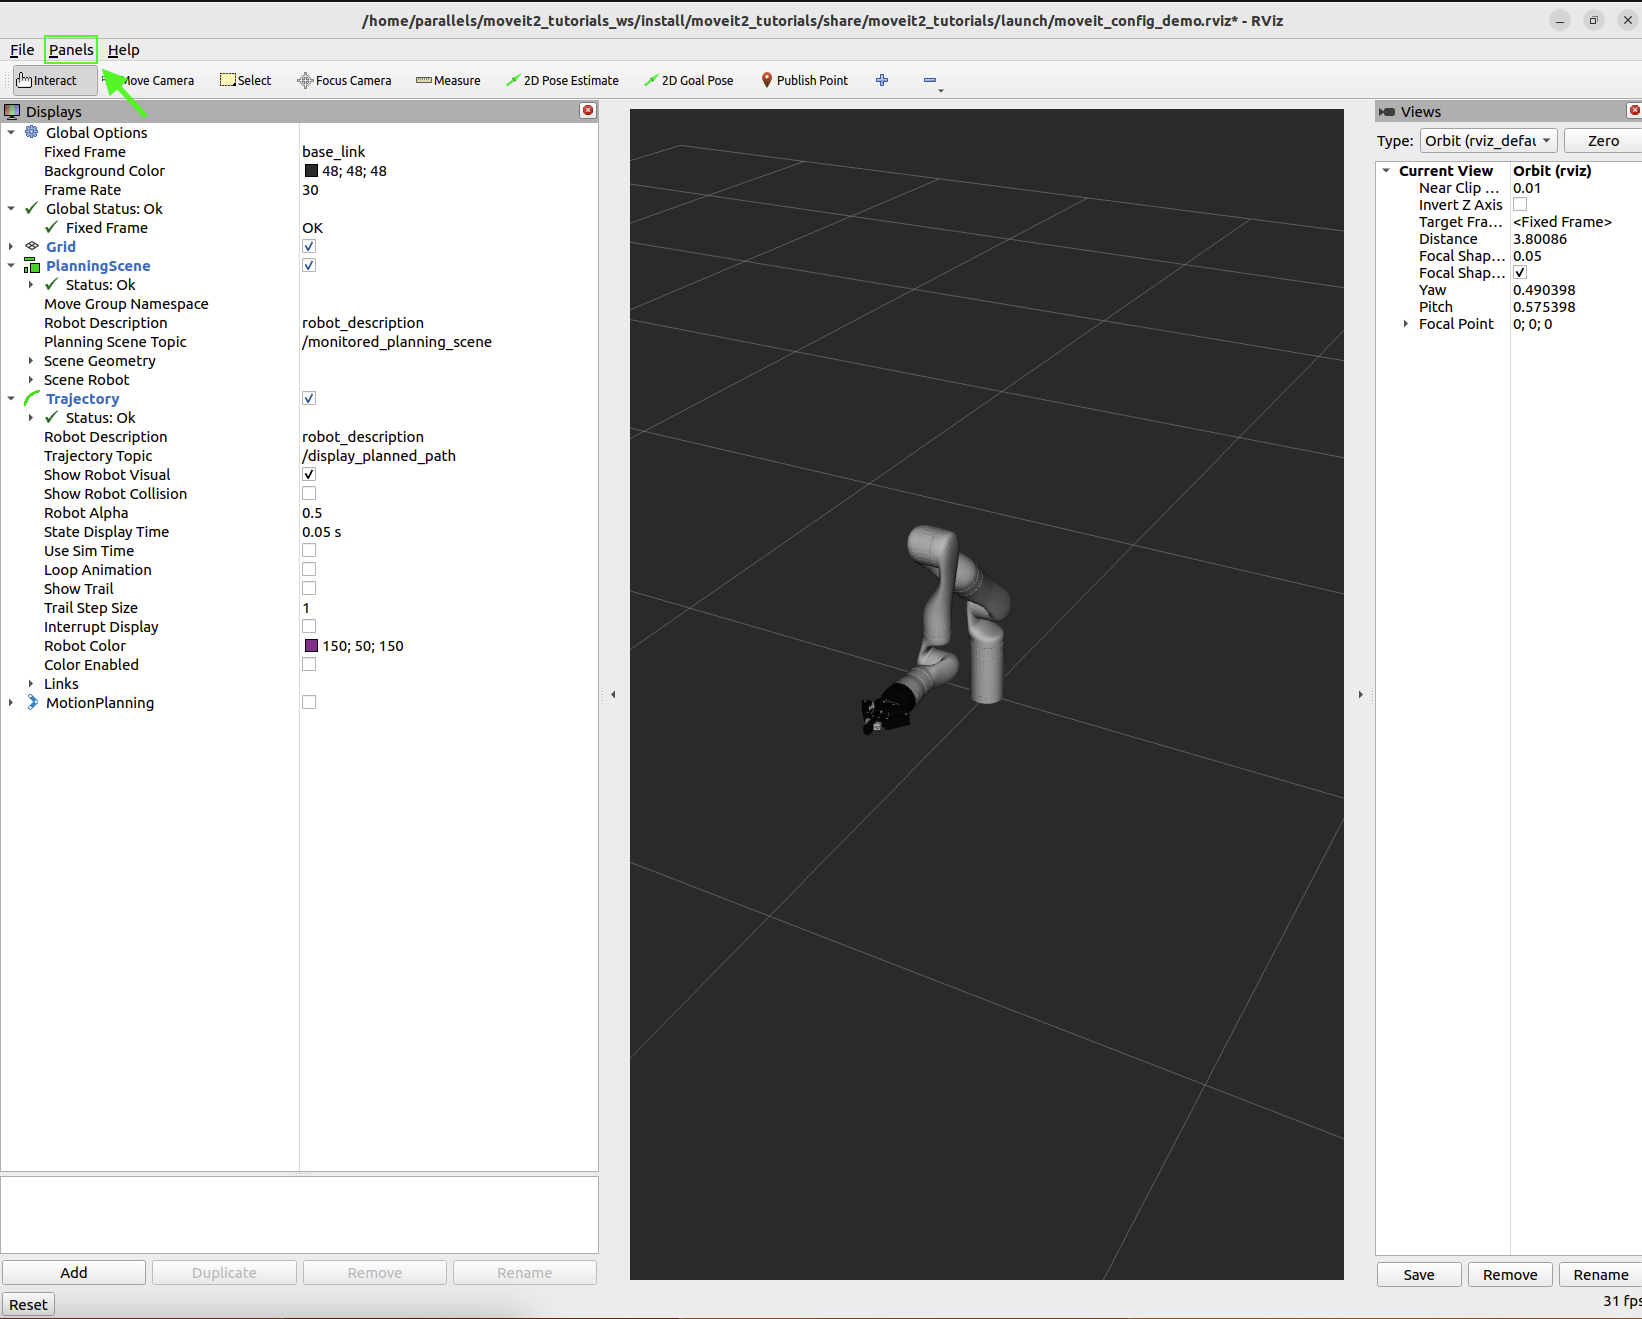
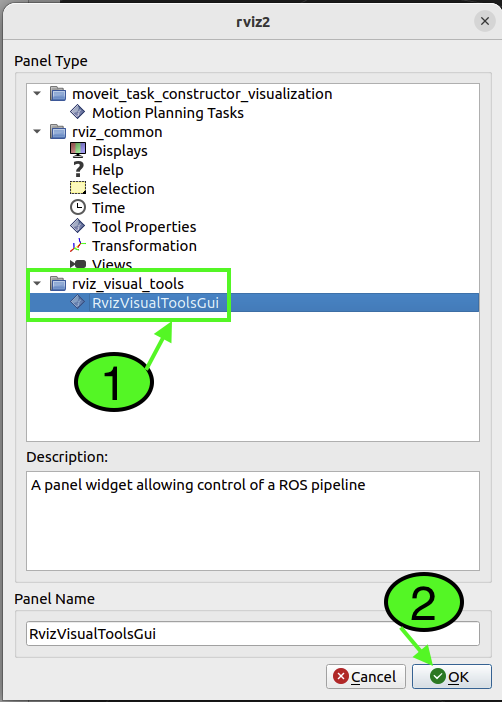
然后选择 RvizVisualToolsGui 并点击 OK。
这会在左下角创建一个带有 Next 按钮的新面板,我们稍后会用到它。
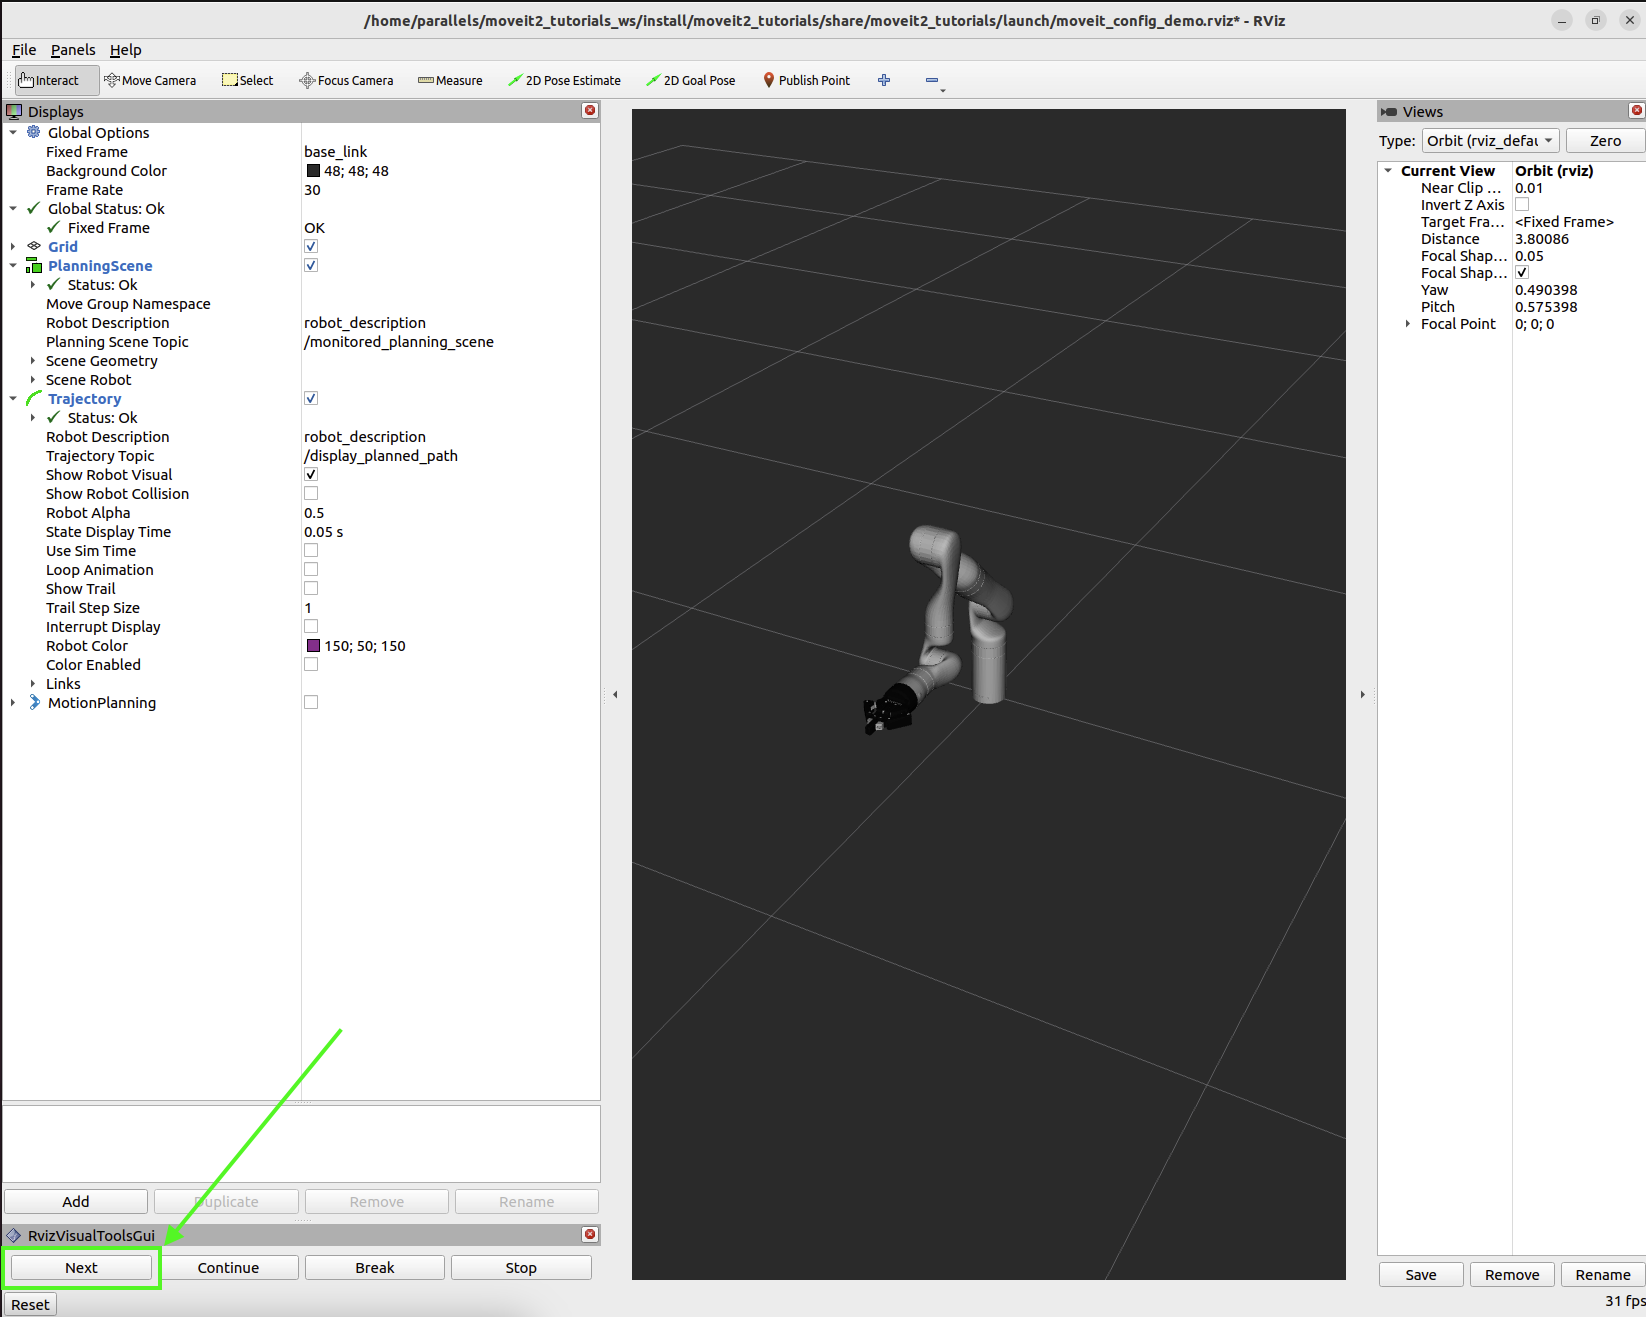
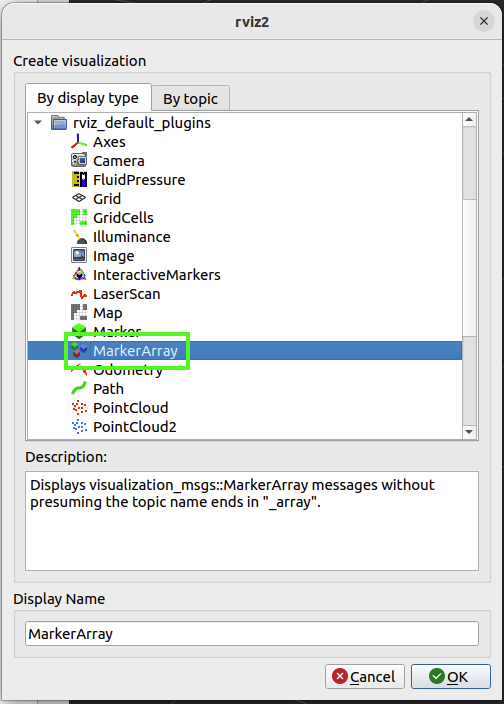
最后,我们需要添加一个 Marker Array 来渲染我们添加的可视化内容。
点击 “Displays” 面板中的 “Add” 按钮。
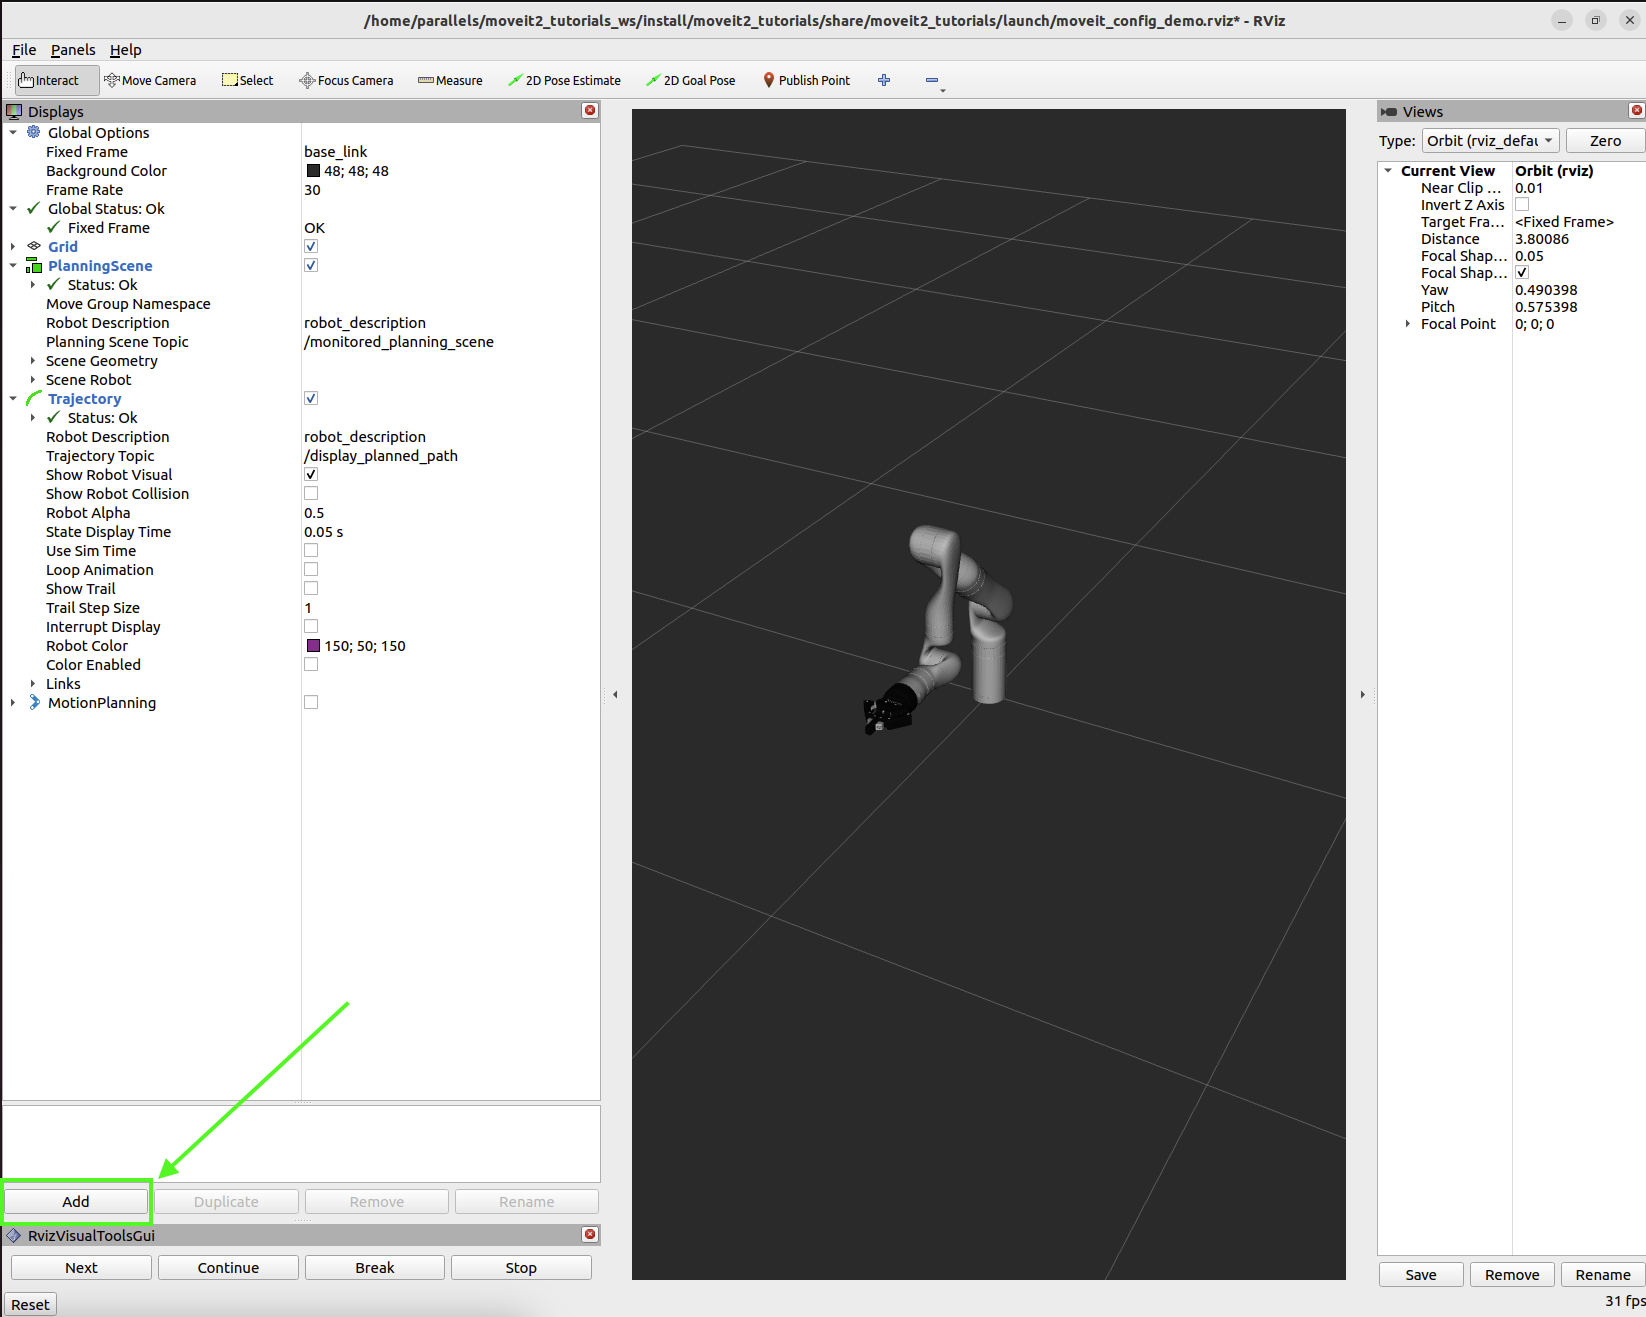
选择 Marker Array 并点击 OK。
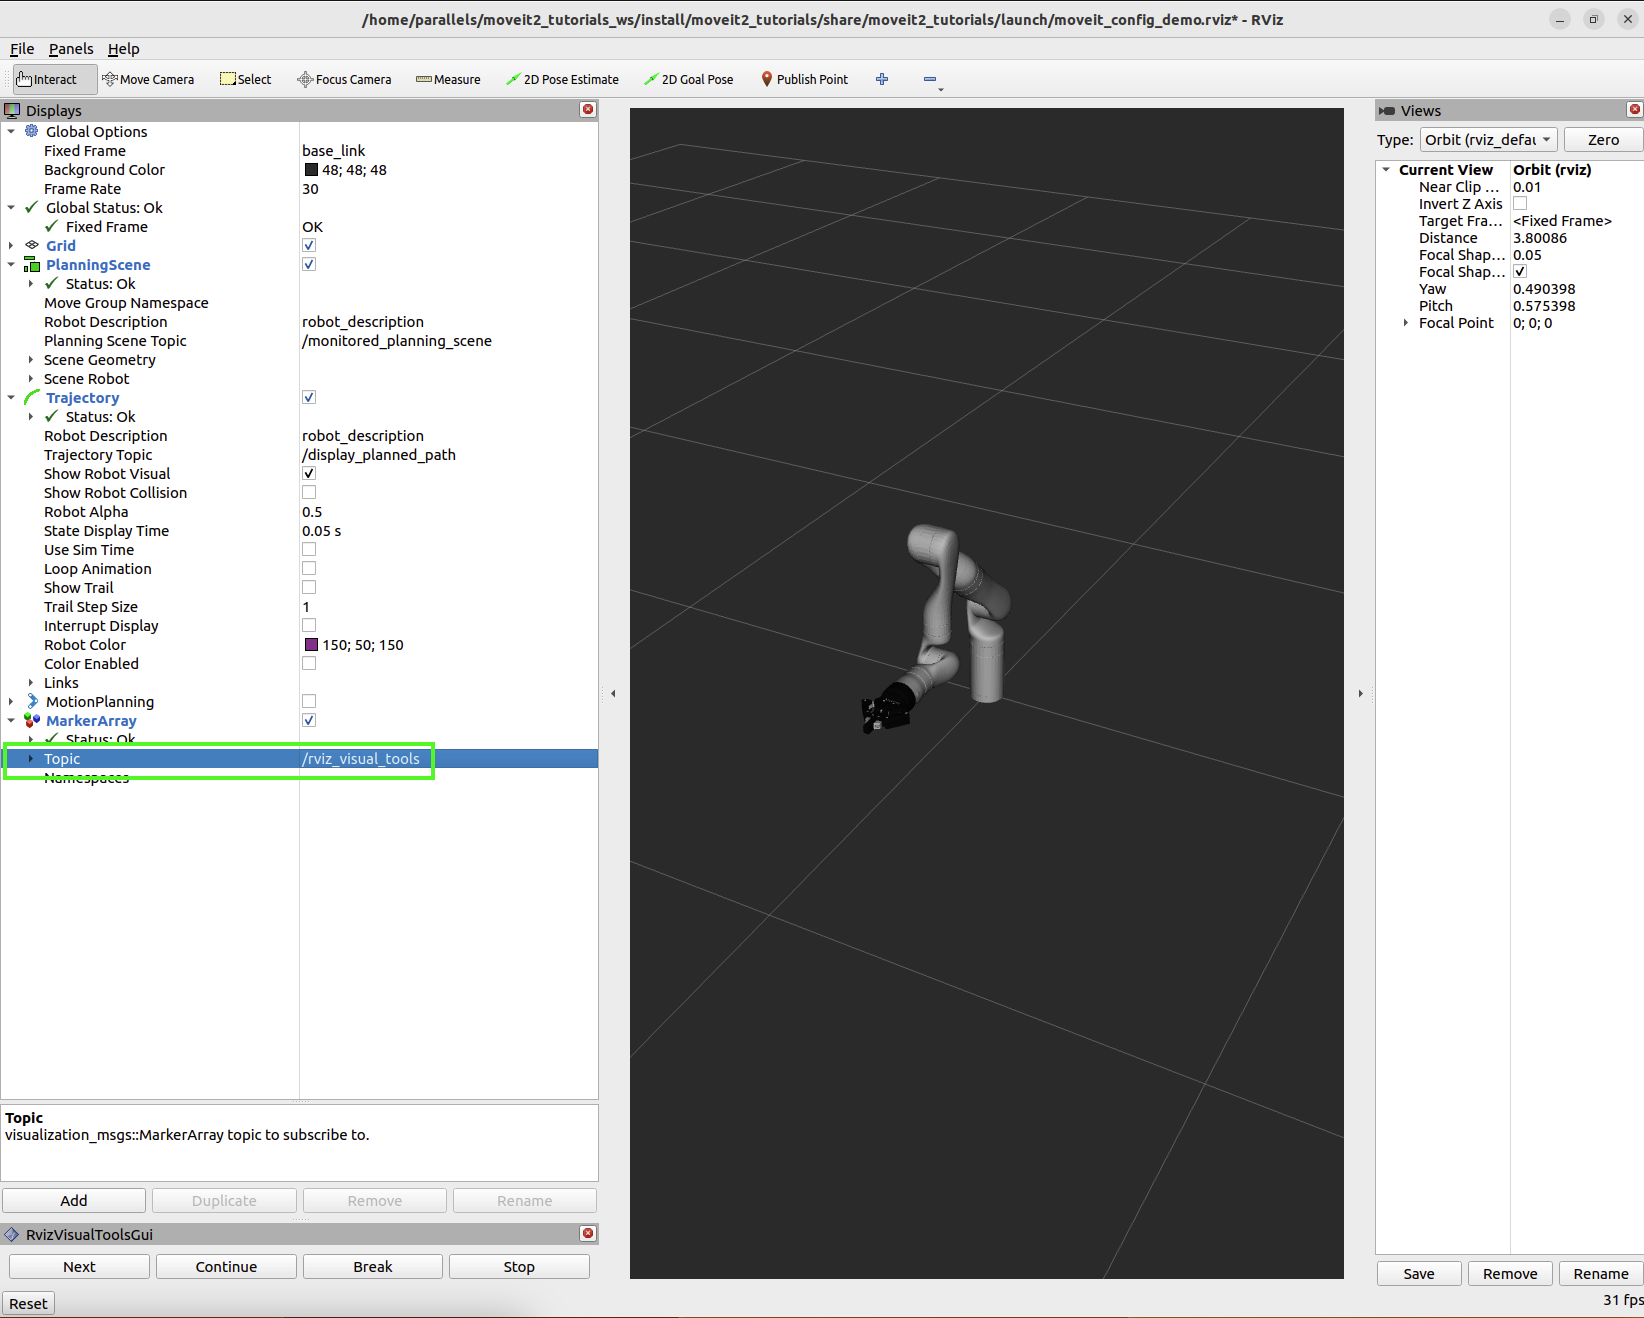
滚动到 Displays 面板中项目的底部,将新添加的 Marker Array 使用的话题修改为 /rviz_visual_tools。
现在你可以运行带有可视化的新程序了。
7 运行程序
Section titled “7 运行程序”在新终端中,进入工作区,source 工作区,然后运行 hello_moveit:
cd ~/ws_moveitsource install/setup.bashros2 run hello_moveit hello_moveit你会注意到程序已暂停,并显示类似如下的日志:
[INFO] [1652822889.492940200] [hello_moveit.remote_control]: Waiting to continue: Press 'Next' in the RvizVisualToolsGui window to plan点击 RViz 中的 Next 按钮,观察程序继续执行。
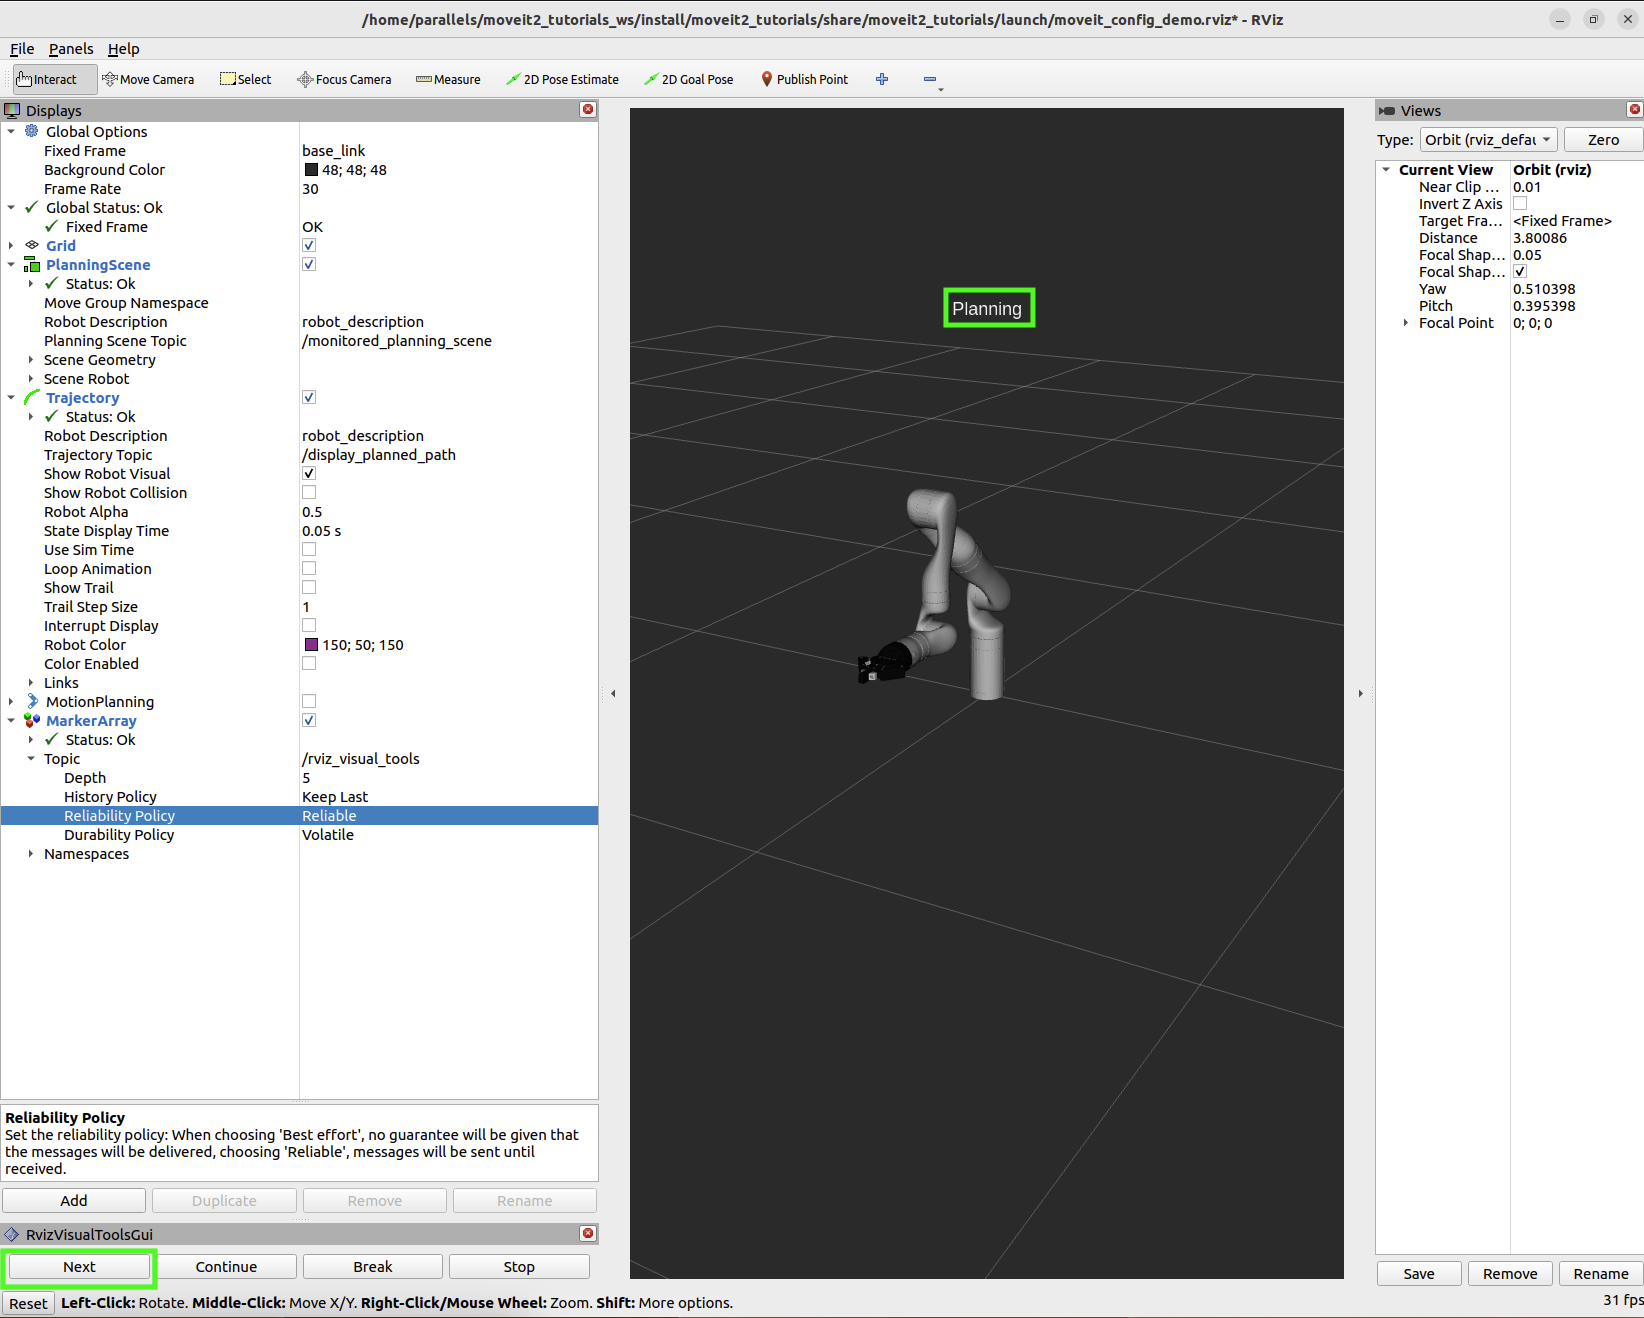
点击 Next 按钮后,你会看到程序完成了规划,在机器人上方添加了标题文本,并绘制了一条代表工具路径的线。
要继续,再次按下 Next 即可查看机器人执行规划。
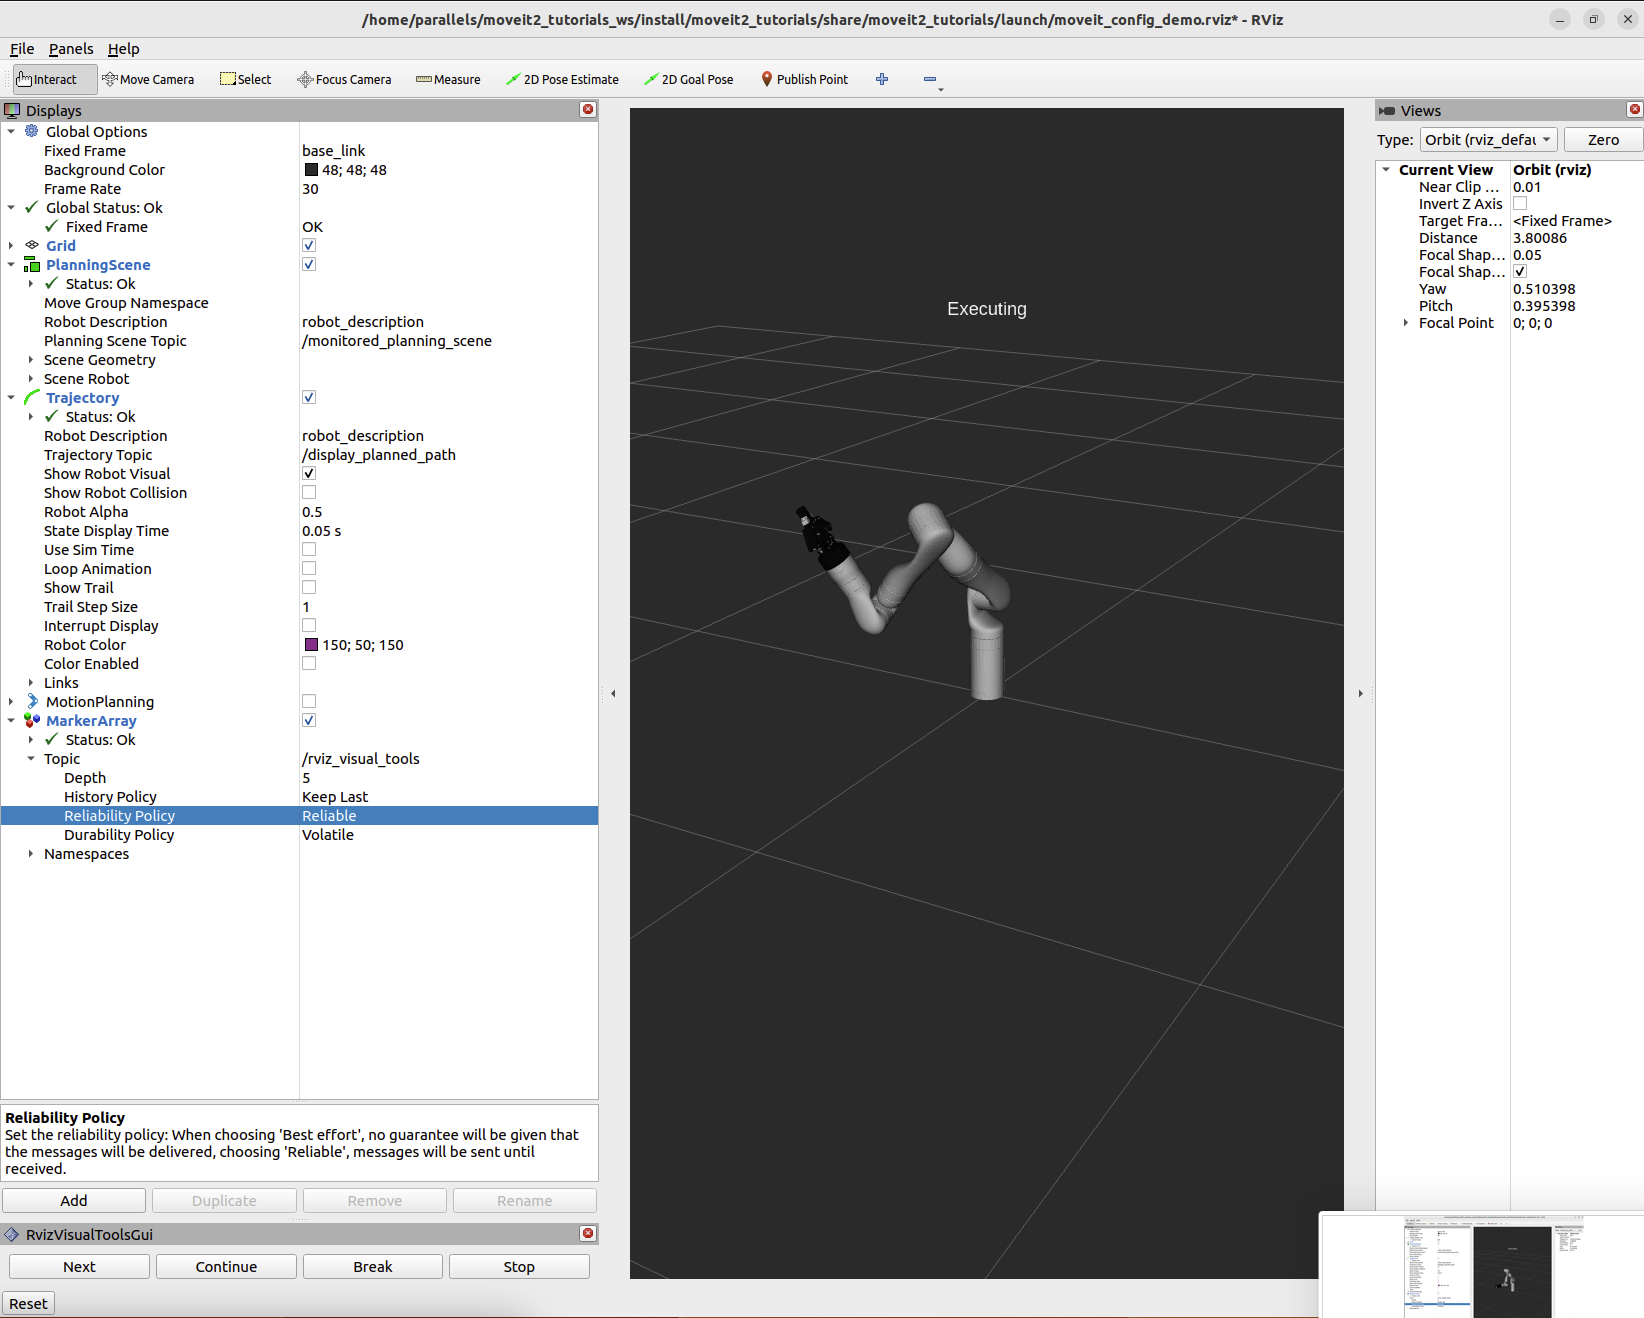
你扩展了使用 MoveIt 编写的程序,实现了与 RViz 中 GUI 的交互——可以通过按钮逐步执行程序、在机器人上方渲染文本,以及显示规划出的工具路径。
- MoveItVisualTools 还有许多其他用于可视化机器人运动的有用功能,你可以在这里了解更多。
- 在 MoveItCpp 教程中还有更多使用
MoveItVisualTools的示例。 - 这是完整的 hello_moveit.cpp 源码副本。
在下一个教程在物体周围规划中,你将在当前程序的基础上进一步扩展,向碰撞场景中添加物体,并观察机器人如何根据这些变化进行规划。