
设置 robot_localization
本教程介绍如何使用 robot_localization 包融合多种里程计数据源以获得平滑的里程计,并演示如何通过 robot_localization 发布 odom => base_link 变换。
robot_localization 包根据 N 个里程计传感器的输入数据,融合生成局部精确且平滑的里程计信息。数据可通过 nav_msgs/Odometry、sensor_msgs/Imu、geometry_msgs/PoseWithCovarianceStamped 和 geometry_msgs/TwistWithCovarianceStamped 消息传入该包。
常见的机器人配置至少包含轮式编码器和 IMU 作为里程计数据源。向 robot_localization 提供多个数据源后,状态估计节点会融合各传感器的里程计信息。融合通过扩展卡尔曼滤波器(ekf_node)或无迹卡尔曼滤波器(ukf_node)实现。此外,该包还提供了 navsat_transform_node,用于在使用 GPS 时将地理坐标转换为机器人的世界坐标系。
启用相应配置后,robot_localization 会通过 odometry/filtered 和 accel/filtered 话题发布融合后的传感器数据,并可在 /tf 话题上发布 odom => base_link 变换。如果之前已完成里程计设置,需要删除 bridge_config.yaml 中的 /tf 桥接,确保变换由 ekf_node 而非 Gazebo 提供。
注意:有关
robot_localization的更多细节,请参阅官方 Robot Localization 文档。
如果机器人只有一个里程计数据源,使用 robot_localization 的意义仅限于数据平滑。此时也可直接在单一里程计数据源节点中通过 tf2 广播器(broadcaster)发布变换。当然,仍可选择用 robot_localization 发布变换,并在输出中获得一定的平滑效果。
注意:关于如何编写 tf2 广播器,可参考 (C++) 教程 和 (Python) 教程。
接下来演示如何用 robot_localization 融合 sam_bot 的传感器数据。它将订阅 /demo/Imu 上的 sensor_msgs/Imu 消息和 /demo/odom 上的 nav_msgs/Odometry 消息,并在 odometry/filtered、accel/filtered 和 /tf 话题上发布数据。
配置 robot_localization
Section titled “配置 robot_localization”下面配置 robot_localization 包,使用扩展卡尔曼滤波器(ekf_node)融合里程计信息并发布 odom => base_link 变换。
首先,加载 ROS 2 安装目录的环境变量:
source /opt/ros/<ros2-distro>/setup.bash然后安装 robot_localization 包:
sudo apt install ros-$ROS_DISTRO-robot-localization接下来用 YAML 文件指定 ekf_node 的参数。在项目根目录下创建 config 目录,并在其中新建 ekf.yaml 文件,将以下内容复制到文件中。
### ekf config file ###ekf_filter_node:    ros__parameters:# The frequency, in Hz, at which the filter will output a position estimate. Note that the filter will not begin# computation until it receives at least one message from one of the inputs. It will then run continuously at the# frequency specified here, regardless of whether it receives more measurements. Defaults to 30 if unspecified.        frequency: 30.0
# ekf_localization_node and ukf_localization_node both use a 3D omnidirectional motion model. If this parameter is# set to true, no 3D information will be used in your state estimate. Use this if you are operating in a planar# environment and want to ignore the effect of small variations in the ground plane that might otherwise be detected# by, for example, an IMU. Defaults to false if unspecified.        two_d_mode: false
# Whether to publish the acceleration state. Defaults to false if unspecified.        publish_acceleration: true
# Whether to broadcast the transformation over the /tf topic. Defaults to true if unspecified.        publish_tf: true
# 1. Set the map_frame, odom_frame, and base_link frames to the appropriate frame names for your system.#     1a. If your system does not have a map_frame, just remove it, and make sure "world_frame" is set to the value of odom_frame.# 2. If you are fusing continuous position data such as wheel encoder odometry, visual odometry, or IMU data, set "world_frame"#    to your odom_frame value. This is the default behavior for robot_localization's state estimation nodes.# 3. If you are fusing global absolute position data that is subject to discrete jumps (e.g., GPS or position updates from landmark#    observations) then:#     3a. Set your "world_frame" to your map_frame value#     3b. MAKE SURE something else is generating the odom->base_link transform. Note that this can even be another state estimation node#         from robot_localization! However, that instance should *not* fuse the global data.        map_frame: map              # Defaults to "map" if unspecified        odom_frame: odom            # Defaults to "odom" if unspecified        base_link_frame: base_link  # Defaults to "base_link" if unspecified        world_frame: odom           # Defaults to the value of odom_frame if unspecified
        odom0: demo/odom        odom0_config: [false, false, false,                      false, false, false,                      true, true, false,                      false, false, true,                      false, false, false]
        imu0: demo/imu        imu0_config: [false, false, false,                      false, false, false,                      false, false, false,                      false, false, true,                      false, false, false]
上述配置定义了 frequency、two_d_mode、publish_acceleration、publish_tf、map_frame、odom_frame、base_link_frame 和 world_frame 的参数值。关于其他可修改的参数,请参阅状态估计节点的参数,完整的 ekf.yaml 示例可在此处查看。
要为 ekf_filter_node 添加传感器输入,在基名(odom、imu、pose、twist)后依次追加数字序号即可。本例中滤波器输入包括一个 nav_msgs/Odometry 和一个 sensor_msgs/Imu,因此使用 odom0 和 imu0。odom0 的值设为 demo/odom,即发布 nav_msgs/Odometry 消息的话题;imu0 的值设为 demo/imu,即发布 sensor_msgs/Imu 消息的话题。
要深入理解 robot_localization 的配置方式和背后的原理,请查阅配置 robot_localization。
注意:关于
robot_localization输入数据配置的更多建议,请参阅为 robot_localization 准备数据和配置 robot_localization。
启动与构建文件
Section titled “启动与构建文件”现在将 ekf_node 添加到启动文件中。打开 launch/display.launch.py,将以下代码粘贴到 return launch.LaunchDescription([ 之前。
robot_localization_node = Node( package='robot_localization', executable='ekf_node', name='ekf_filter_node', output='screen', parameters=[os.path.join(pkg_share, 'config/ekf.yaml'), {'use_sim_time': LaunchConfiguration('use_sim_time')}])接下来,在 return launch.LaunchDescription([ 块中添加以下启动参数。
launch.actions.DeclareLaunchArgument(name='use_sim_time', default_value='True', description='Flag to enable use_sim_time'),最后,在 rviz_node 行上方添加 robot_localization_node, 以启动机器人定位节点。
robot_state_publisher_node, spawn_entity, robot_localization_node, rviz_node])接下来将 robot_localization 依赖添加到包定义中。打开 package.xml,在最后一个 <exec_depend> 标签下方添加以下行。
<exec_depend>robot_localization</exec_depend>最后打开 CMakeLists.txt,在 install(DIRECTORY...) 中添加 config 目录,如下所示。
install( DIRECTORY src launch rviz config DESTINATION share/${PROJECT_NAME})构建、运行与验证
Section titled “构建、运行与验证”现在构建并运行包。进入项目根目录,执行以下命令:
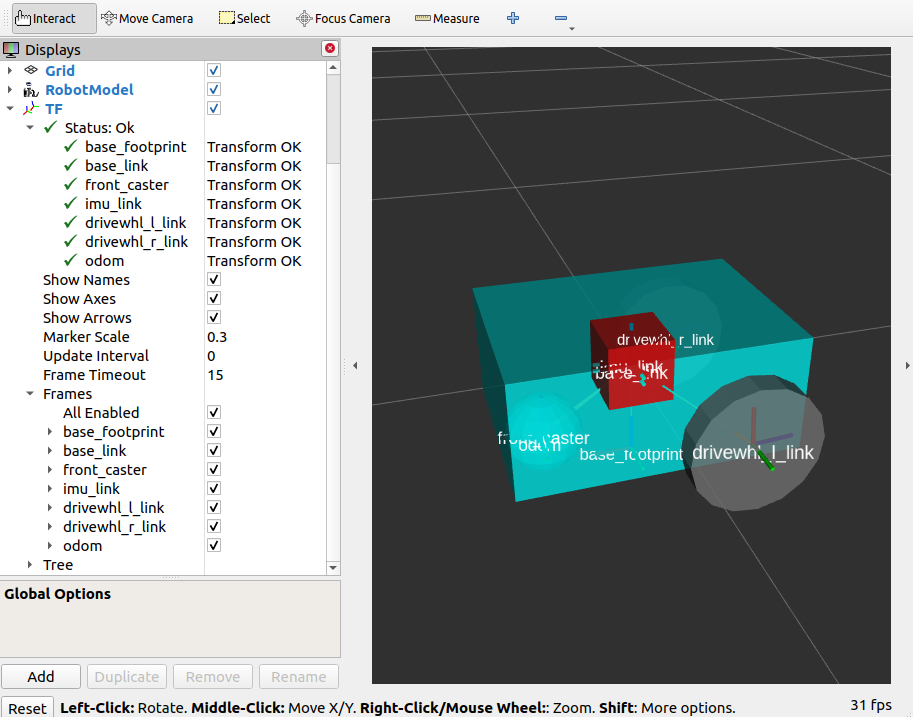
colcon build. install/setup.bashros2 launch sam_bot_description display.launch.pyGazebo 和 RViz 应随即启动。在 RViz 窗口中,应能看到 sam_bot 的模型和 TF 坐标系:
接下来验证 odometry/filtered、accel/filtered 和 /tf 话题是否处于活动状态。打开一个新终端,执行:
ros2 topic list话题列表中应能看到 odometry/filtered、accel/filtered 和 /tf。
执行以下命令可检查这些话题的订阅者数量:
ros2 topic info /demo/imuros2 topic info /demo/odom/demo/imu 和 /demo/odom 应各自有 1 个订阅者。
要验证 ekf_filter_node 是否为这些话题的订阅者,执行:
ros2 node info /ekf_filter_node输出应如下所示。
/ekf_filter_nodeSubscribers: /demo/imu: sensor_msgs/msg/Imu /demo/odom: nav_msgs/msg/Odometry /parameter_events: rcl_interfaces/msg/ParameterEvent /set_pose: geometry_msgs/msg/PoseWithCovarianceStampedPublishers: /accel/filtered: geometry_msgs/msg/AccelWithCovarianceStamped /diagnostics: diagnostic_msgs/msg/DiagnosticArray /odometry/filtered: nav_msgs/msg/Odometry /parameter_events: rcl_interfaces/msg/ParameterEvent /rosout: rcl_interfaces/msg/Log /tf: tf2_msgs/msg/TFMessageService Servers: ...从输出中可以看到 ekf_filter_node 订阅了 /demo/imu 和 /demo/odom,并在 odometry/filtered、accel/filtered 和 /tf 话题上发布数据。
还可使用 tf2_echo 工具验证 robot_localization 是否发布了 odom => base_link 变换。在另一个终端中运行:
ros2 run tf2_ros tf2_echo odom base_link应能看到类似如下的持续输出。
At time 8.842000000- Translation: [0.003, -0.000, 0.127]- Rotation: in Quaternion [-0.000, 0.092, 0.003, 0.996]At time 9.842000000- Translation: [0.002, -0.000, 0.127]- Rotation: in Quaternion [-0.000, 0.092, 0.003, 0.996]本指南介绍了如何使用多个里程计传感器,通过 robot_localization 提供经滤波和平滑处理的里程计,并验证了 robot_localization 是否正确发布 odom => base_link 变换。