
TF2 广播器(Python)
目标: 学习如何将机器人的状态广播到 tf2。
教程级别: 中级
预计时间: 15 分钟
在接下来的两个教程中,我们将编写代码来重现 tf2 简介教程中的演示。后续教程将在此演示的基础上,介绍更高级的 tf2 功能,包括变换查找中的超时机制和时间旅行。
本教程假设你已经具备 ROS 2 基础知识,并且完成了 tf2 简介教程和 tf2 静态广播器教程(Python)。我们将复用上一个教程中的 learning_tf2_py 功能包(package)。
在之前的教程中,你已经学习了如何创建工作空间(workspace)和创建功能包(package)。
1 编写广播器节点
Section titled “1 编写广播器节点”首先创建源文件。进入上一个教程中创建的 learning_tf2_py 功能包。在 src/learning_tf2_py/learning_tf2_py 目录中,输入以下命令下载示例广播器代码:
Linux/macOS:
wget https://raw.githubusercontent.com/ros/geometry_tutorials/{DISTRO}/turtle_tf2_py/turtle_tf2_py/turtle_tf2_broadcaster.pyWindows:
在 Windows 命令行提示符中:
curl -sk https://raw.githubusercontent.com/ros/geometry_tutorials/{DISTRO}/turtle_tf2_py/turtle_tf2_py/turtle_tf2_broadcaster.py -o turtle_tf2_broadcaster.py或者在 PowerShell 中:
curl https://raw.githubusercontent.com/ros/geometry_tutorials/{DISTRO}/turtle_tf2_py/turtle_tf2_py/turtle_tf2_broadcaster.py -o turtle_tf2_broadcaster.py用你喜欢的文本编辑器打开 turtle_tf2_broadcaster.py 文件。
import math
from geometry_msgs.msg import TransformStamped
import numpy as np
import rclpyfrom rclpy.executors import ExternalShutdownExceptionfrom rclpy.node import Node
from tf2_ros import TransformBroadcaster
from turtlesim_msgs.msg import Pose

def quaternion_from_euler(ai, aj, ak):    ai /= 2.0    aj /= 2.0    ak /= 2.0    ci = math.cos(ai)    si = math.sin(ai)    cj = math.cos(aj)    sj = math.sin(aj)    ck = math.cos(ak)    sk = math.sin(ak)    cc = ci*ck    cs = ci*sk    sc = si*ck    ss = si*sk
    q = np.empty((4, ))    q[0] = cj*sc - sj*cs    q[1] = cj*ss + sj*cc    q[2] = cj*cs - sj*sc    q[3] = cj*cc + sj*ss
    return q

class FramePublisher(Node):
    def __init__(self):        super().__init__('turtle_tf2_frame_publisher')
        # Declare and acquire `turtlename` parameter        self.turtlename = self.declare_parameter(          'turtlename', 'turtle').get_parameter_value().string_value
        # Initialize the transform broadcaster        self.tf_broadcaster = TransformBroadcaster(self)
        # Subscribe to a turtle{1}{2}/pose topic and call handle_turtle_pose        # callback function on each message        self.subscription = self.create_subscription(            Pose,            f'/{self.turtlename}/pose',            self.handle_turtle_pose,            1)        self.subscription  # prevent unused variable warning
    def handle_turtle_pose(self, msg):        t = TransformStamped()
        # Read message content and assign it to        # corresponding tf variables        t.header.stamp = self.get_clock().now().to_msg()        t.header.frame_id = 'world'        t.child_frame_id = self.turtlename
        # Turtle only exists in 2D, thus we get x and y translation        # coordinates from the message and set the z coordinate to 0        t.transform.translation.x = msg.x        t.transform.translation.y = msg.y        t.transform.translation.z = 0.0
        # For the same reason, turtle can only rotate around one axis        # and this why we set rotation in x and y to 0 and obtain        # rotation in z axis from the message        q = quaternion_from_euler(0, 0, msg.theta)        t.transform.rotation.x = q[0]        t.transform.rotation.y = q[1]        t.transform.rotation.z = q[2]        t.transform.rotation.w = q[3]
        # Send the transformation        self.tf_broadcaster.sendTransform(t)

def main():    try:        with rclpy.init():            node = FramePublisher()            rclpy.spin(node)    except (KeyboardInterrupt, ExternalShutdownException):        pass
1.1 代码解析
Section titled “1.1 代码解析”下面来看看与将乌龟位姿发布到 tf2 相关的代码。
首先,声明并获取参数 turtlename,用于指定乌龟名称,例如 turtle1 或 turtle2。
self.turtlename = self.declare_parameter( 'turtlename', 'turtle').get_parameter_value().string_value然后,节点订阅话题 {self.turtlename}/pose,每收到一条消息就调用 handle_turtle_pose 回调函数。
self .subscription = self.create_subscription( Pose, f'/{self.turtlename}/pose', self.handle_turtle_pose, 1)接下来创建一个 TransformStamped 对象,并设置相应的元数据。
-
首先为要发布的变换设置时间戳,通过调用
self.get_clock().now()获取节点使用的当前时间。 -
然后设置所创建变换的父坐标系名称,这里是
world。 -
最后设置子坐标系名称,即乌龟本身的名称。
乌龟位姿消息的回调函数负责广播该乌龟的平移和旋转,将其作为从 world 坐标系到 turtleX 坐标系的变换发布出去。
t = TransformStamped()
# Read message content and assign it to# corresponding tf variablest.header.stamp = self.get_clock().now().to_msg()t.header.frame_id = 'world't.child_frame_id = self.turtlename
这里将乌龟的位姿信息填入 3D 变换结构中。
# Turtle only exists in 2D, thus we get x and y translation# coordinates from the message and set the z coordinate to 0t.transform.translation.x = msg.xt.transform.translation.y = msg.yt.transform.translation.z = 0.0
# For the same reason, turtle can only rotate around one axis# and this why we set rotation in x and y to 0 and obtain# rotation in z axis from the messageq = quaternion_from_euler(0, 0, msg.theta)t.transform.rotation.x = q[0]t.transform.rotation.y = q[1]t.transform.rotation.z = q[2]t.transform.rotation.w = q[3]
最后,将构造好的变换传递给 TransformBroadcaster 的 sendTransform 方法,由它负责广播。
# Send the transformationself.tf_broadcaster.sendTransform(t)1.2 添加入口点
Section titled “1.2 添加入口点”要让 ros2 run 命令能运行你的节点,必须在 setup.py(位于 src/learning_tf2_py 目录中)中添加入口点。
在 'console_scripts': 的方括号之间添加以下行:
'turtle_tf2_broadcaster = learning_tf2_py.turtle_tf2_broadcaster:main',2 编写 launch 文件
Section titled “2 编写 launch 文件”接下来为这个演示创建一个 launch 文件。在 src/learning_tf2_py 目录下创建一个 launch 文件夹。用文本编辑器在其中创建一个名为 turtle_tf2_demo_launch 的新文件,扩展名为 .py、.xml 或 .yaml,添加以下内容:
XML:
<?xml version="1.0" encoding="UTF-8"?><launch> <node pkg="turtlesim" exec="turtlesim_node" name="sim" /> <node pkg="learning_tf2_py" exec="turtle_tf2_broadcaster" name="broadcaster1"> <param name="turtlename" value="turtle1" /> </node></launch>YAML:
%YAML 1.2---launch: - node: pkg: "turtlesim" exec: "turtlesim_node" name: "sim" - node: pkg: "learning_tf2_py" exec: "turtle_tf2_broadcaster" name: "broadcaster1" param: - name: "turtlename" value: "turtle1"Python:
from launch import LaunchDescriptionfrom launch_ros.actions import Node

def generate_launch_description():    return LaunchDescription([        Node(            package='turtlesim',            executable='turtlesim_node',            name='sim'        ),        Node(            package='learning_tf2_py',            executable='turtle_tf2_broadcaster',            name='broadcaster1',            parameters=[                {'turtlename': 'turtle1'}            ]        ),    ])
2.1 代码解析
Section titled “2.1 代码解析”下面来分析 launch 文件的结构。每种格式都有各自的写法:
XML:
XML launch 文件以 XML 声明和根元素 <launch> 开头。
<?xml version="1.0" encoding="UTF-8"?><launch>YAML:
YAML launch 文件以 YAML 版本声明和 launch: 键开头。
%YAML 1.2---launch:Python:
在 Python launch 文件中,首先从 launch 和 launch_ros 包导入所需模块。launch 是一个通用的启动框架(并非 ROS 2 专用),而 launch_ros 包含了 ROS 2 特有的功能,比如这里导入的节点。
from launch import LaunchDescriptionfrom launch_ros.actions import Node接下来启动 turtlesim 仿真节点,并使用 turtle_tf2_broadcaster 节点将 turtle1 的状态广播到 tf2。
XML:
<node pkg="turtlesim" exec="turtlesim_node" name="sim" /> <node pkg="learning_tf2_py" exec="turtle_tf2_broadcaster" name="broadcaster1"> <param name="turtlename" value="turtle1" /> </node>YAML:
- node: pkg: "turtlesim" exec: "turtlesim_node" name: "sim" - node: pkg: "learning_tf2_py" exec: "turtle_tf2_broadcaster" name: "broadcaster1" param: - name: "turtlename" value: "turtle1"Python:
return LaunchDescription([ Node( package='turtlesim', executable='turtlesim_node', name='sim' ), Node( package='learning_tf2_py', executable='turtle_tf2_broadcaster', name='broadcaster1', parameters=[ {'turtlename': 'turtle1'} ] ), ])2.2 添加依赖
Section titled “2.2 添加依赖”返回上一级到 learning_tf2_py 目录,该目录下存放着 setup.py、setup.cfg 和 package.xml 文件。
用文本编辑器打开 package.xml,添加与 launch 文件导入语句对应的以下依赖:
<exec_depend>launch</exec_depend><exec_depend>launch_ros</exec_depend>这样就添加了 launch 和 launch_ros 的执行依赖。
请确保保存文件。
2.3 更新 setup.py
Section titled “2.3 更新 setup.py”重新打开 setup.py,添加以下内容以便安装 launch/ 文件夹中的 launch 文件。修改后的 data_files 字段如下:
data_files=[ ... (os.path.join('share', package_name, 'launch'), glob('launch/*')),],同时在文件顶部添加相应的导入:
import osfrom glob import glob关于创建 launch 文件的更多详情,请参阅相关教程。
在工作空间根目录运行 rosdep 检查缺失的依赖。
Linux:
rosdep install -i --from-path src --rosdistro {DISTRO} -ymacOS:
rosdep 仅在 Linux 上可用,你需要自行安装 geometry_msgs 和 turtlesim 依赖。
Windows:
rosdep 仅在 Linux 上可用,你需要自行安装 geometry_msgs 和 turtlesim 依赖。
仍在工作空间根目录下构建功能包:
Linux/macOS:
colcon build --packages-select learning_tf2_pyWindows:
colcon build --merge-install --packages-select learning_tf2_py打开一个新终端,导航到工作空间根目录,并 source 环境配置文件:
Linux/macOS:
. install/setup.bashWindows:
在 Windows 命令行提示符中:
call install\setup.bat或者在 PowerShell 中:
.\install\setup.ps1现在运行 launch 文件,它会启动 turtlesim 仿真节点和 turtle_tf2_broadcaster 节点:
XML:
ros2 launch learning_tf2_py turtle_tf2_demo_launch.xmlYAML:
ros2 launch learning_tf2_py turtle_tf2_demo_launch.yamlPython:
ros2 launch learning_tf2_py turtle_tf2_demo_launch.py在第二个终端窗口中输入以下命令:
ros2 run turtlesim turtle_teleop_key你应该能看到 turtlesim 仿真已启动,其中有一只可以用键盘控制的乌龟。
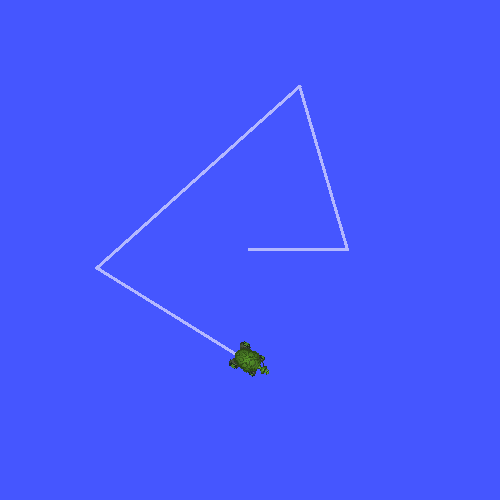
现在,用 tf2_echo 工具检查乌龟位姿是否确实被广播到了 tf2:
ros2 run tf2_ros tf2_echo world turtle1这会显示第一只乌龟的位姿。用方向键驱动乌龟移动(确保当前活动窗口是 turtle_teleop_key 所在的终端,而不是仿真器窗口)。控制台输出类似如下:
At time 1714913843.708748879- Translation: [4.541, 3.889, 0.000]- Rotation: in Quaternion [0.000, 0.000, 0.999, -0.035]- Rotation: in RPY (radian) [0.000, -0.000, -3.072]- Rotation: in RPY (degree) [0.000, -0.000, -176.013]- Matrix: -0.998 0.070 0.000 4.541 -0.070 -0.998 0.000 3.889 0.000 0.000 1.000 0.000 0.000 0.000 0.000 1.000如果你对 world 和 turtle2 之间的变换运行 tf2_echo,此时看不到任何输出,因为第二只乌龟尚不存在。不过,当我们在下一个教程中添加第二只乌龟后,turtle2 的位姿就会被广播到 tf2。
在本教程中,你学习了如何将机器人的位姿(即乌龟的位置和朝向)广播到 tf2,以及如何使用 tf2_echo 工具进行验证。要实际使用广播到 tf2 的变换,请继续学习下一篇关于创建 tf2 监听器的教程。