
交互式可视化
本教程介绍由以下 API 提供的可视化窗口的用户交互功能:
open3d.visualization.draw_geometries_with_editingopen3d.visualization.VisualizerWithEditing
import numpy as npimport copyimport open3d as o3d

def demo_crop_geometry():    print("Demo for manual geometry cropping")    print(        "1) Press 'Y' twice to align geometry with negative direction of y-axis"    )    print("2) Press 'K' to lock screen and to switch to selection mode")    print("3) Drag for rectangle selection,")    print("   or use ctrl + left click for polygon selection")    print("4) Press 'C' to get a selected geometry")    print("5) Press 'S' to save the selected geometry")    print("6) Press 'F' to switch to freeview mode")    pcd_data = o3d.data.DemoICPPointClouds()    pcd = o3d.io.read_point_cloud(pcd_data.paths[0])    o3d.visualization.draw_geometries_with_editing([pcd])

def draw_registration_result(source, target, transformation):    source_temp = copy.deepcopy(source)    target_temp = copy.deepcopy(target)    source_temp.paint_uniform_color([1, 0.706, 0])    target_temp.paint_uniform_color([0, 0.651, 0.929])    source_temp.transform(transformation)    o3d.visualization.draw_geometries([source_temp, target_temp])

def prepare_data():    pcd_data = o3d.data.DemoICPPointClouds()    source = o3d.io.read_point_cloud(pcd_data.paths[0])    target = o3d.io.read_point_cloud(pcd_data.paths[2])    print("Visualization of two point clouds before manual alignment")    draw_registration_result(source, target, np.identity(4))    return source, target

def pick_points(pcd):    print("")    print(        "1) Please pick at least three correspondences using [shift + left click]"    )    print("   Press [shift + right click] to undo point picking")    print("2) After picking points, press 'Q' to close the window")    vis = o3d.visualization.VisualizerWithEditing()    vis.create_window()    vis.add_geometry(pcd)    vis.run()  # user picks points    vis.destroy_window()    print("")    return vis.get_picked_points()

def register_via_correspondences(source, target, source_points, target_points):    corr = np.zeros((len(source_points), 2))    corr[:, 0] = source_points    corr[:, 1] = target_points    # estimate rough transformation using correspondences    print("Compute a rough transform using the correspondences given by user")    p2p = o3d.pipelines.registration.TransformationEstimationPointToPoint()    trans_init = p2p.compute_transformation(source, target,                                            o3d.utility.Vector2iVector(corr))    # point-to-point ICP for refinement    print("Perform point-to-point ICP refinement")    threshold = 0.03  # 3cm distance threshold    reg_p2p = o3d.pipelines.registration.registration_icp(        source, target, threshold, trans_init,        o3d.pipelines.registration.TransformationEstimationPointToPoint())    draw_registration_result(source, target, reg_p2p.transformation)

def demo_manual_registration():    print("Demo for manual ICP")    source, target = prepare_data()
    # pick points from two point clouds and builds correspondences    source_points = pick_points(source)    target_points = pick_points(target)    assert (len(source_points) >= 3 and len(target_points) >= 3)    assert (len(source_points) == len(target_points))    register_via_correspondences(source, target, source_points, target_points)    print("")

if __name__ == "__main__": demo_crop_geometry() demo_manual_registration()这个脚本执行了两个用户交互应用:demo_crop_geometry 和 demo_manual_registration。
def demo_crop_geometry(): print("Demo for manual geometry cropping") print( "1) Press 'Y' twice to align geometry with negative direction of y-axis" ) print("2) Press 'K' to lock screen and to switch to selection mode") print("3) Drag for rectangle selection,") print(" or use ctrl + left click for polygon selection") print("4) Press 'C' to get a selected geometry") print("5) Press 'S' to save the selected geometry") print("6) Press 'F' to switch to freeview mode") pcd_data = o3d.data.DemoICPPointClouds() pcd = o3d.io.read_point_cloud(pcd_data.paths[0]) o3d.visualization.draw_geometries_with_editing([pcd])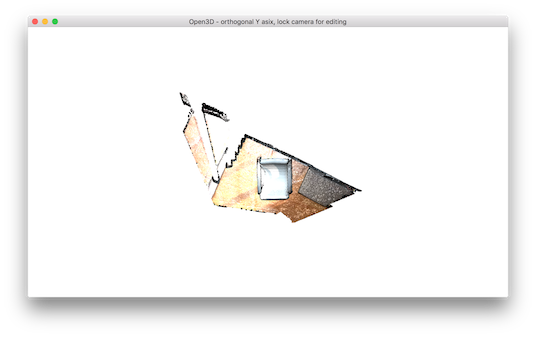
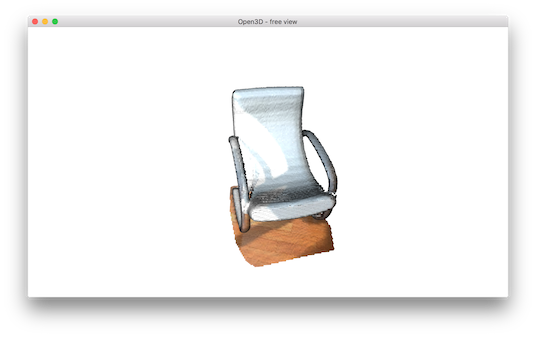
这个函数只是读取一个点云,然后调用 draw_geometries_with_editing。该函数提供了顶点选择与裁剪(cropping)功能。
当几何体显示出来后,按两次 Y 键可将几何体与 y 轴负方向对齐。调整好观察朝向后,按 K 键即可锁定屏幕并切换到选择模式(selection mode)。
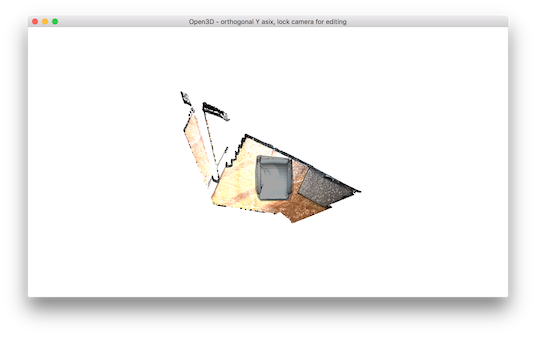
要选择一个区域,可以使用鼠标拖拽(矩形选择)或 ctrl + 鼠标左键(多边形选择)。下面的示例展示了用多边形选中的一个区域。
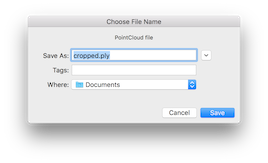
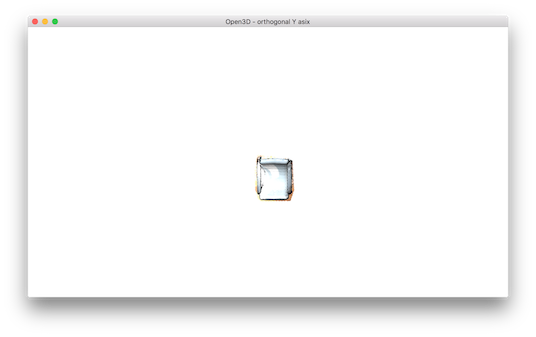
注意被选中的区域会以暗色阴影标出。要保留所选区域并丢弃其余部分,按 C 键。此时会弹出一个对话框,可用于保存裁剪后的几何体。保存后会显示裁剪结果。
要结束选择模式,按 F 键切换到自由视角模式(freeview mode)。
下面的脚本使用 point-to-point ICP 对两个点云进行配准。它通过用户交互来获得初始对齐。
def prepare_data(): pcd_data = o3d.data.DemoICPPointClouds() source = o3d.io.read_point_cloud(pcd_data.paths[0]) target = o3d.io.read_point_cloud(pcd_data.paths[2]) print("Visualization of two point clouds before manual alignment") draw_registration_result(source, target, np.identity(4)) return source, target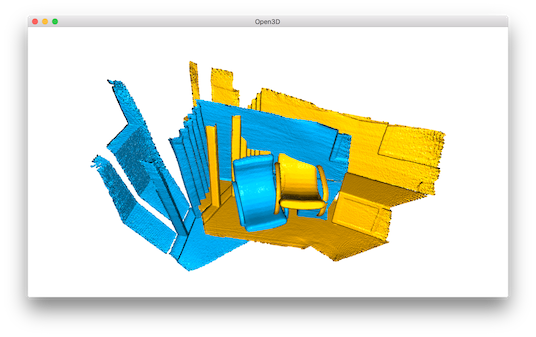
这个函数读取两个点云,并在进行手动对齐之前将它们可视化。
选择对应关系
Section titled “选择对应关系”def pick_points(pcd): print("") print( "1) Please pick at least three correspondences using [shift + left click]" ) print(" Press [shift + right click] to undo point picking") print("2) After picking points, press 'Q' to close the window") vis = o3d.visualization.VisualizerWithEditing() vis.create_window() vis.add_geometry(pcd) vis.run() # user picks points vis.destroy_window() print("") return vis.get_picked_points()函数 pick_points(pcd) 创建一个 VisualizerWithEditing 实例。为了模仿 draw_geometries,它依次创建窗口、添加几何体、显示几何体,然后终止。VisualizerWithEditing 提供的一个新接口函数是 get_picked_points(),它返回用户拾取顶点的索引。
要拾取一个顶点,在窗口内按 shift + 鼠标左键。当某个顶点被选中时,可视化窗口会在该顶点上叠加显示一个球体。例如,在源点云中拾取三个顶点后会显示:
这会打印出:
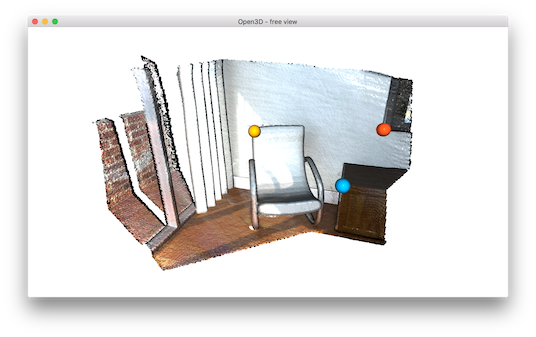
Picked point #58481 (2.14, 1.56, 1.53) to add in queue.Picked point #77321 (2.86, 1.92, 1.09) to add in queue.Picked point #42639 (3.28, 1.53, 1.45) to add in queue.按 Q 键关闭窗口。下一步是在目标点云中拾取相同的对应关系。球体的颜色有助于识别同一个对应关系。
这会打印出:
Picked point #54028 (1.62, 1.81, 1.23) to add in queue.Picked point #97115 (2.45, 2.19, 1.11) to add in queue.Picked point #47467 (2.75, 1.71, 1.45) to add in queue.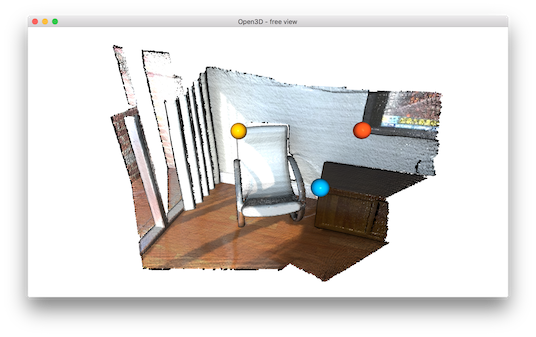
使用用户对应关系进行配准
Section titled “使用用户对应关系进行配准”def register_via_correspondences(source, target, source_points, target_points): corr = np.zeros((len(source_points), 2)) corr[:, 0] = source_points corr[:, 1] = target_points # estimate rough transformation using correspondences print("Compute a rough transform using the correspondences given by user") p2p = o3d.pipelines.registration.TransformationEstimationPointToPoint() trans_init = p2p.compute_transformation(source, target, o3d.utility.Vector2iVector(corr)) # point-to-point ICP for refinement print("Perform point-to-point ICP refinement") threshold = 0.03 # 3cm distance threshold reg_p2p = o3d.pipelines.registration.registration_icp( source, target, threshold, trans_init, o3d.pipelines.registration.TransformationEstimationPointToPoint()) draw_registration_result(source, target, reg_p2p.transformation)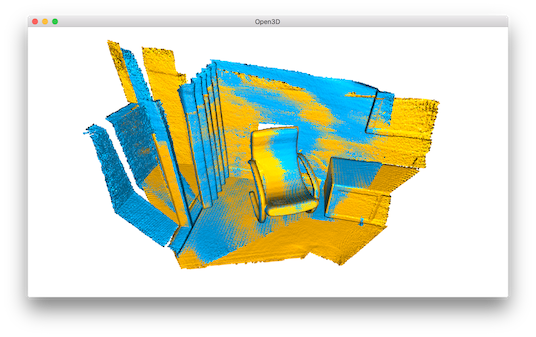
示例的后半部分根据用户提供的对应关系计算初始变换。该脚本使用 Vector2iVector(corr) 构建对应关系对,并利用 TransformationEstimationPointToPoint.compute_transformation 从对应关系计算出初始变换。随后这个初始变换再用 registration_icp 进行细化。
配准结果如下: